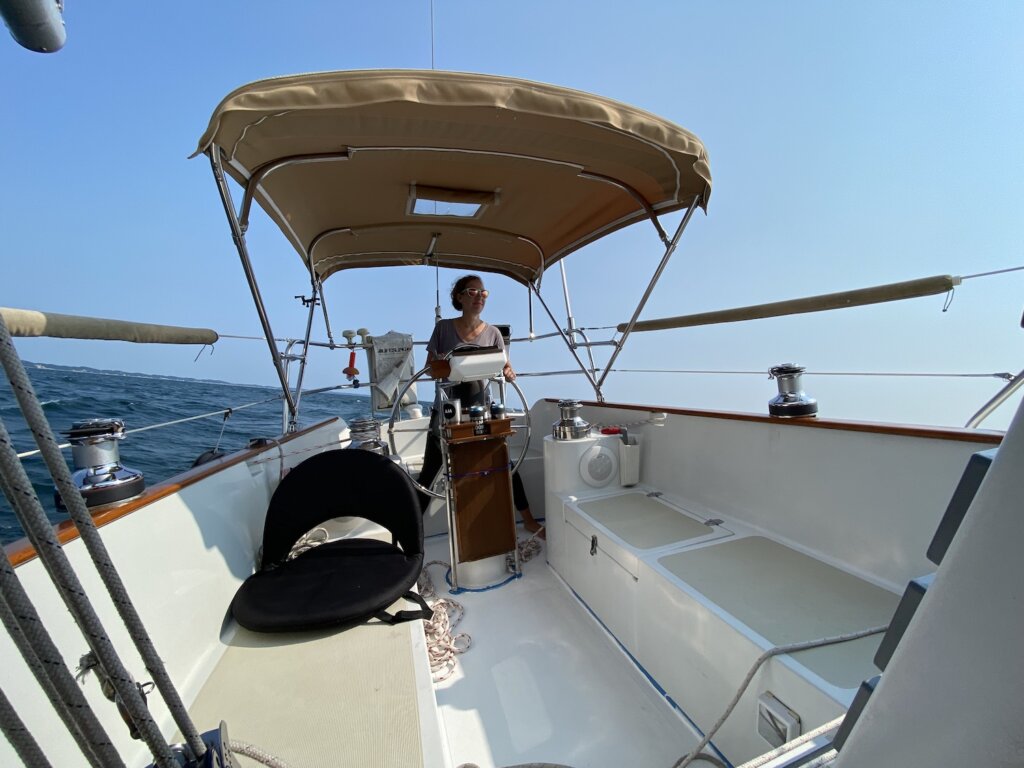
As part of our refit on Resande, we decided to splurge a bit and go with custom SeaDek nonskid in our cockpit. After re-coring our cockpit (see post here) we knew we wanted to put SeaDek over the cockpit floor so it would blend in better. While we were at it, we might as well do all the seating with SeaDek to complete the look and have a much more comfortable cockpit. SeaDek has some common templates on their website, but with only 18 hulls ever made Resande is a pretty rare lady -even if there was another owner that’s measured, your relying on their work. As you’ll see, it’s not that difficult just do measure it yourself.
SeaDek has two options if you’re looking for a custom template layout:
- You can hire a professional to template and send in the measurements for you – finding one nearby can be tricky depending on your location. The nearest one to us was about an hour away and they’ll (rightfully) charge for mileage & time for the initial measurement and the dry fitting. When I looked into it, it was actually pretty reasonably priced – you can find a local dealer here: https://www.seadek.com/seadek-certified
- You can do it yourself! There are some great videos online for how to do it, and they actually make the process really seamless. I was really impressed. This is the option we chose, and the subject of the rest of this post.
Step 1: Estimate the size of your templates
Your going to order a template kit from SeaDek https://www.seadek.com/template-kit.html, which they will mail to you in a tube along with the instructions, a sample pack of SeaDek swatches with all the different colors, and several sheets of Mylar. You need to know approximately the size of your templates so you know how much Mylar to order. Each Mylar sheet is 40″ by 80″, which is also the maximum size SeaDek is able to cut. we’ll keep this in mind later, if you have large pieces that will need to be cut in two – the SeaDek designers will figure out the best looking fit, but it’s something to consider. For our cockpit, I calculated that we’d need 4.5 sheets of Mylar, so I ordered 6 to be safe. They are inexpensive to add, and you’d hate to run out – so order extra
Step 2: Template kit arrives, prepare to measure!
Our template kit arrived pretty quickly – make sure you keep the packaging! They include a prepaid label to send the templates back so they can scan them. Before you get started, make sure you have the following:
- Masking tape to hold down the Mylar
- Mylar sheets
- Sharp scissors
- Fresh fine point sharpie – included with the template kit
- An extra set of hands (optional, but it really helps!)
Step 3: Cut mylar to oversized shapes and tape into place
Once leave 1-2 inches around the desired nonskid area, and tape into place. You want it to lie as flat as possible so it’s not distorted when they scan it in.
Step 4: Start labeling, tracing and marking pieces for hardware
You can now trace the old molded nonskid on your project area. The better job you do, the better it will turn out. We messed up a few areas in the re-cored area that didn’t have non-skid to reference and we just did a squiggle line through it to cross off the error – they figured it out in the design process. SeaDek wants some pretty specific labeling on each mylar piece:
- Name, Address, and Phone #
- Write TOP on the top side of each part
- Write “Bow”, “Stern”, “Port”, “Starboard” on all four sides of the template
- Number each template piece
- Note any hardware, hinges, latches, etc.
We had 11 different pieces in our cockpit, so it was a lot of labeling, but it also helps everything be really clear for the designer as they put your project together.
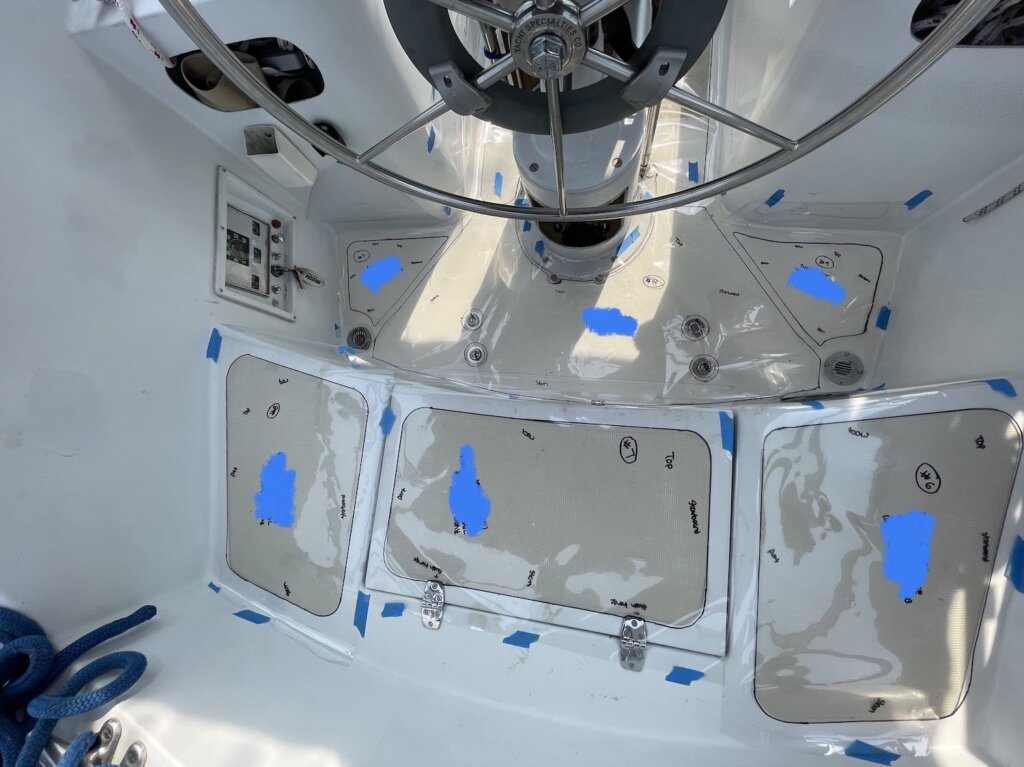
Step 5: Take pictures of everything while it’s in place
To help out the SeaDek designer put your puzzle together, you’ll send them pictures of your project traced in place – make sure they can see the template #’s and orientation. You’ll email this to endusersales@seadek.com – once emailed they’ll respond with a confirmation email detailing the designers that will be helping you with the projcet
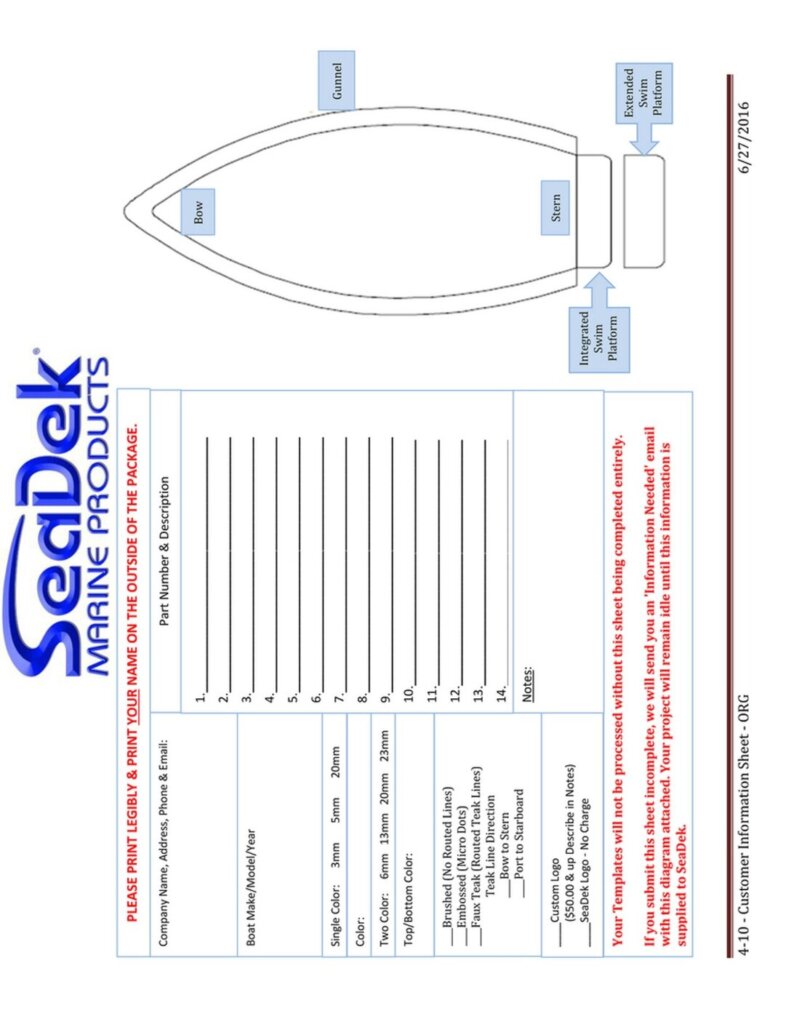
Step 6: Fill out the SeaDek Material Information Sheet
They will include a format that looks like the image below that you need to fill out all of your information, the boat’s information, all the template #’s and descriptions, color, thickness, a sketch of your template, and other info:
Step 7: Roll it up, tape it up, and ship it back to SeaDek!
The next step is that simple, mail it back with the included prepaid label and the designer will reach out to you. It was about 2 weeks between mailing my templates back and getting the initial design drawings! I know timing can vary based on the projects they have, but that was my experience.
Step 8: Review the initial designs – approve them to send the dry fit templates
You will receive the drawing design a few weeks after mailing the templates in. If you’re comfortable with the design and don’t see any glaring issues. We sent them back a minor adjustment to make the pieces in our cockpit mirror images of each other – these were done free-hand, so they fixed them up and had them print the dry fit templates.
Step 9: Receive the dry-fit templates, cut and tape in place
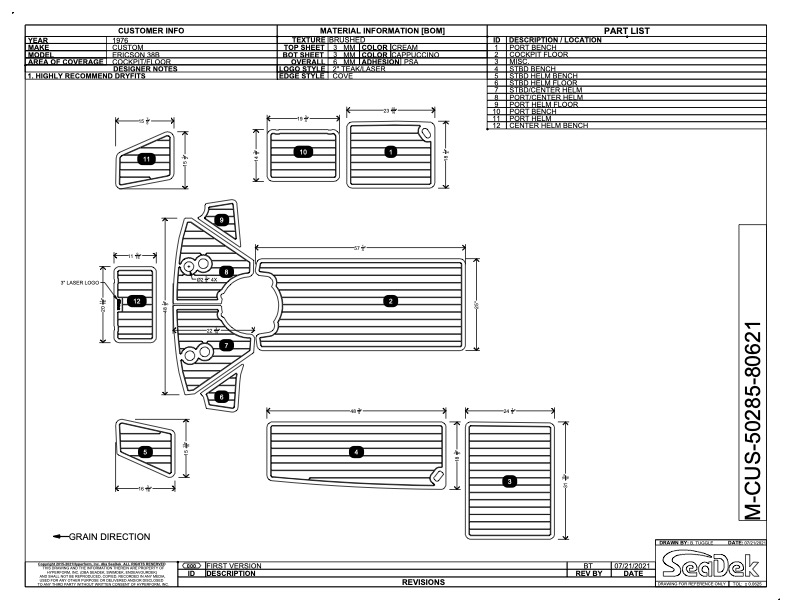
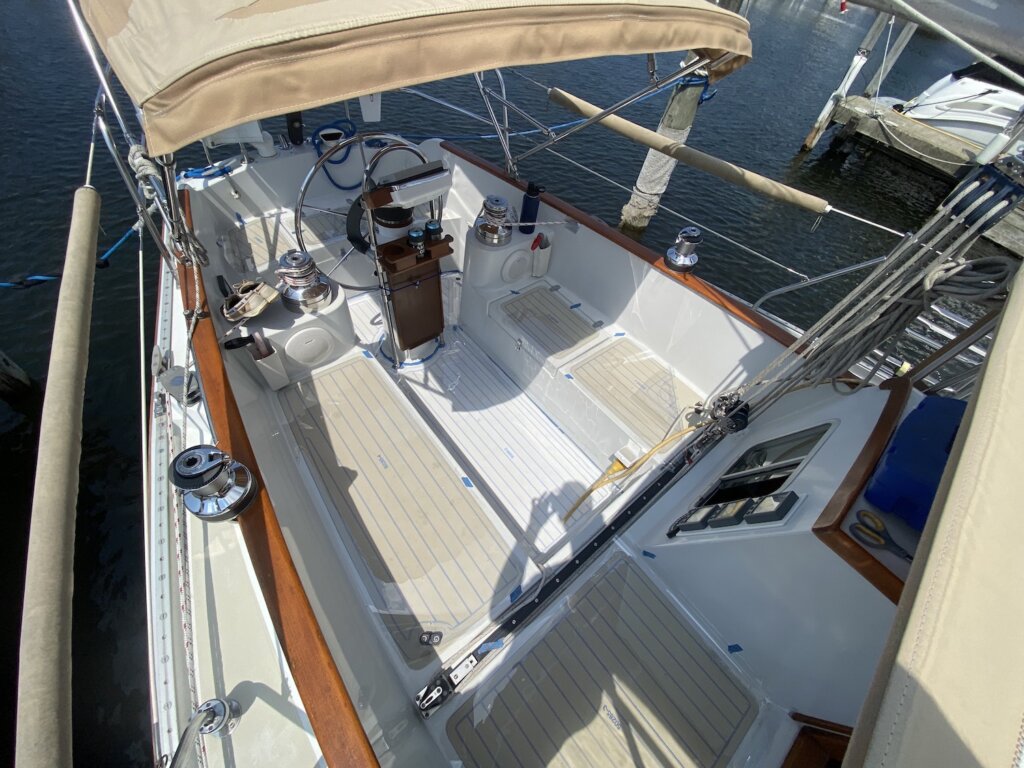
They will send you new mylar sheets that are laser printed with your templates on them – including grain direction and spacing. It gives you a good idea of how they will look in place. Again, cut around the templates, leaving a few inches around the entire template, and tape them into place to make sure everything lines up with the nonskid on your boat. From here, you can mark major errors and send them back to be scanned again, or email them approving the designs. We had one angle that we had slightly modified, but we just told them to make it a straight line and bump it out .25″ because the nonskid wasn’t a perfect line and we didn’t need it to be that exact to the original.
Step 10: Order the Seadek!
Once you’re happy with the design, you can place the order. When we were ordering, they were offering a 3 year warranty that covered pretty much everything. We weighed getting it because we plan to live on the boat and give it a lot of abuse – we’re even bringing cats and it covers pet damage! We decided against it, because it ended up being about 20% of the cost to replace the SeaDek – realistically I just didn’t see us ripping out the old SeaDek within 3 years in nearly any scenario. There may be some cat scratch damage, but I don’t know if we’d actually want to spend the time ripping it all out to put in new SeaDek. Time will tell if we made the right decision.
Bonus: Design Considerations
- Remember drainage! You do not want to interrupt the natural drainage flow of the cockpit. This was one of my biggest concerns, and if you look at the location of the drains in the cockpit, you’ll notice there is a direct path to them that’s because outboard of that channel, the cockpit floor starts sloping up. If we didn’t do something, the water would pool somewhere around here and not drain out.
- Use a straight edge: Free hand drawing will have imperfections, especially with how our nonskid was laid out.
- Don’t be afraid of coloring outside the lines: you can use your non-skid as the template, but you can add additional areas easily, or expand the non-skid area. Don’t be overly constrained by the existing non-skid.
Step 11: Installation!!!!
This is the exciting part. We are working on putting together a video with instructions and tips/tricks on how we installed our SeaDek. We are super happy with how it turned out! We will link the video once we have it completed.
To install the SeaDek:
- Use a glue primer to help the pieces adhere. Using a foam paint brush to brush along the edges, we applied this before placing each piece.
- While giving the glue a short amount of time to become somewhat tacky, use a razor blade to cut along the middle of the back paper cover of the SeaDek piece your going to place
- Fold over the edges on each side of your cut.
- Dry fit/place the piece without removing the paper backing, this way you can ensure you have to piece exactly where you want it.
- Use painter’s tape to secure one half and help keep it in place
- Slowly peel back the paper backing on the half you didn’t tape in place
- Press down, start in the middle and move out towards the edges to avoid bumps, bubbles
- Make sure to apply firm pressure to ensure you have the piece secure
- Remove the tape and repeat the process to stick the second half down
- Repeat this process for each piece of SeaDek
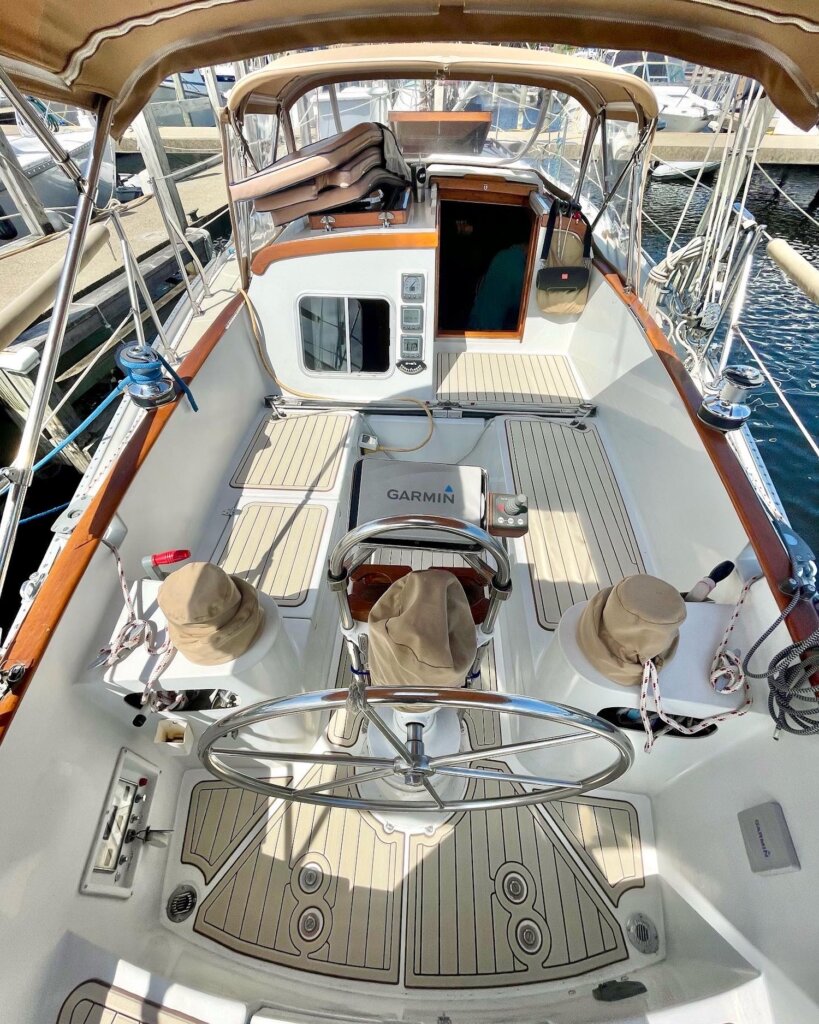
- Step back and admire your new SeaDek!!!!!!
What do you think? Would you DIY or hire an expert? Let us know below!