Categories
sailing Sailing Upgrades

How We Added a Self-tacking Staysail to our Sailboat

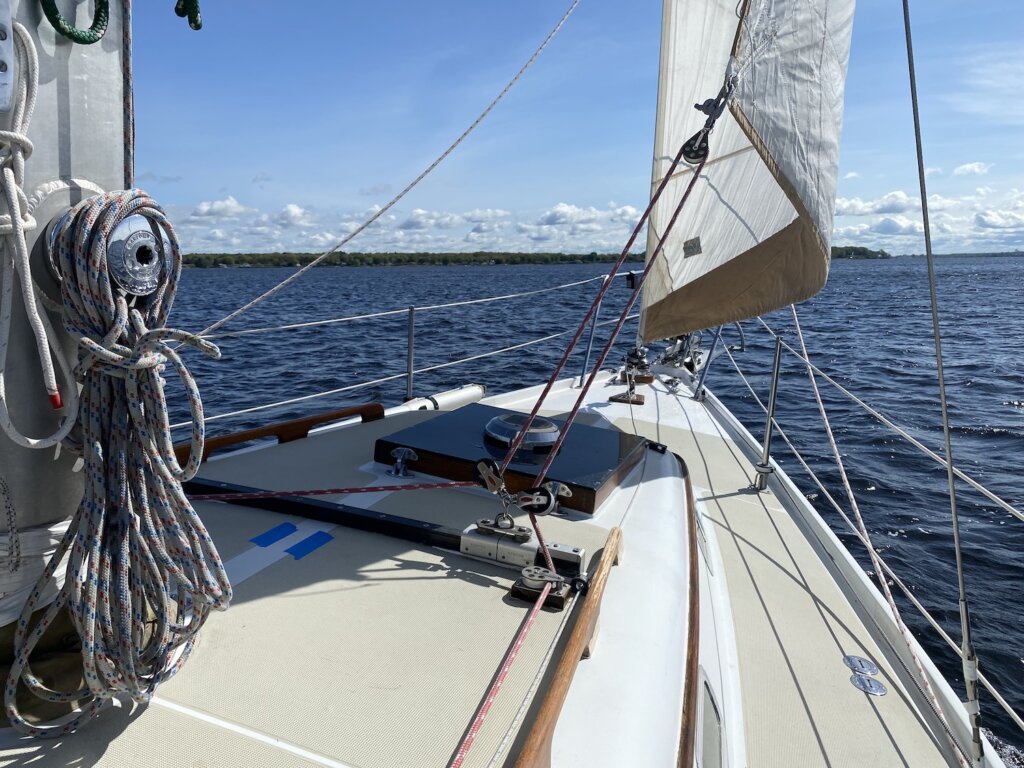
Resande’s original sail plan included a Staysail, and it was indeed self-tacking but included a bulky boom that swept across the deck. To achieve a cleaner and simpler deck, we wanted to figure out a way to keep the self-tacking setup, but without the boom which provided structure and shape to the sail. The boom would also violently whip around when furling the staysail and send vibrations through the boat.

I was surprised how difficult it was to find forums that showed how to accomplish this. There were some that talked about how to add a boom, but most of the keyboard warriors and racing enthusiasts decried the idea that it would lead to suboptimal sail shape. As a cruiser, I’m less concerned about perfect sail shape (which ended up not even being an issue) and the benefits of removing a 14 foot aluminum pole from the deck far exceeded downsides.

With the boom, we did have a staysail traveler on the cabin top, which, worked similar to a mainsail track. The true issue we had, was when we removed the boom, the track became useless since sheeting directly through the track would result in competing forces. Back to the mainsail comparison, you have control of the traveler from port to starboard with a dedicated line. You technically could do this with the staysail traveler, but then it wouldn’t be as self-tacking, and would add unnecessary rigging components in a process we’re trying to simplify.

After countless hours of trying to find a solution, I finally found it on the Harken website of all places. Their site showed four (now three) different commonly used self-tacking setups:

  • Standard Self-Tacker: you’ve got a sheet going forward to near the bottom of the furling drum, then back to a block on your traveler car which is led back forward to the clew of your sail.
    • This works by creating a pivot point forward so your traveler can tack without the lateral forces trying to self-center on the track. The closer the forward block is to the traveler, the more the traveler car will want to be centered under load which will greatly limit your sheeting angles.
    • The downside is this has a very long sheet going from the cockpit to the base of the sail, then back to the traveler, then up to the clew. This zig-zag will sweep the deck just like the original staysail-boom setup (it’s actually pretty much the same)
  • Self-Tacker on a Boom: is basically the same as the standard self tacker, and the original equipment on our Ericson 39B. It is bulkier on your deck, but the benefit is you have more control of the staysail shape. You have control of the sheet and boom with different lines led to the cockpit.
  • Sheet up the mast: this one seems to have been removed from the Harken website, but it uses the same principle as the Standard self-tacker. Instead of running the sheet all the way forward however, you run it up the mast then down through the traveler block, then forward to the clew which results in a cleaner deck. This would have been our backup plan if the next option didn’t work
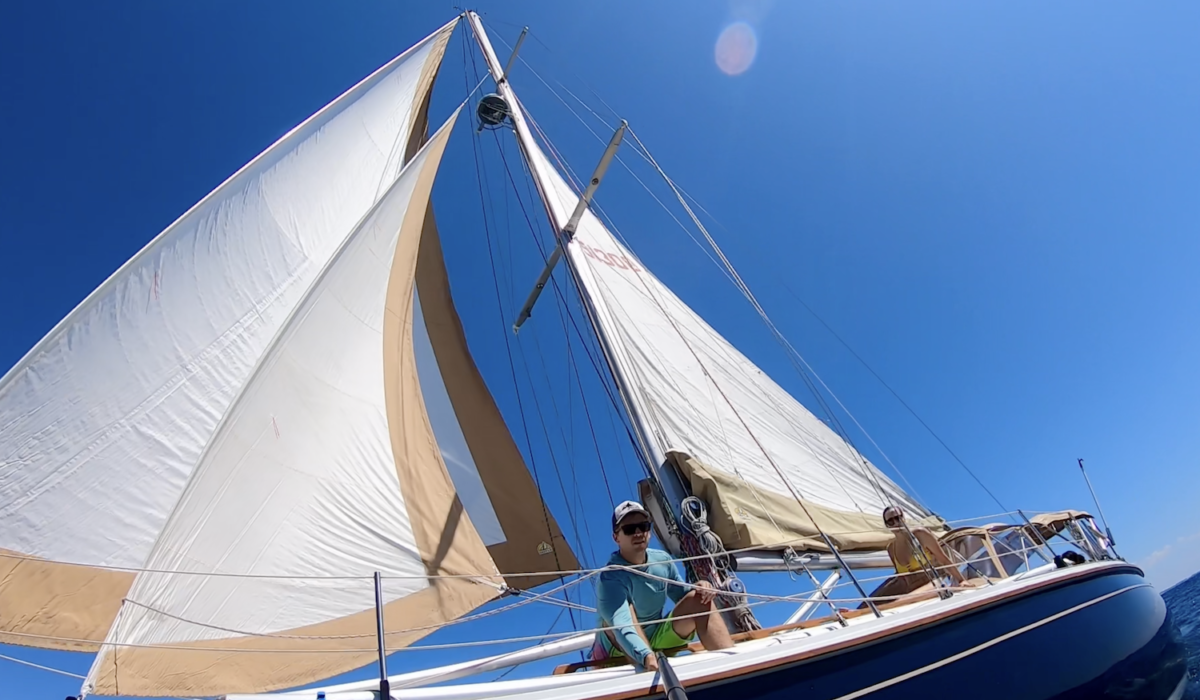
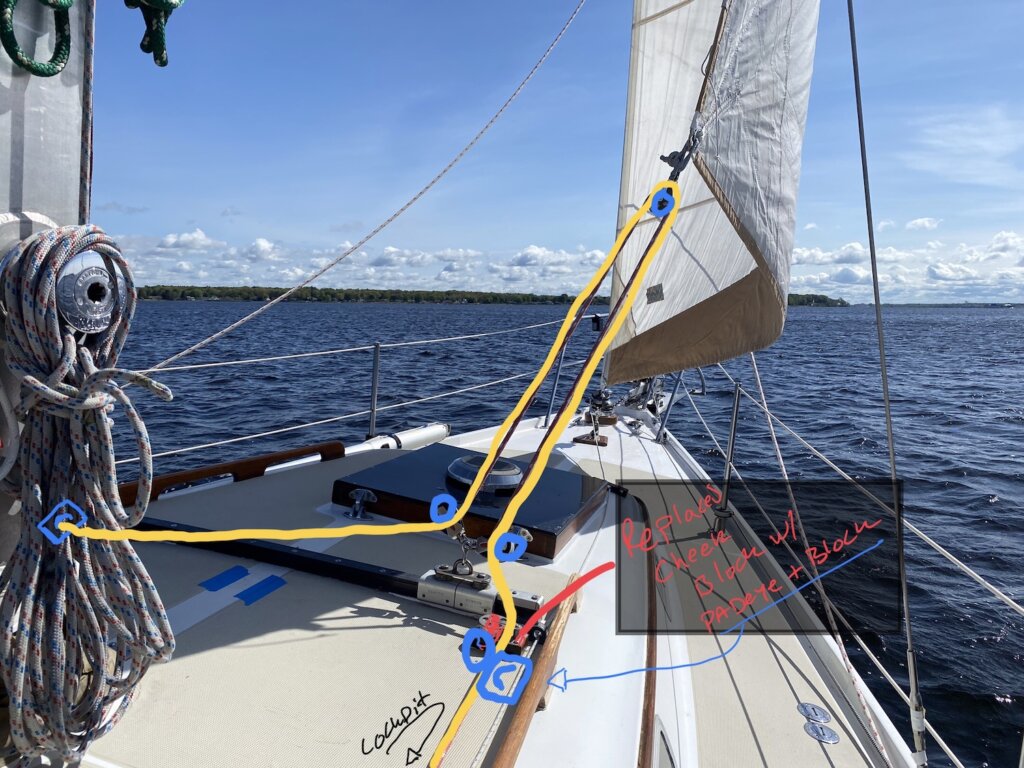
  • 2:1 Self-Tacker: the simplest and cleanest (in my opinion) variation, the 2:1 self tacker rides on the sheet itself laterally during the tack. The key difference is the end of the sheet goes to a fixed point instead of the clew. The clew has a block that provides a low resistance path between port and starboard.

The 2:1 Self-Tacker is the one we ended up using on our boat. It accomplished our goal of cleaning up the deck, and it simplified our running rigging in the process. What we found in practice, is our sheeting angles were as good as they were with the boom, though we have less control than we did with two separate lines.

More options, for offshore passage-making Now that we have the boom out of our lives, rigging it like this also leaves the option to run sheets back to the cockpit similar to how you would the headsail. We could want to do this for two reasons I can think of.

  • On a long passage, when you’re on the same tack for days potentially, the self tacking feature isn’t that important.. It could give you more control of sail shape.
  • More importantly, the self-tacking setup would make it impossible to back the headsail when trying to heave to under staysail only. I could see a scenario where we’re running a reefed main and staysail and want to heave-to. I would likely set up the staysail like this on a long passage for the additional options it would provide.

Overall, we’re very happy with our decision to remove the boom. I would highly recommend trying it out and testing it with the 2:1 self tacker (minimal rigging required). Let us know you’re questions/comments below I was surprised how difficult this was to find an answer on when trying to research how to do this.

Categories
Sailing Upgrades

Choosing the Right Watermaker for a Cruising Sailboat

As part of our refit on S.V. Resande, we have decided we want the ability to desalinate seawater to make our own water. Our goal is to disconnect as much as possible from the resources ashore, and water, like electricity is a critical utility to achieve that.

There are a several different options when considering a Reverse Osmosis desalination system. In this post, we’re going to look at offerings from two different companies: Seawater Pro and Spectra. Most watermakers are constructed similar to the Seawater Pro, it actually isn’t even that difficult to piece together your own kit as all the components are fairly easy to source.

One of the main considerations you need to keep in mind is the energy efficiency of your system. Electricity is another finite resource when cruising, and you need a robust system to power this process. Of the options we’re looking at, two are 110V AC powered and the other three are DC powered. It’s really important to understand whether your AC or DC system will be able to provide the needed electricity to the motors. We completely refit Resande’s electrical system, so the options we’re considering below will all work with our system. I’ll be comparing the five different models for their Price, Energy Efficiency, Output, Reliability, and Overall Size

Cost is an important factor that will influence your decision. All of these options are a large investment when refitting a boat, and money is always a constraint. Cost is especially when you consider it’s inverse relationship with energy efficiency: generally speaking, the more you pay, the more efficient your system will be. Below is a table of the five units we’re looking at, pricing is as of December 2022: Winner: Seawater Pro 40 GPH

ModelPrice Gallons/ Hour (GPH)Cost per Gallon-Hour
 Seawater Pro ACC 110 20 GPH $  2,995.0020 $     149.75
 Seawater Pro DC 12 17 GPH $  3,495.0017 $     205.59
 Seawater Pro ACC 110 40 GPH $  3,495.0040 $       87.38
Spectra VT150 $  7,300.006.3 $  1,158.73
Spectra VT200 $  7,900.008.3 $     951.81

Energy Efficiency Just like money, electricity is another finite resource on a boat. Cruising is all about managing your resources. Once you’ve determined if your electrical system is capable of running each option, you need to look at the differences in efficiency. The easiest way to do this is to bring it down to a comparable metric, in this case Watts Per Gallon. I pulled the specs off these models to give rough estimates of the efficiency you can expect from each. The unique thing about the Spectra watermakers is their low energy consumption. Spectra does this by reclaiming some of the pressure with what’s called a Clark pump. It’s impressive that you can desalinate water for 120 watts or less, which should be easily handled by most unmodified electrical systems. They are by far the most efficient option, but you do pay for it in up front costs. Winner: Spectra models

BrandModelGallons/ Hour (GPH)WattsWatts/Gallon (Efficiency)
SeaWater Pro Seawater Pro ACC 110 20 GPH20970                    48.50
SeaWater Pro Seawater Pro DC 12V 17 GPH17600                    35.29
SeaWater Pro Seawater Pro ACC 110 40 GPH40970                    24.25
SpectraSpectra VT1506.3107                    17.00
SpectraSpectra VT2008.3120                    14.50

Cost Vs. Efficiency: as I mentioned before, cost and efficiency have an inverse relationship with these watermakers. The graph below helps illustrate the relationship between up front cost and watts per gallon

Output is important to understand how much time it takes to fill your tanks. The options we’re looking at here vary from 6.3 GPH to 40 GPH. Resande has 80 gallons of water, which would take anywhere from nearly 13 hours to only 2 hours to fill from completely empty. In some ways, output is irrelevant, and you should focus on efficiency since time itself isn’t typically a constraint. You likely aren’t using 80 gallons per day, and you could use the Spectra option for one hour per day to replace your daily consumption. On the other hand, I could see us running the watermaker during peak sunlight hours, where we’re putting nearly 500+ watts of solar to take some of that load off the stored energy in the battery bank. During our shakedown trip in Summer 2022 to South Manitou, we proved out our electrical system with only 350 watts of solar installed. With the weather we had, our batteries were regularly topped off from the night’s consumption by around noon each day, and any additional sunlight was just going to waste the rest of the day. It would be great to convert that to water. Winner: Neutral/Depends on tankage and usage

Reliability I will preface this by saying I have heard nothing negative about the reliability of the Spectra watermakers. That being said, the Spectra Clark pump and spare parts are proprietary and therefore not easily replaceable. If you’re in a remote island, you’re probably not getting your watermaker fixed anytime soon. The Seawater Pro, uses simple and common components that a fellow cruiser may even have. Winner: Seawater Pro models

Overall Size: On a boat, the space required for additional equipment always needs to be a consideration. The Seawater Pro 40 GPH for example has two large 40″ membranes and a high pressure pump with motor. The Spectra however uses a 20″ membrane and it’s all packaged with the Clark pump to be one compact unit. Either one will require space, and depending on the available space one option may be easier to install than the other. You will want to make sure it’s physically located near the main positive bus bar since you’ll likely be pulling heavy amperage (needing heavy gauge wiring) with the Seawater Pro options. The Spectra options would give significantly greater flexibility due to their size, shape, and lower current draw.

Deciding between Seawater Pro models: As of right now, we’re deciding between the three Seawater Pro options.

  • The 20 GPH model makes the least sense on paper, however you could easily upgrade it to 40 GPH in the future just by buying an additional membrane. It’s the cheapest option, and smaller than the 40 GPH in our space constraints
  • The 17 GPH model is more efficient than the 20 GPH option, but a bit pricier. Apples to apples with the 20 GPH it’s probably worth the additional $500. It has a lower current draw at 600W (50 Amps) and runs directly off DC, so you don’t have to worry about involving the inverter to make water.
  • The 40 GPH option is the same price as the DC 17 GPH option, but you get 2.3X the output. You do have to deal with a second membrane and it’s the highest efficiency of the three Seawater Pro options

March 2023 Update: We just received our watermaker yesterday. We ended up going with the 17 GPH DC Powered Seawater Pro model. We also added in the control panel since we wanted to do it right, do it once, and the extra cost would be offset by the countless times we’d be able to avoid ripping apart our aft to operate it in the future.

One more option: at nearly the last minute, we strongly considered going with the Sun Pure Watermaker option, which is very similarly priced and spec’d to the Seawater Pro. The nice thing about it was it’s local here in Michigan, so we’d be able to support a local business and save money on shipping. We still ended up going with Seawater Pro because the quality of the plumbing fittings and flush system looked slightly higher and more importantly the membrane housing is reinforced with the stainless steel rods (2:00 on this video) which help protect from hydraulic shock that can happen, specifically on a boat.

Please leave a comment below letting us know what you would do!