Categories
sailing

Exploring Paradise Bay, Beaver Island

We sailed to Beaver Island on our way up and out of Lake Michigan this summer. This was the first new place we had taken Resande and we were excited to explore! Everyone told us great things about this island!

We anchored in Paradise Bay and stayed for three nights. There is also a municipal marina you can stay at in the bay if you are traveling by boat. A ferry also runs from Charlevoix several times a day.

Beaver Island is the largest island in Lake Michigan. St James is the town alongside Paradise Bay. The town has an interesting history. In the 1800s Jesse Strang brought his group of Mormons to the island. He crowned himself king making him the only ever king within the United States. He was eventually murdered by some who didn’t agree with him and the community began to fall apart. The island also has a strong marine/fishing history. You can learn more as you walk through town. There are plaques around town that will lead you on a short walking tour.

In town, you will find several small shops and restaurants as well as a very good, well-stocked grocery store. The island is known for its whitefish. We bought some at the grocery store to grill up on our own. It was delicious! We also enjoyed a beer sitting outside along the bay at Whiskey Point Brewing. The brewery only had one type of beer in stock while we were there. We were told by some other cruisers who visit each summer that the brewery often only has 1-2 beers on tap and often closes early because they run out. So if you want to visit, go when you see they are open!

The next day, we visited the Marine Museum, free to enter but they do take donations. it is run by the historical society on the island. There is a lot of information in the museum on the history of fishing and shipping to/from the island. There is also a great deal of shipwreck information on the wrecks of Lake Michigan and all the Great Lakes. During your visit, you can walk through a restored wooden gill net fishing boat which is very cool! You can get through the museum in about 30-40 minutes. Apparently, we didn’t take any photos inside the museum so you’ll just have to go and see it for yourself!

From the museum, you can continue walking around the bay to Whiskey Point lighthouse. If you continue along the road (Gull Harbor Drive) you can walk around Sucker Point. You’ll get great views of the water here but you will need to walk through some very shallow water as you go. We cut back in at Lake Dr and then walked to the George and Althea Petritz Nature Preserve. We did a short hike here then headed back into town.

We were told by some other cruisers that the Beaver Island Lodge has a great bar/restaurant with a perfect sunset view. They happened to be closed the evening we walked by but we could still see the view. The property overlooks the water and you can see the other nearby islands in the distance. It definitely would be a nice sunset spot if you want to stop in for a cocktail.

The island is huge and there are several companies that offer bike and e-bike rentals. We didn’t do this during our visit but it would be a great way to explore further on the island.

super clear water in the bay.

We did decide to take a day sail to the nearby Garden Island. The island is beautiful however the bugs were terrible! And so was the poison ivy! We had hoped to do a hike here but we quickly turned around and opted to just walk along the beach instead.

After relaxing on the island for a few days it was time for us to continue our sailing journey. This island definitely has a lot to offer and if you have more time there is so much more to explore!

Categories
DIY Projects sailing Sailing Upgrades

How to Make a DIY Swim platform

We don’t have an easy way on/off our sailboat SV Resande so we decided to make our own swim platform. Back in the 70’s when Resande was built swim platforms weren’t really a thing boat builders added. We weren’t sure exactly how it would turn out but figured it was worth a shot. We actually ended up really happy with it.

Our boat has a pretty narrow stern. We knew we didn’t want too big of a swim platform so that it didn’t look out of place. We actually used the seat from inside our dinghy as a reference point. It felt like a fairly good size, large enough for one of us to comfortably sit on. Having this seat to base our design off of also meant we could bring that seat to the boatyard, hold it up to the back of the boat and get somewhat of an idea what it may look like before proceeding further.

From there we made a wood form/frame so we could finalize the size we wanted. Once we were happy with our design we brought the wood platform to the boat to help ensure we liked the fit. We also needed to make sure we could match the angle of our stern so that we can actually install the swim platform and have it lay flat against the hull. Our stern has both an angle and a radius, making it a compound angle to attempt to match. We measured the angle (about 70 degrees) with a goniometer from Erika’s work, and measured a 2″ deflection over 24″ of length on the back (1″ per foot).

Back at home, we used a miter saw to cut the exact angle of the wood frame. For the radius, I’m sure there’s a great fancy mathematical way to calculate this, but I simply took a tape measure and created a arc on the floor until we found where a centerline meets a 1″ deflection over 12 inches… it was about 68″ if I remember. For this angle, we used a flexible piece of scrap metal from work, we screwed it to the wood frame to get both the miter angle and this moderate radius. We used some thin plastic sheeting (meant to cover windows to keep cold air out in the winter) to wrap the wood so we could fiberglass using the frame then “pop” out our swim platform. We also used some old plastic to draw in where our ladder would go to better size the swim platform up. We screwed the plastic and the wood frame to another scrap piece of wood so we could keep everything still and square as we worked.

Here’s the wood frame screwed to the scrap wood base, coated in plastic

We chose not to make the entire platform out of straight fiberglass but instead use some core material. We have used this form core for some of our re-coring projects and found it very easy to use. It was perfect for this project as well. For the ladder mount areas, we decided to reinforce with 1/4″ G10.

As a completely fresh build, we used vinyl polyester resin for this project. We first laid down a layer of wetted out 1.5 oz chopped strand mat, which form fits to the corners and started up the undercut angle. We then layered on layer of 1708 Biaxial, added in the foam core and G10, then two more layers of 1708 Biaxial

Fresh out of the mold, before grinding away the excess
To reinforce, we added two ‘ribs’ of foam and glassed over them with 1708 Biaxial and epoxy resin. The foam was only to create the angled rib for structure.

After a few layers of faring it was back to the boat to again check the fit and make sure we were happy.

We used Total Boat topside primer and then wet edge topside paint. We chose to match the dark blue of the boat hull.

Once the blue paint was finished we installed the swim ladder and then taped out were we wanted to add total boat non-skin paint.

Two coats of Total Boat white non-skid paint coved the blue well and we were very happy with how it turned out. We will be installing this soon and will then update this post with how it all ends up.

What do you think? We think it turned out pretty great, and can’t wait to put it to use this summer!

Categories
DIY Projects Sailing Upgrades

Total Cost to Turn a Great Lakes Cruiser into a Live-Aboard Bluewater Sailboat

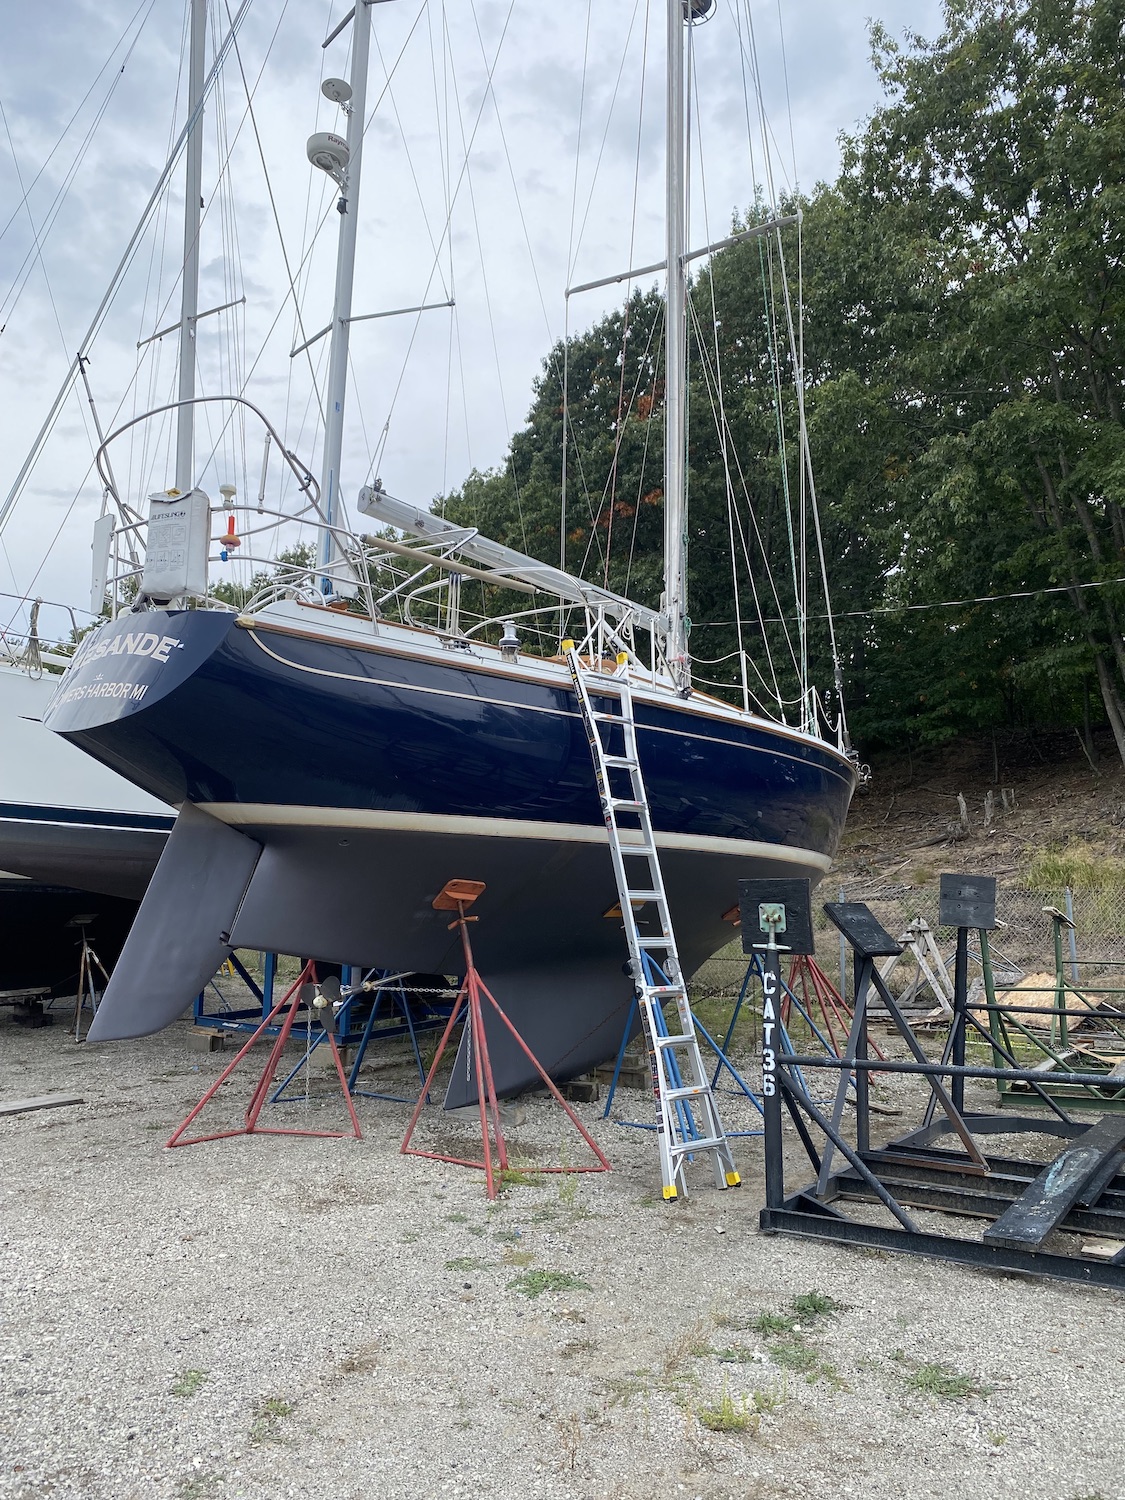
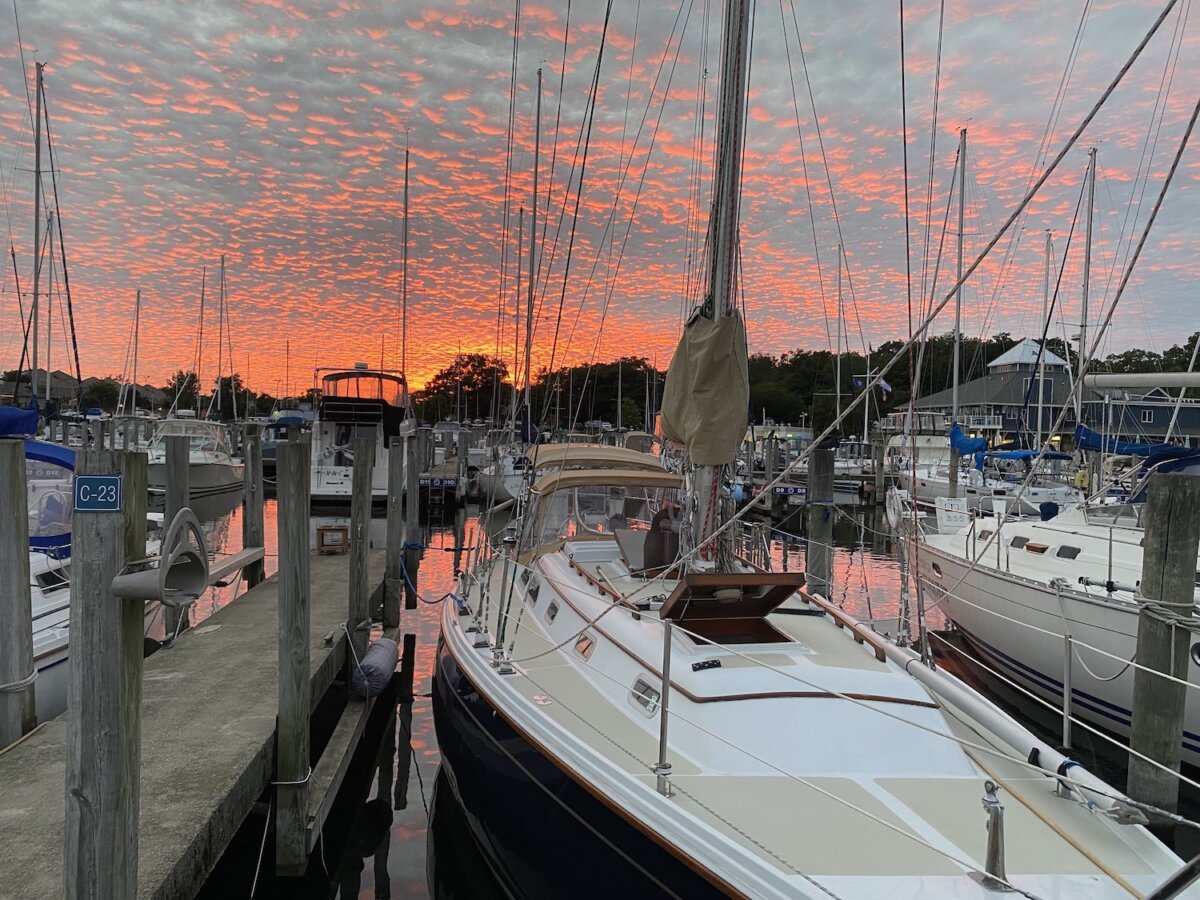
As I write this post, I’m sitting on my couch in the final months of our two-year refit that started in spring 2021. We purchased Resande, our 1976 Ericson 39B in September 2020 and got to sail her down to our home port of Muskegon before hauling out for winter. Starting with that trip, we started putting a project list together for what it would take to get her “Liveaboard Ready”. We broke this out by system, and looking back we were a little optimistic about the refit budget when we started.

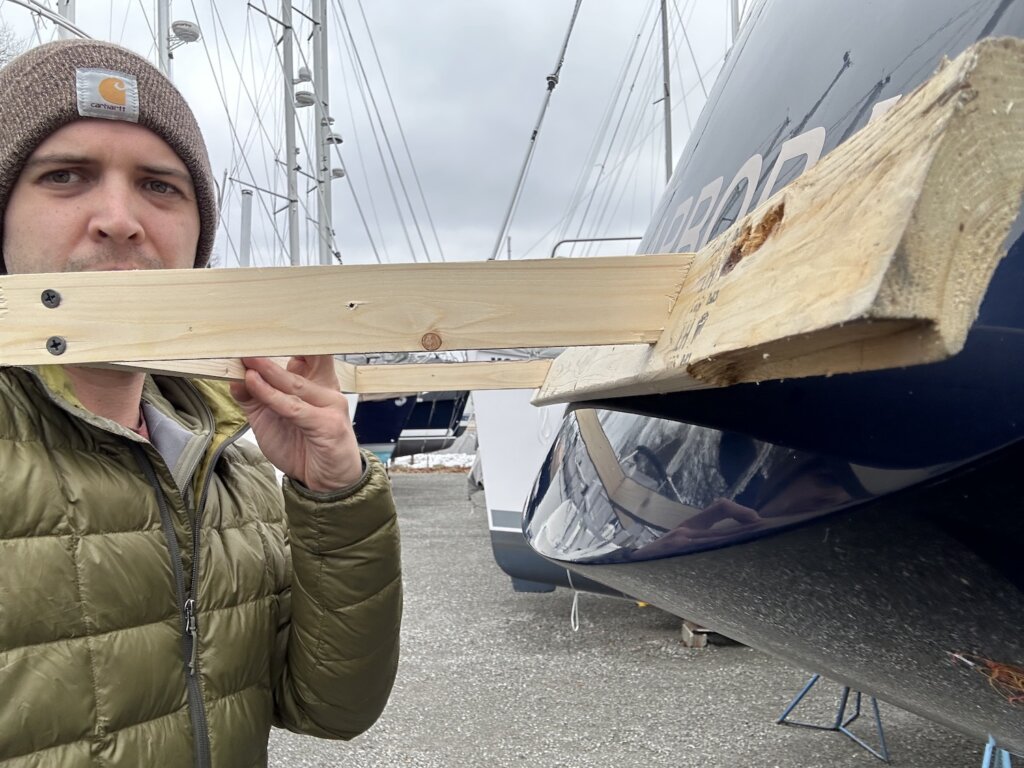
We knew when we bought Resande we’d have some re-coring projects due to do. I won’t go in-depth on them here, but as DIY projects they’re time-consuming but not that expensive. only a couple hundred dollars in materials for all four areas we re-cored. Paying a professional would have been thousands since it’s all about the time it takes to make it look pretty again. Here is our entire Master Project List.

Cost of Purchasing Resande

We purchased Resande for $55,000 + 6% Michigan Sales tax for a grand total of $58,300. This was in the aftermath of COVID buying where Boats, RV’s, and most recreation was selling fast. We jumped on the listing almost right away after looking all summer. She fit almost all of our requirements and was actually more of a ‘blue water’ boat than we were even looking for. We did a partial survey where we found moisture in the foredeck, cabin top, and helm – all of which have been fixed as of this writing.

Cost of the Refit

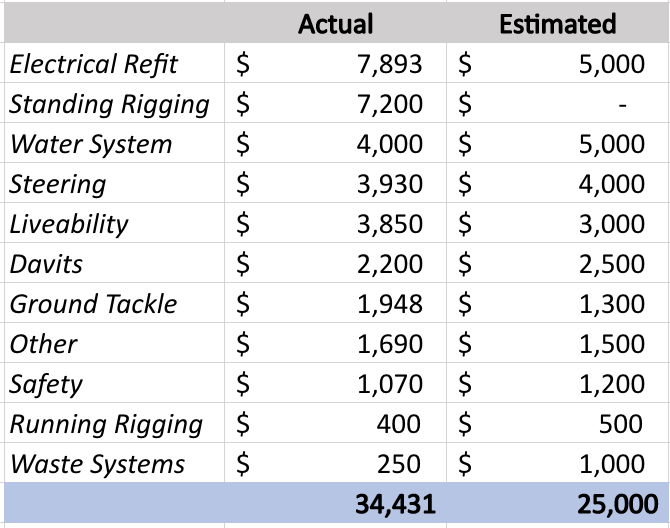
Our initial estimate for the refit was $25,000, but we ended up replacing the (original to the boat) standing rigging for peace of mind, the electrical refit also ended up being quite a bit more than anticipated as the scope expanded. Below is a breakdown of actual vs. estimated refit costs. The total refit was about $34,400, bringing our total investment in Resande to just under $93,000.

Electrical System – $7,893

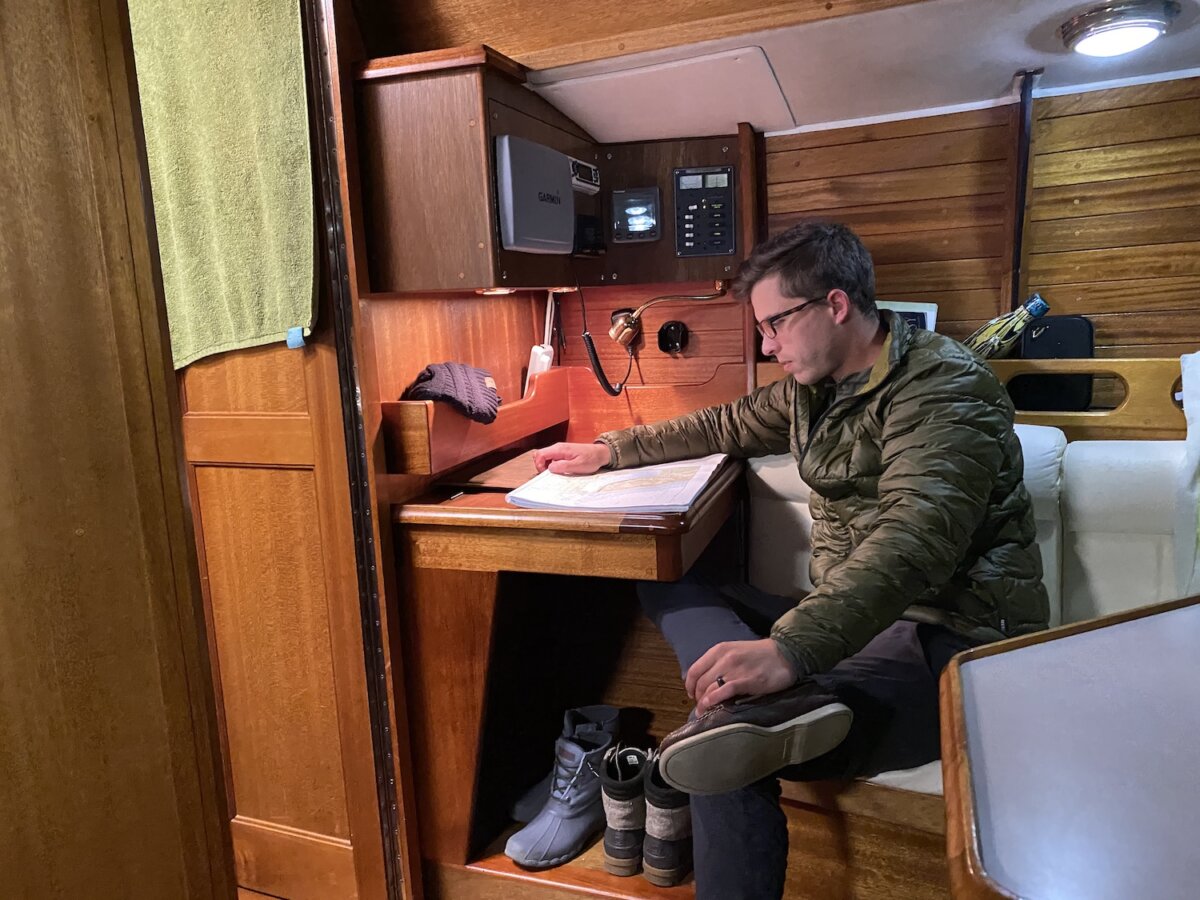
In deciding on a boat, we knew most boats purchased in the Great Lakes would need most of this list replaced or upgraded. The dated electrical system for any boat in our price range was going to need a complete overhaul especially since we planned to switch to Lithium. We ended up using the Explorist Life 200-400ah Diagram and following the videos and bill of materials almost exactly. We ended up with the following system:

  • 400 AH Battle Born Batteries
  • 2000w Victron Multiplus Charger/Inverter
  • 525 Watts of Solar
  • Victron MPPT Charge Controller
  • Victron Lynx distributor
  • DC/DC Charger for dissimilar chemistries
  • All new AC wiring
  • New AC disconnect and Panel with Rev. Polarity
  • BMV 712 Smart Battery Monitor
  • 130 Amp Balmar inverter, with Balmar charge controller and Perkins 4108 Serpentine belt kit

Standing Rigging – $7,200

This one wasn’t really on our radar when we bought the boat. Many boats in the Great Lakes never have standing rigging replaced. The previous owner told me himself you don’t need to replace standing rigging on a freshwater boat. In researching, I found all kinds of conflicting opinions on freshwater standing rigging. The common theme was that the risk is that with age stainless steel work hardens and gets brittle over time – for our boat (47 years young) you could make a good assumption that the rigging was well past its prime. Since we don’t have an exact plan for how long we’ll be cruising, the peace of mind of knowing we’ve got a brand new rig that can take us around the world if we wanted was worth the investment.

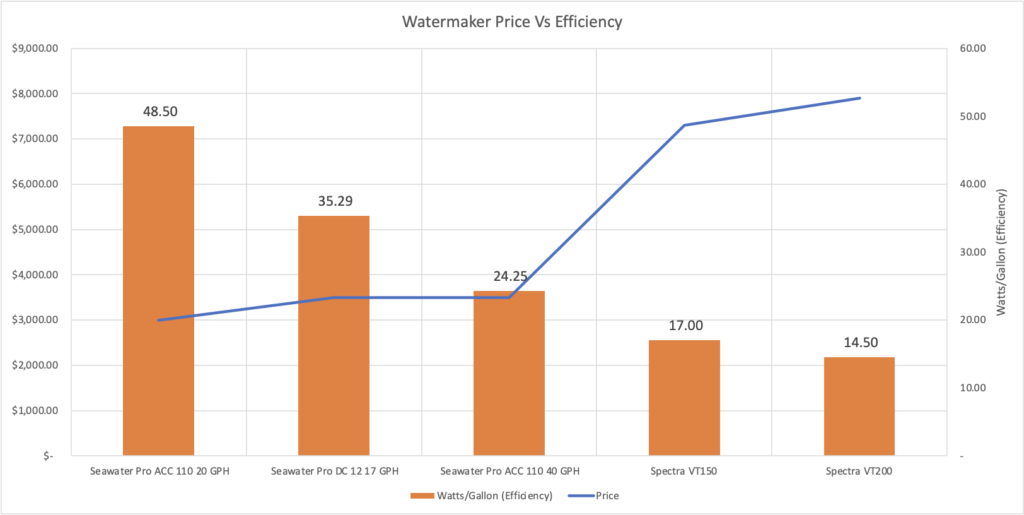
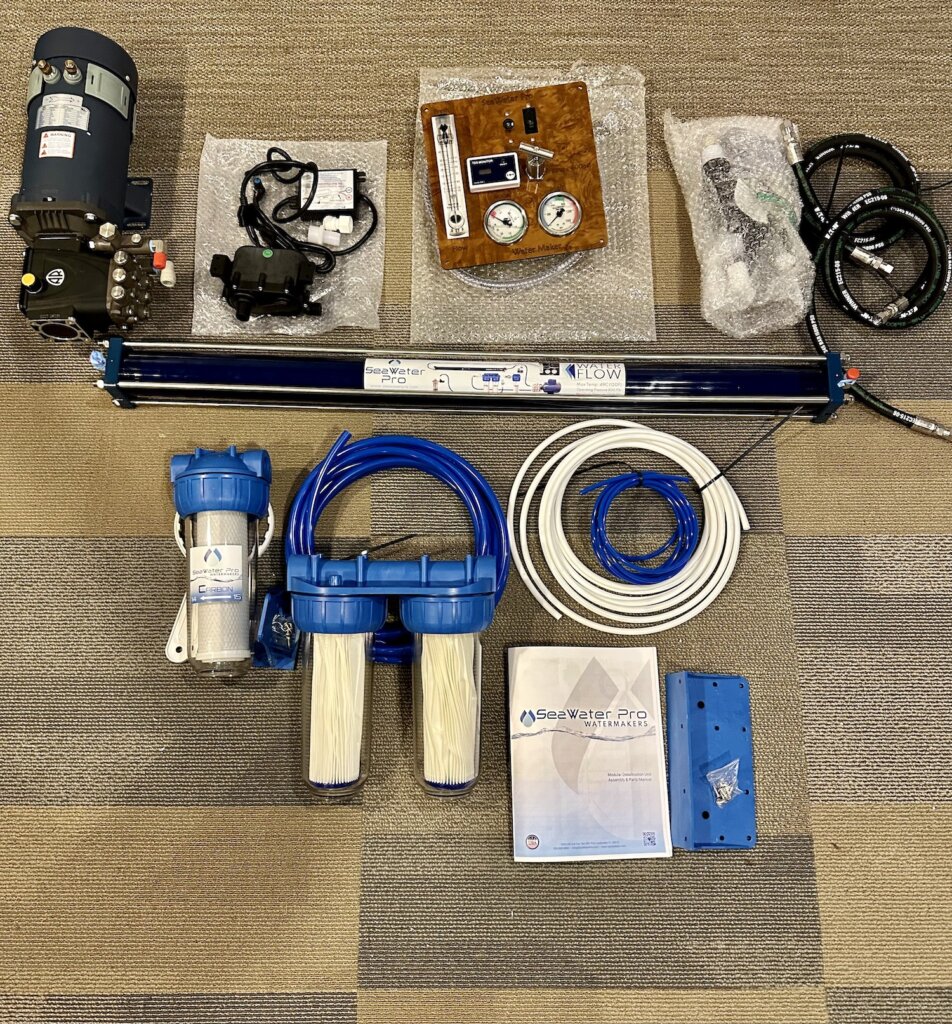
Water System – $4,400

We just ordered the 17 GPH Seawater Pro watermaker for about $4k. We also purchased an Acuva Arrowmax UV 2.0 water purifier since we’ll be drinking water out of our stainless water storage tanks.
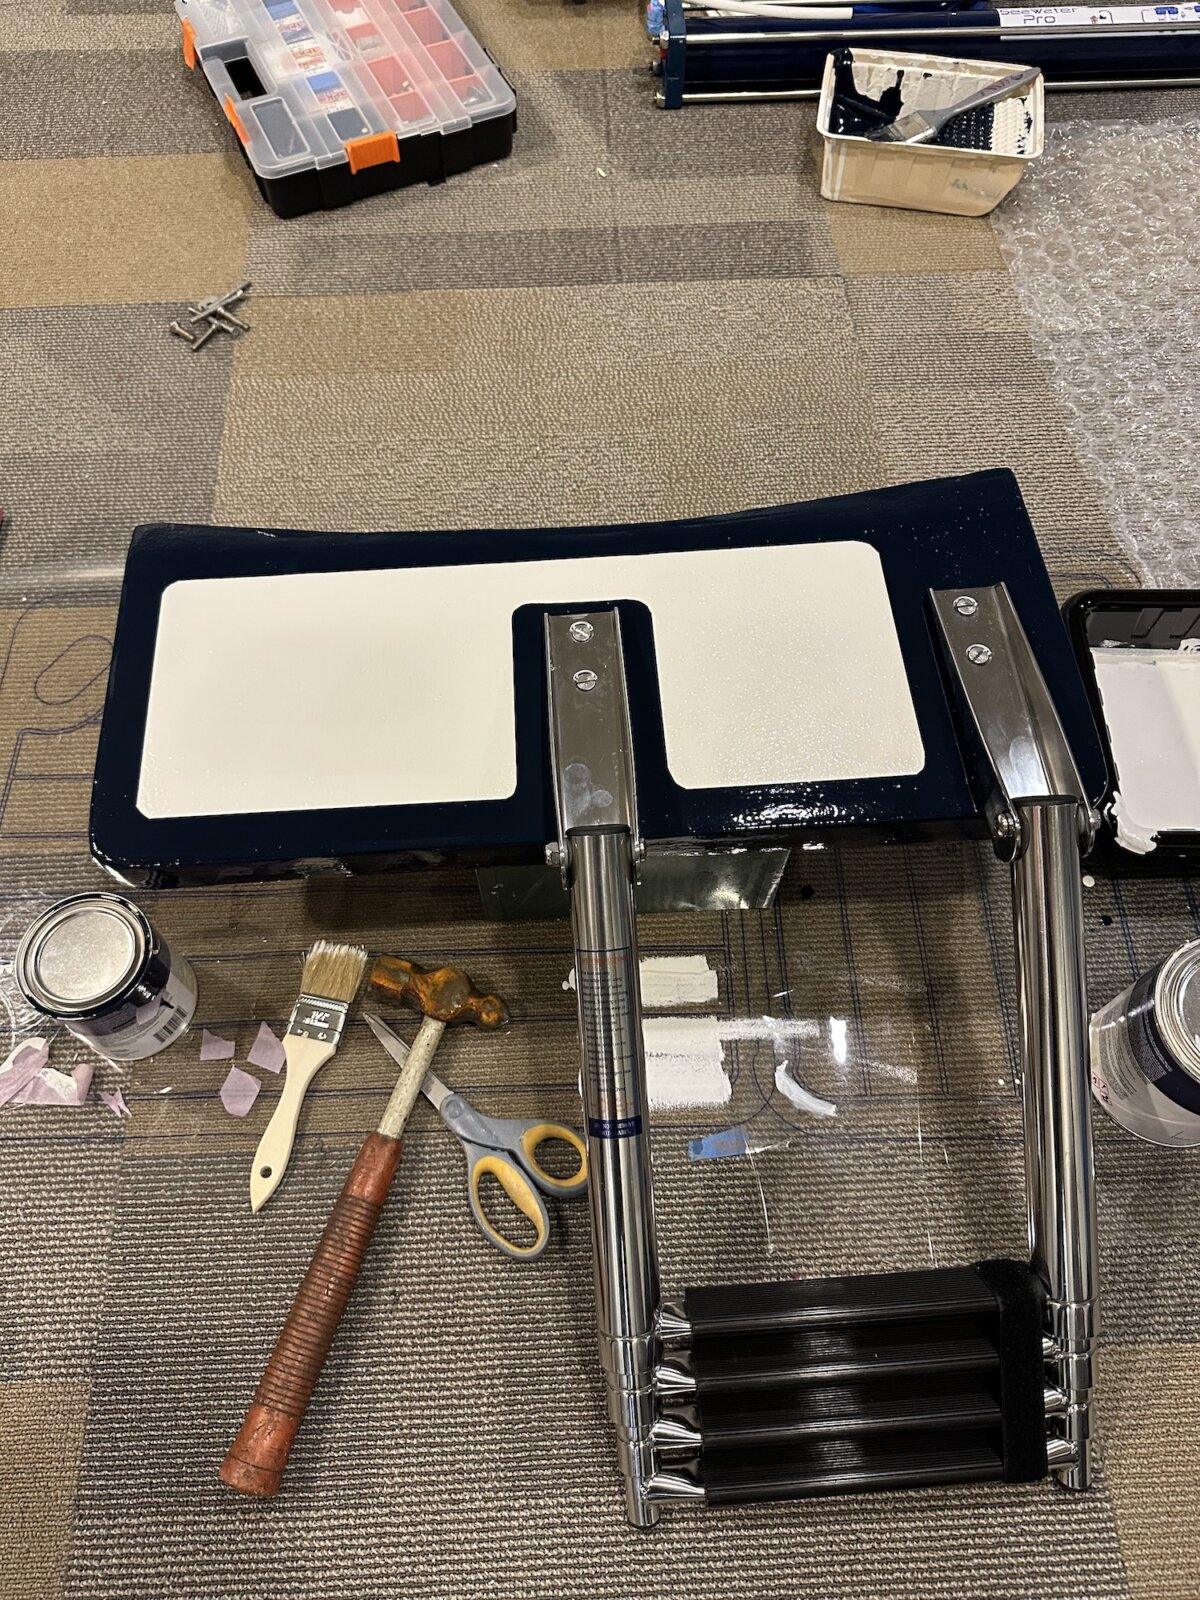
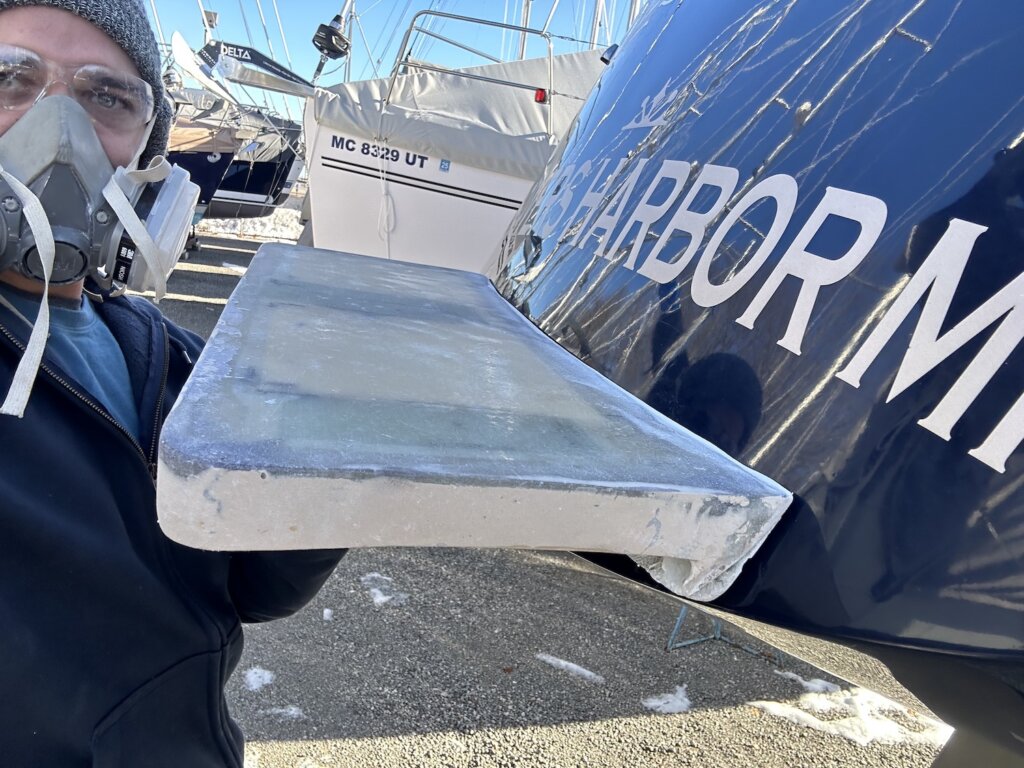
Steering – $3,930

Our boat came with an old Raymarine X1 Wheel Pilot, which we removed (and actually sold piece by piece for about $700 on Ebay!) to install a below-deck Garmin autopilot. We went with Garmin due to a family friend who works there getting us a discount, and it’s worked great so far. We also bought a 40″ Lewmar folding steering wheel. The original wheel on Resande was only 32″ so it’s a really nice upgrade.

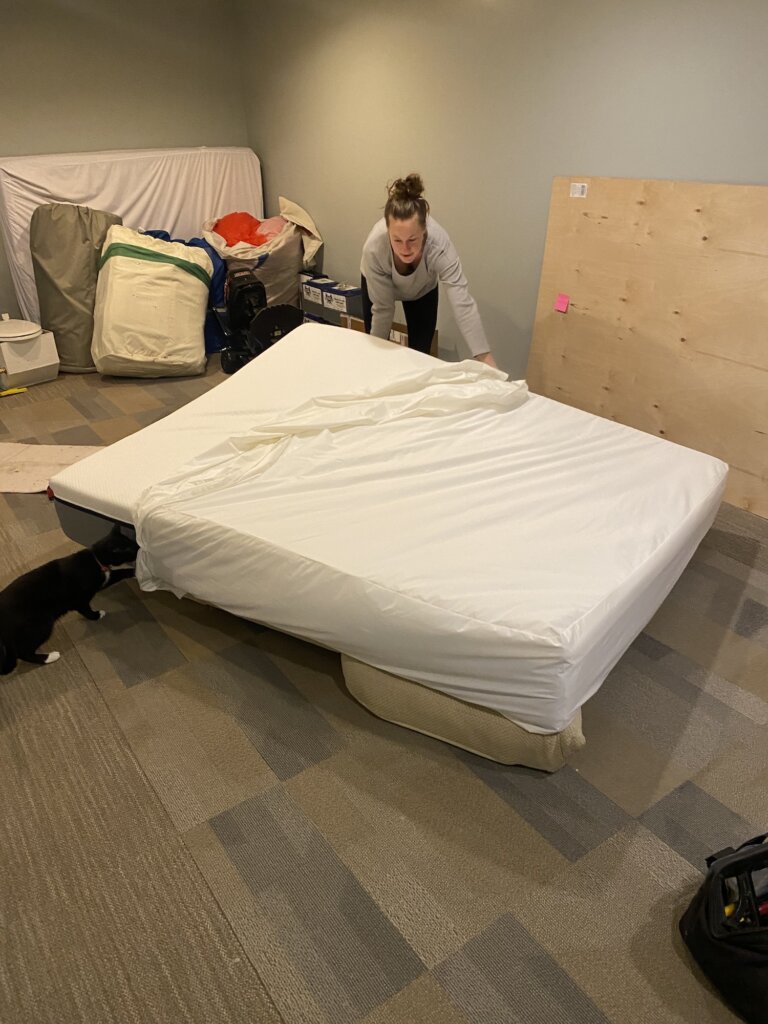
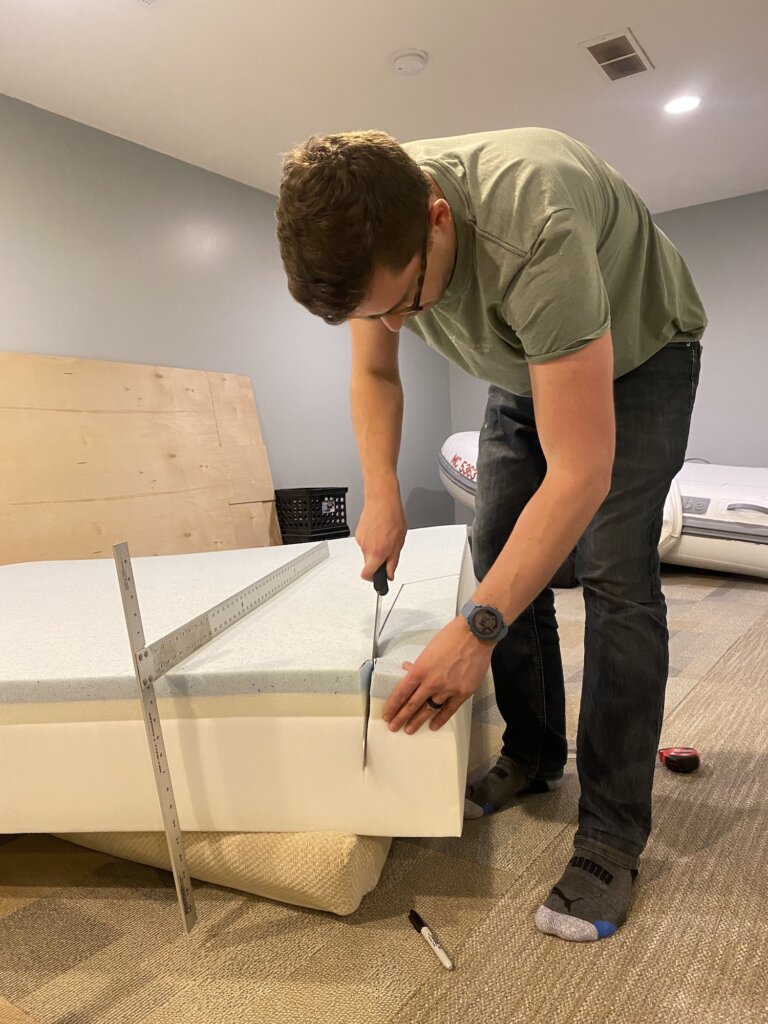
Liveability – $3,850

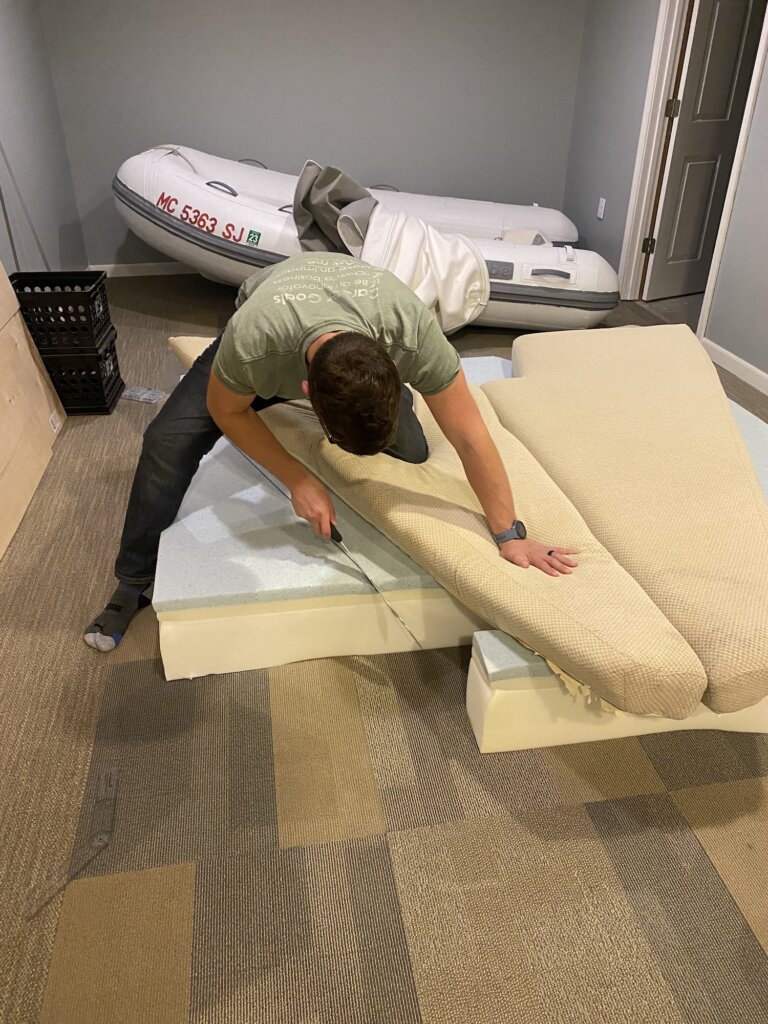
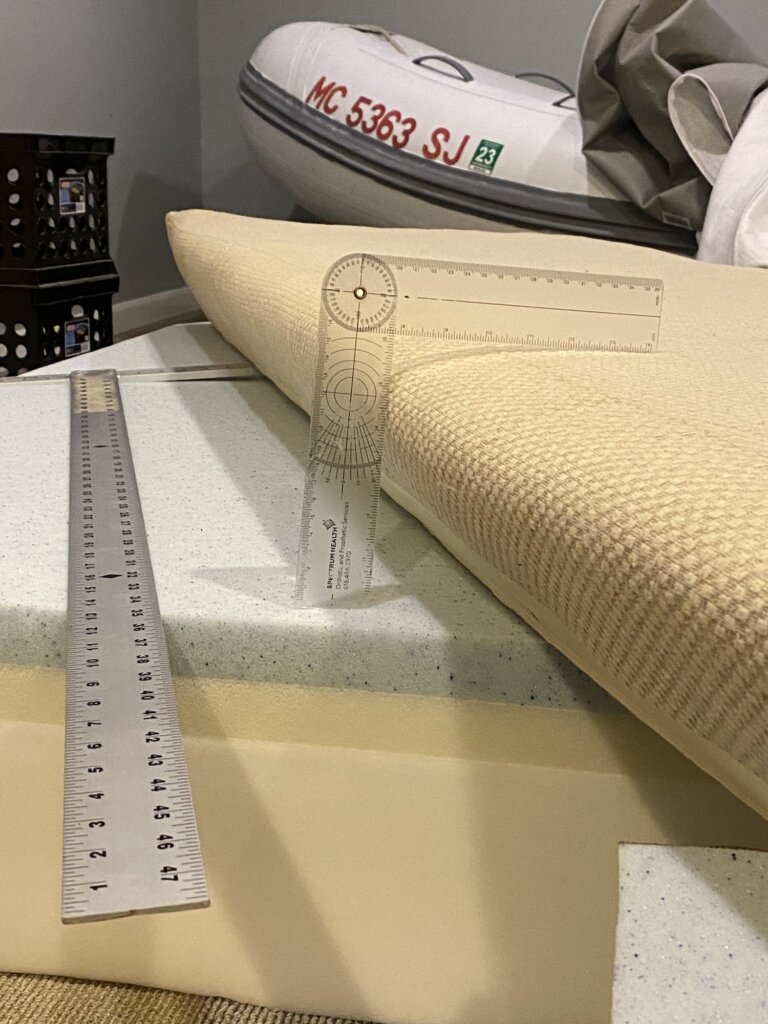
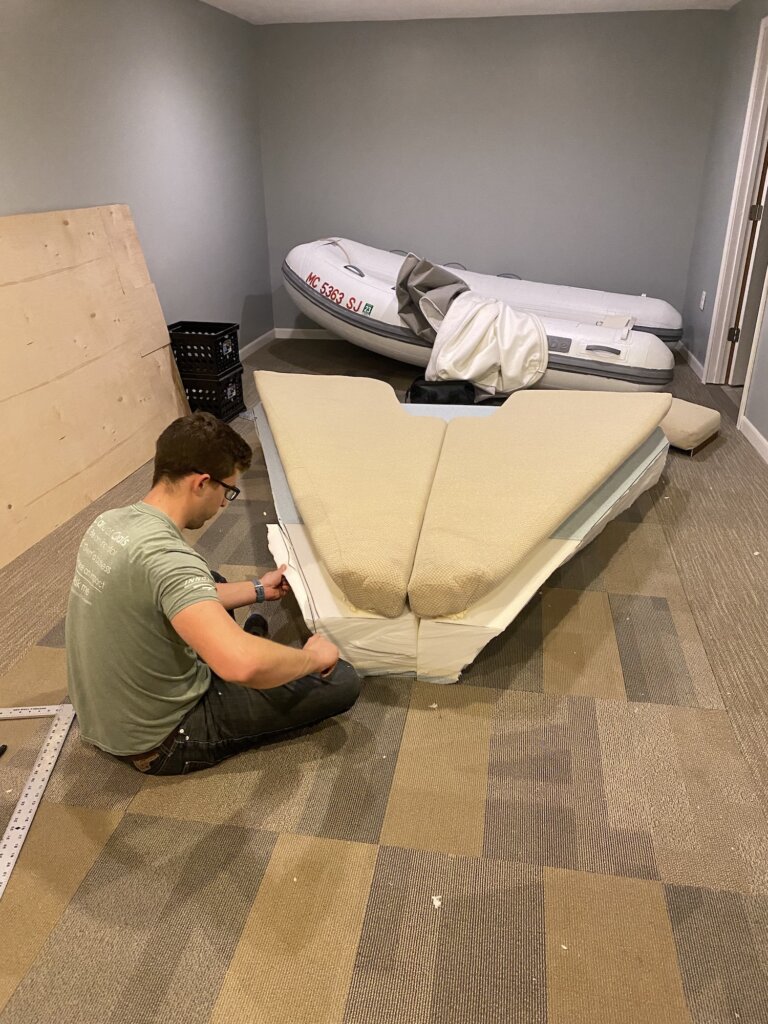
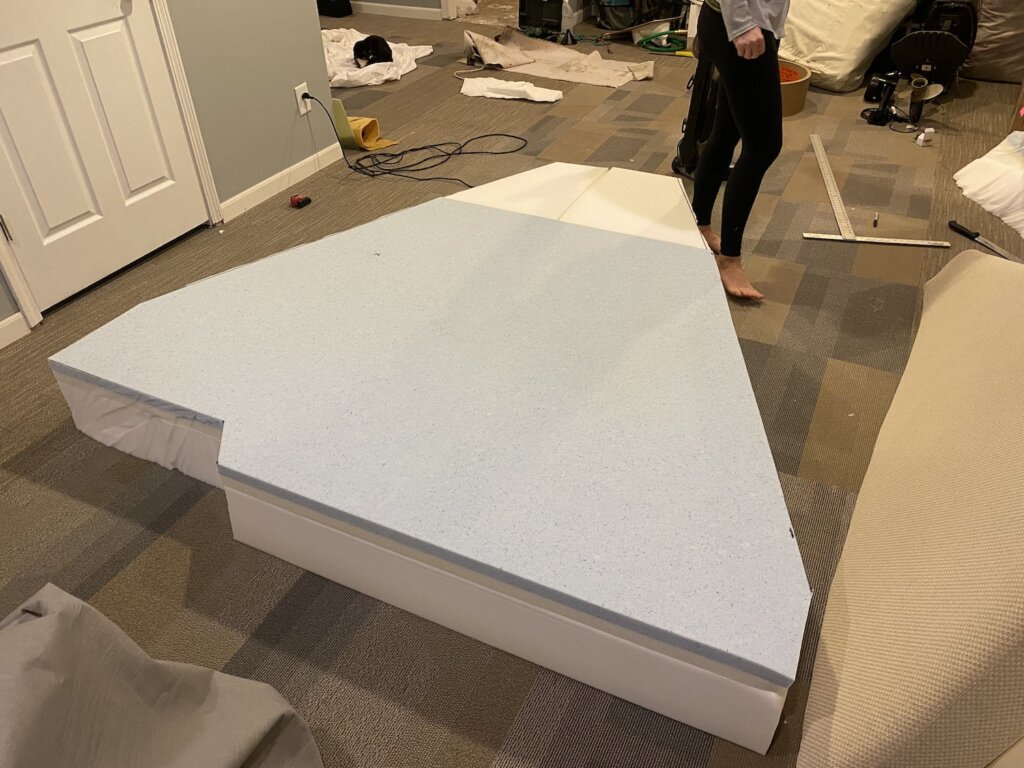
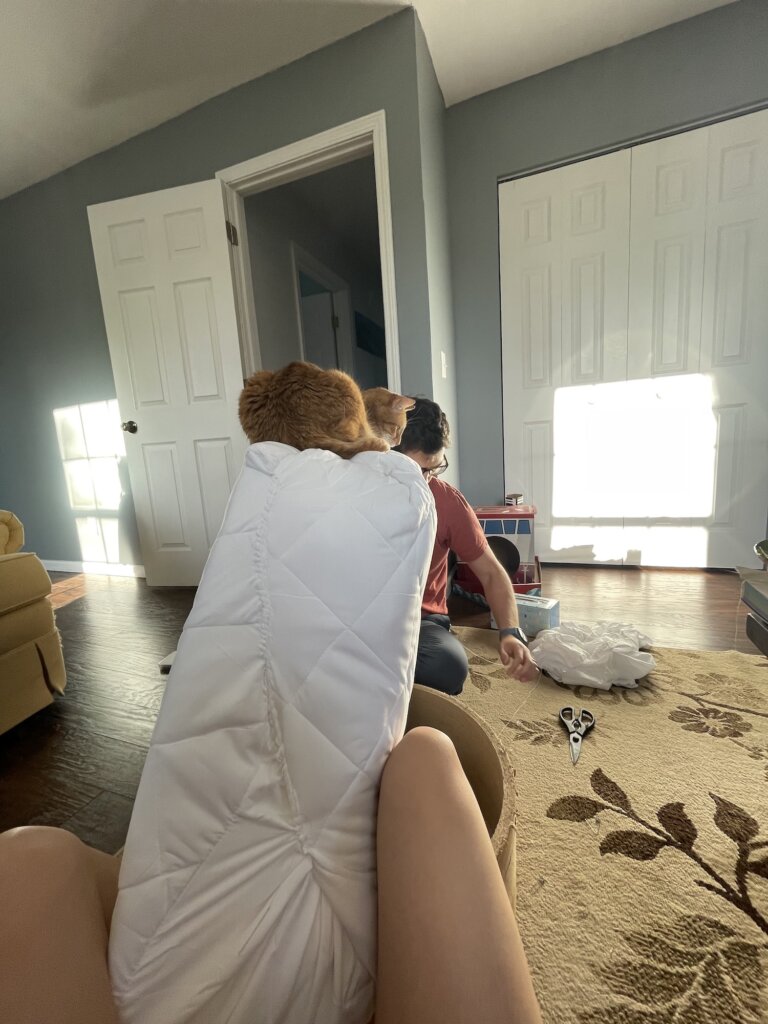
There were a few things we knew needed replacing if we were going to live on Resande. First off was the mattress – we ditched the thin old one for a big upgrade for about $750: DIY Boat V-berth Mattress: Step by step guide. We also got our cushions re-upholstered in our Saloon was $1900. Finally, a more fun one was putting Seadek in our cockpit was about $1,200
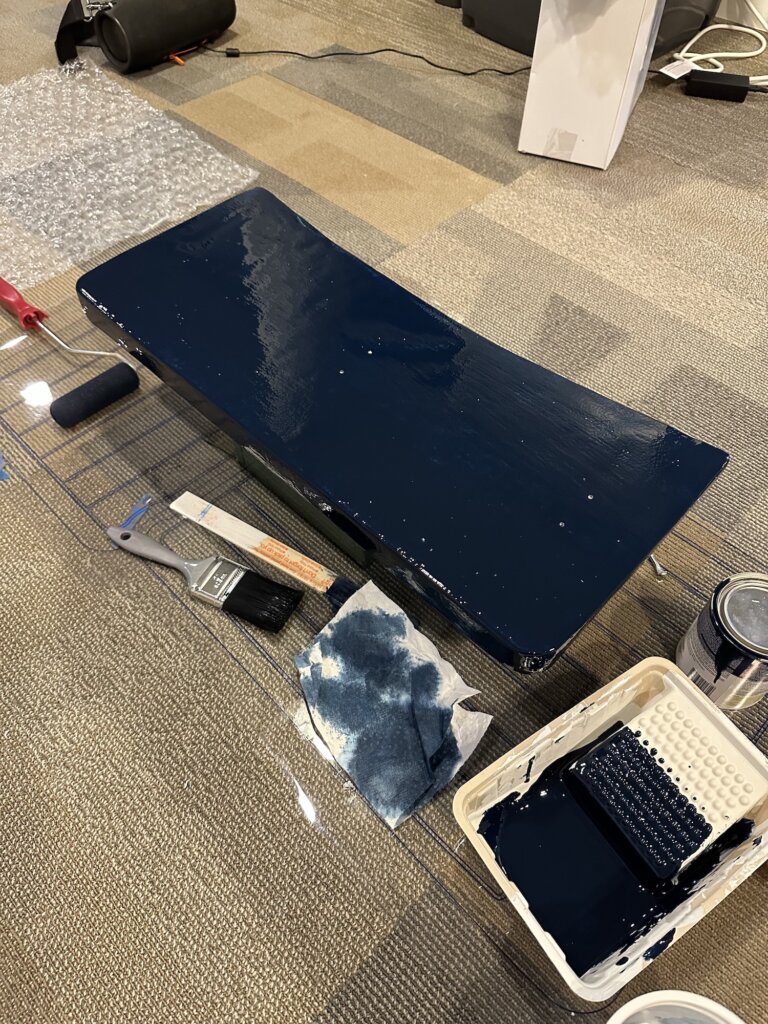
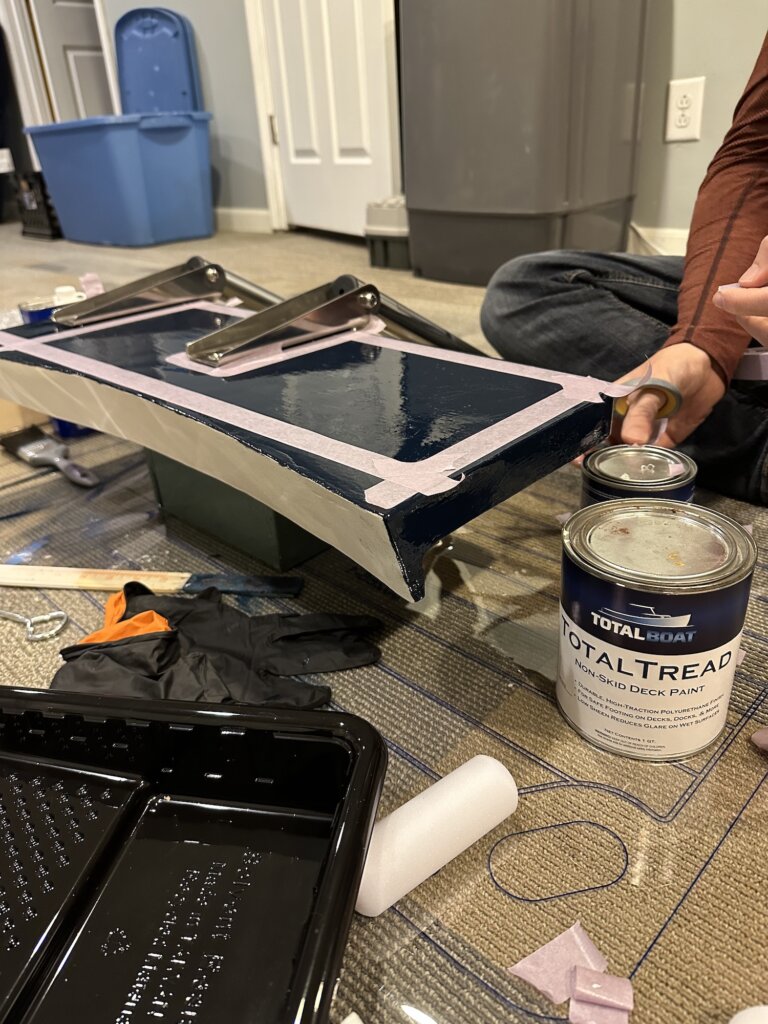
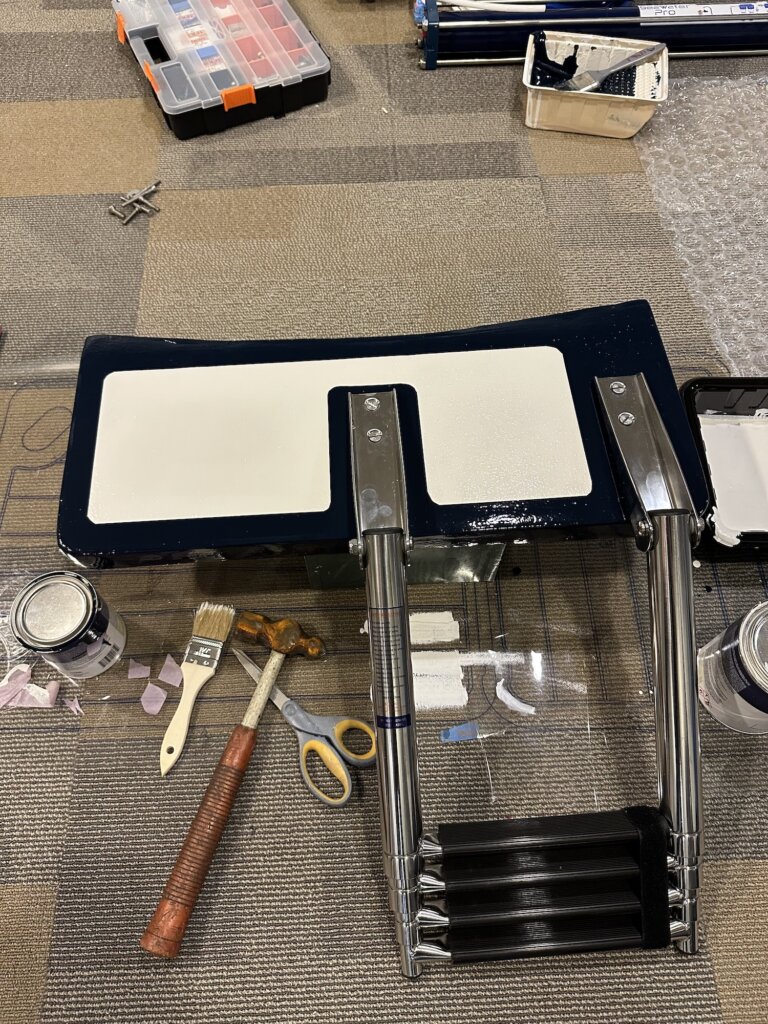
Davits – $2,200

We went back and forth on what to do about dinghy davits. Really the main contenders were between a tower (Towers in a box) or the Garhauer DD 6-2 Davits. We ended up going with the Garhauer davits since they were a lower all-in cost and I was confident we’d be able to fit them on our very narrow stern of Resande. Resande is only about 60″ wide at the stern, which is slightly lower than the minimum on the towers. We likely could have made it work with some side mounts a bit more forward, but combined with the overall cost I settled on the Davits. As of now we haven’t installed them so, we’ll still have to see how they turn out.

Ground Tackle – $1,950

The original anchor on our boat was a 35 lb CQR. Not a bad anchor by any means, but the newest generation anchors have made significant leaps in both holding power and ability to re-set. The two most important things you want in an anchor. Really the new generation of ‘digging’ anchors are essentially an inverted plow anchor. Instead of creating resistance by plowing the seabed, these anchors dig down into the seabed. We chose to go with a Mantus 55 lb M1 Anchor slightly oversized for our boat, as the calculator put us near that threshold between 45 and 55 lbs – we opted for the heavier option.

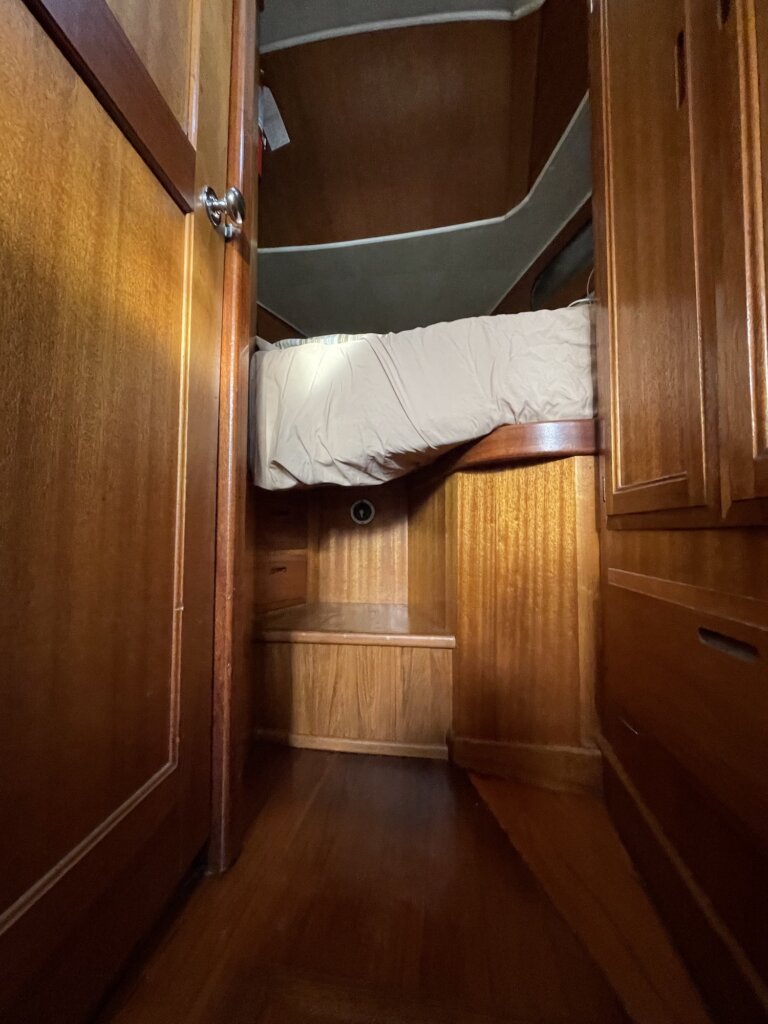
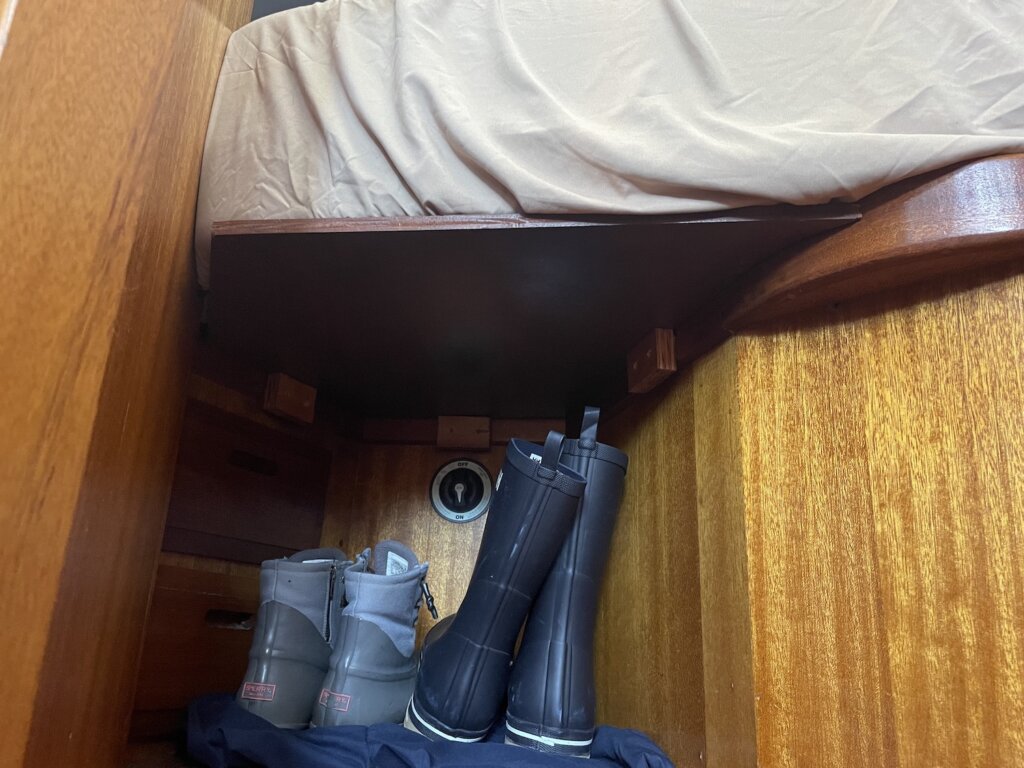
Attaching us to the anchor, we ended up with an all-chain rode – we ended up splitting a 550 ft barrel with another boat which netted about 275 ft per boat. Since this is arguably more chain than we really need in most cases (5:1 gets us to about 35 ft of depth with 175 ft) we actually keep about 100 ft (and about 100 lbs) of chain in the v-berth locker which is below the waterline and closer to the center of the boat. On the rare occasion we’re anchoring in deeper water we can always move more chain to the anchor locker, but this setup should get us through the Caribbean without issue. I’ll probably add about 50 ft of nylon rode that we can get to and cut off in an emergency.

Finally, the M1 anchor didn’t quite fit with the original bow roller. we ended up buying the Mantus Bow roller and fitting it onto the bow of the boat. to this day, we’re still trying to figure out how to get it to roll off without hitting our jib furler, but that’s a different post altogether.

Other – $1,690

This is a bit of a catch-all. Epoxy, paint, coring material, lights, fans, wires, connectors, pumps, rebuild kits, spare parts. The dozens of random projects we’ve done to get everything ready to go. This is probably much lower than the real number.

Safety – $1,070

For Safety, we added an AIS, Jack lines, and a bunch of random smaller projects to make sure we stay on the boat and upright.

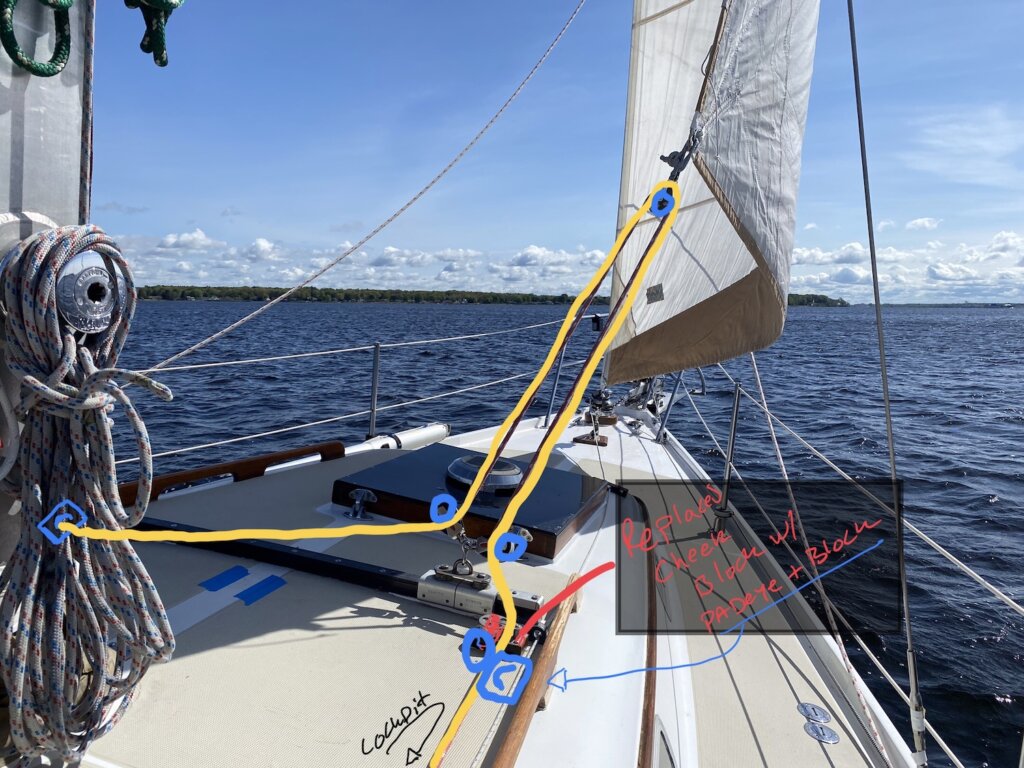
Running Rigging – $400

Not a huge surprise, but we had several lines that needed replacement: Main sheet, overhaul on the reefing system, furling line, etc.
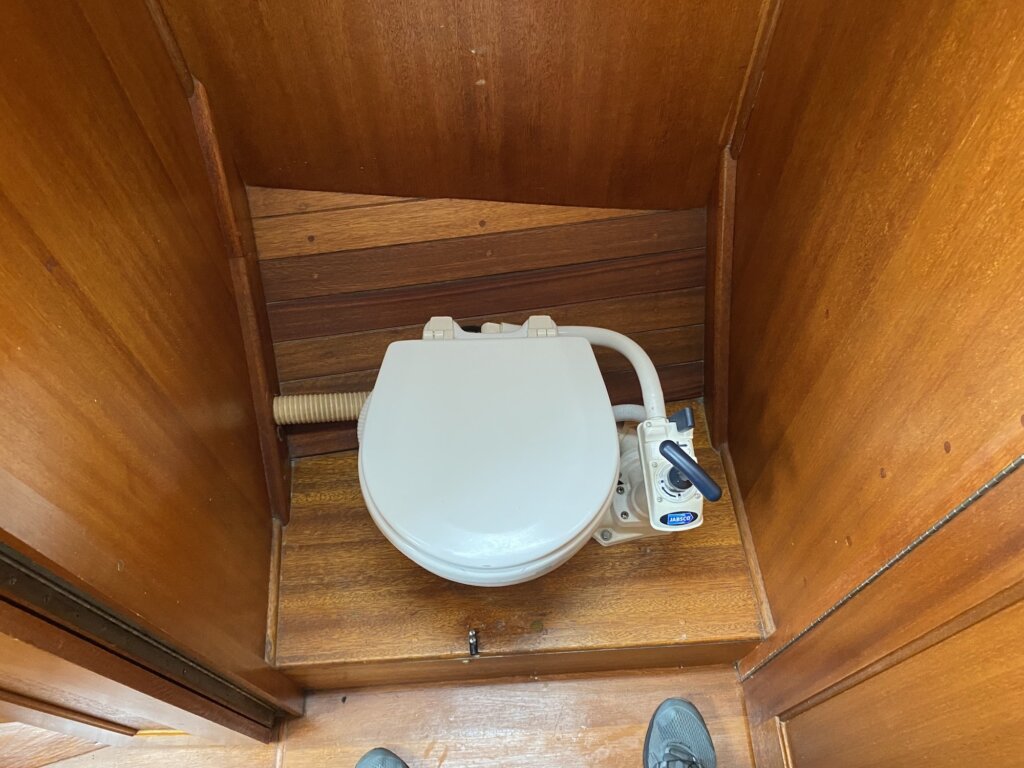
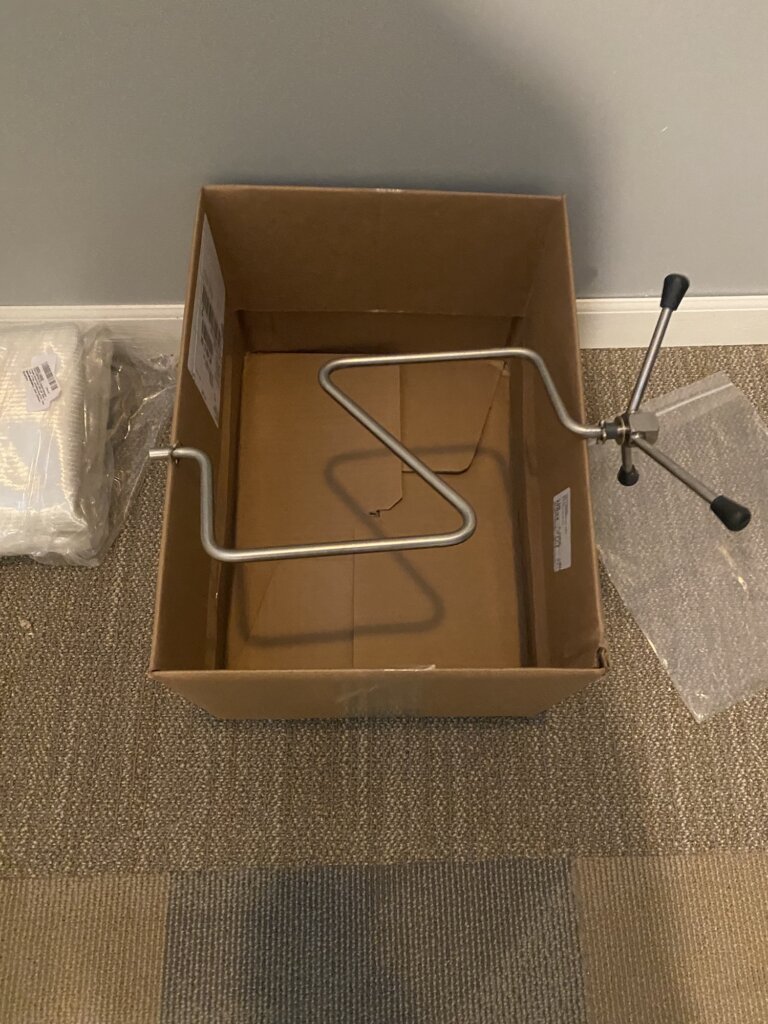
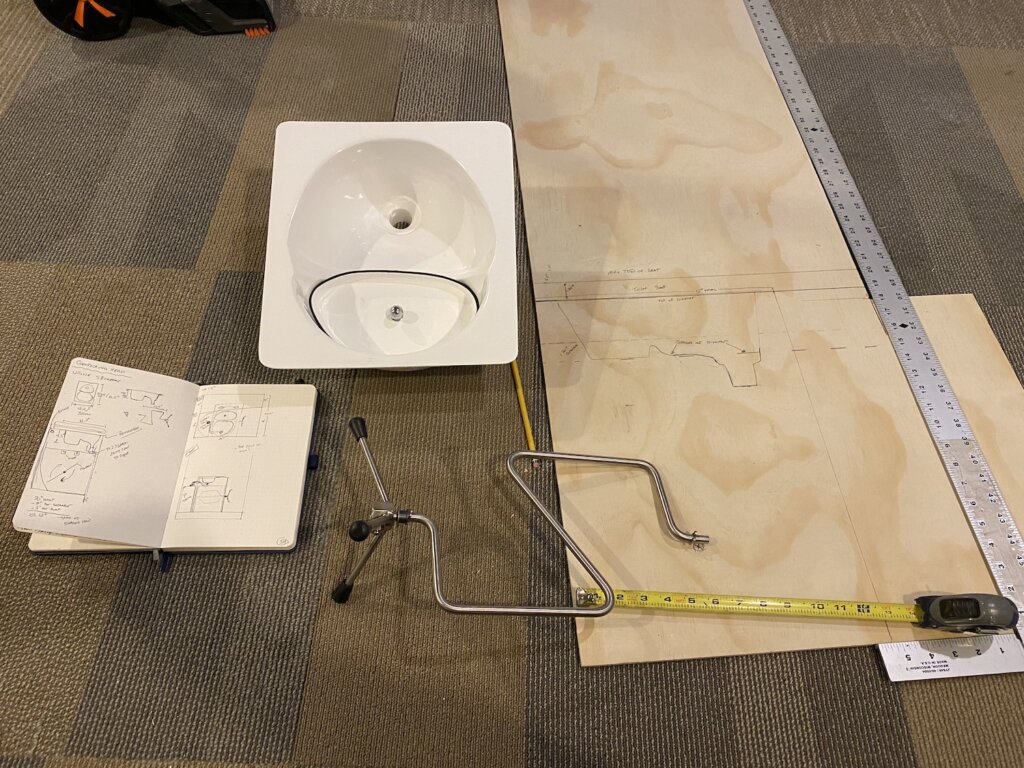
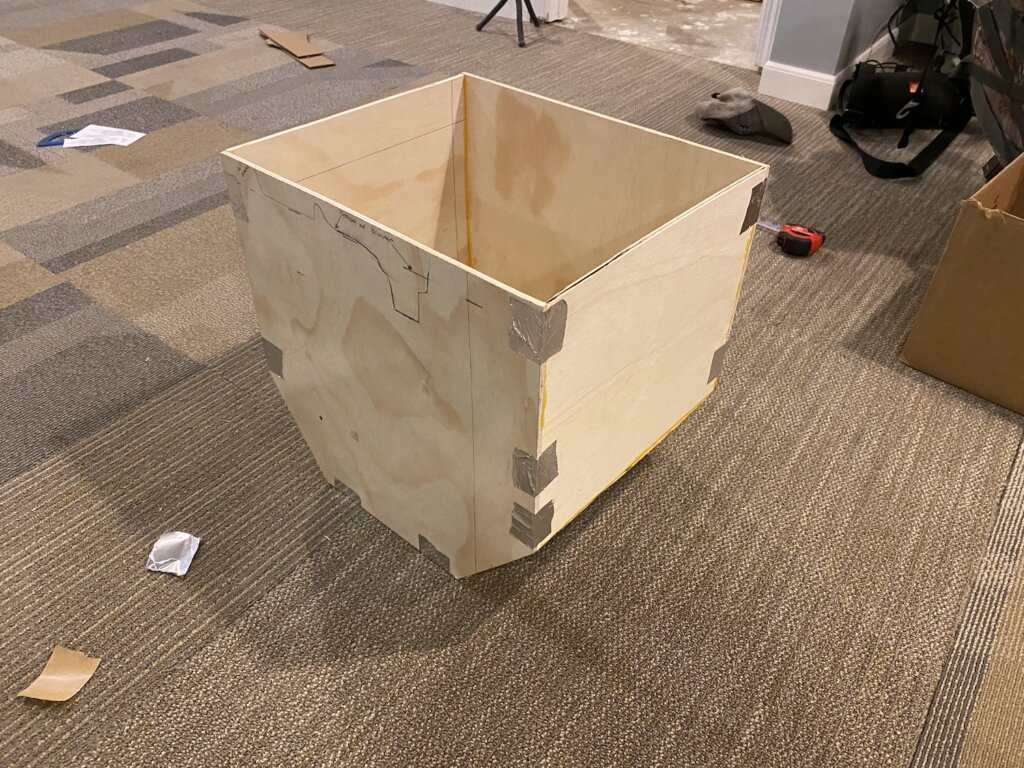
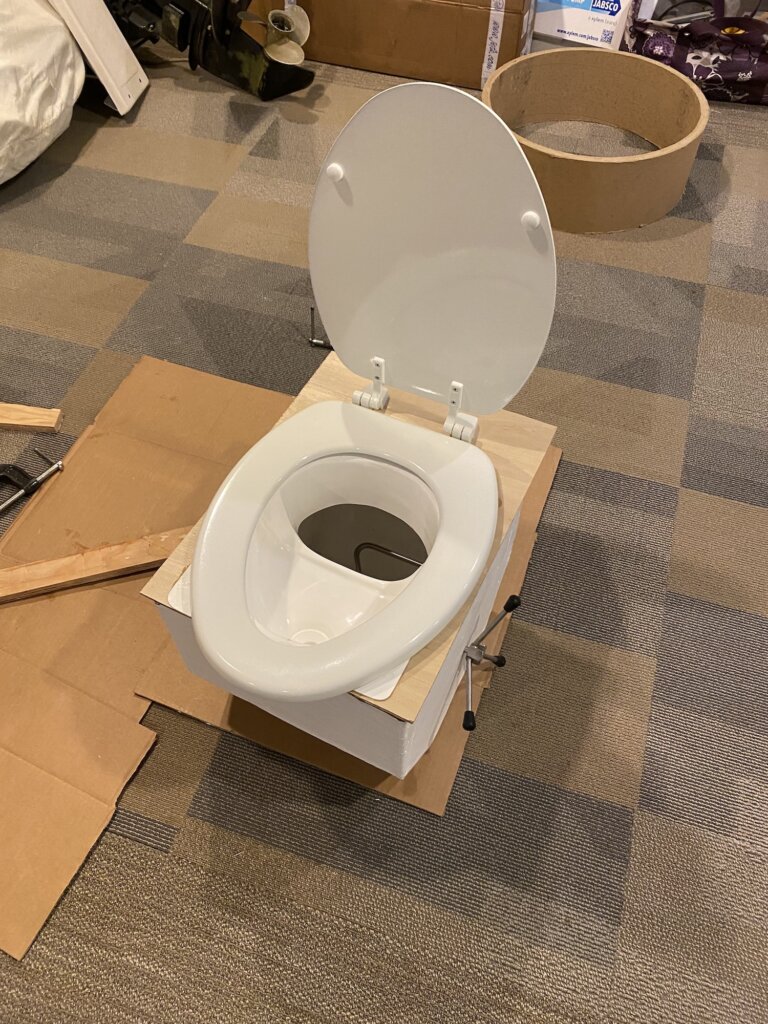
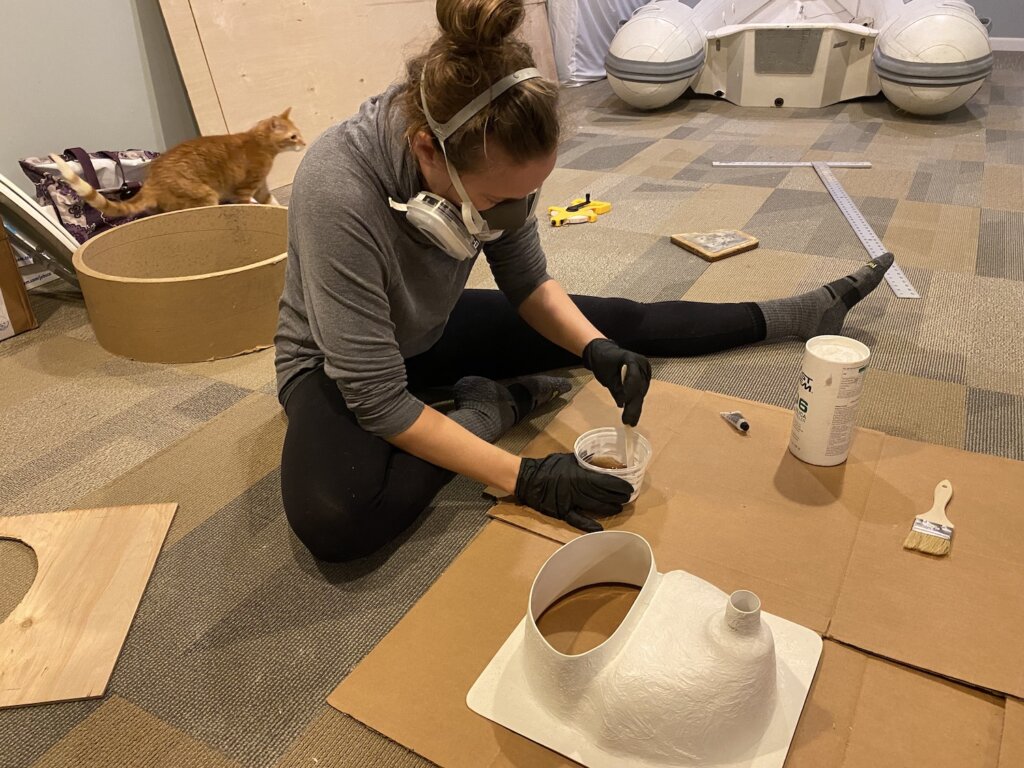
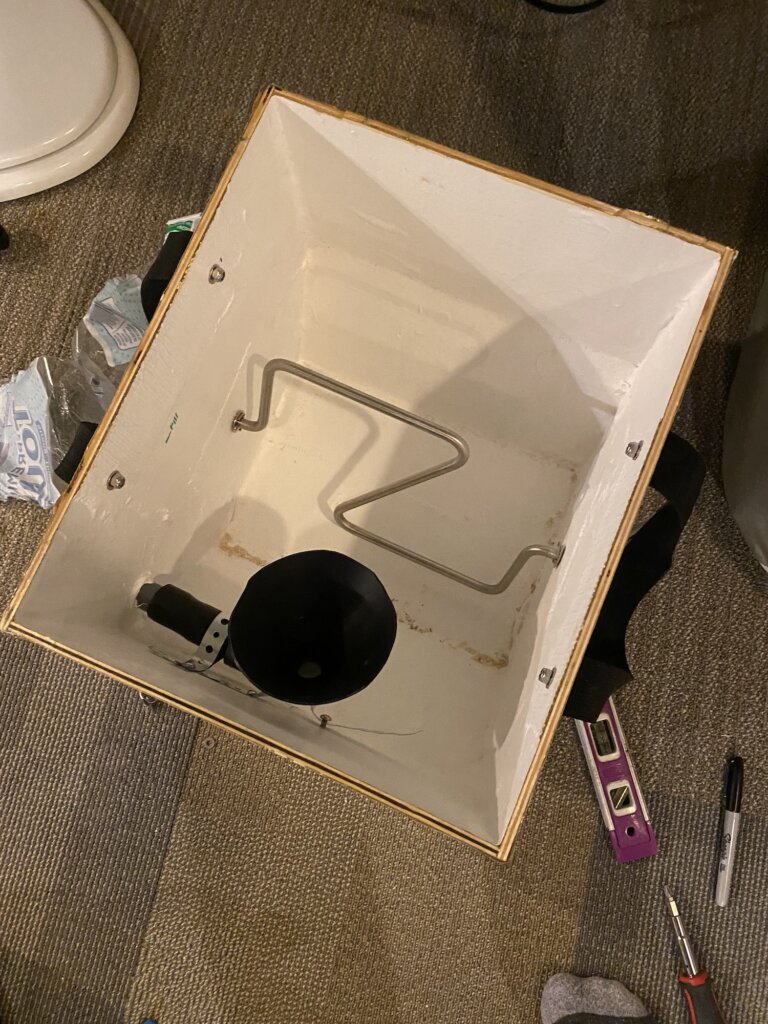
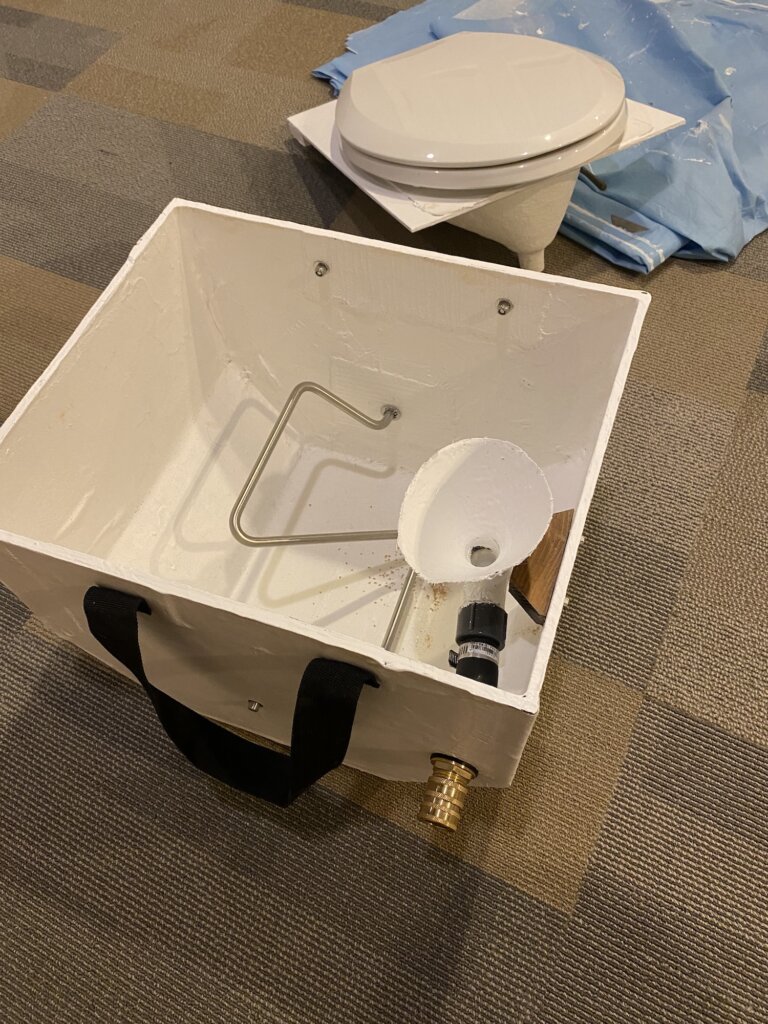
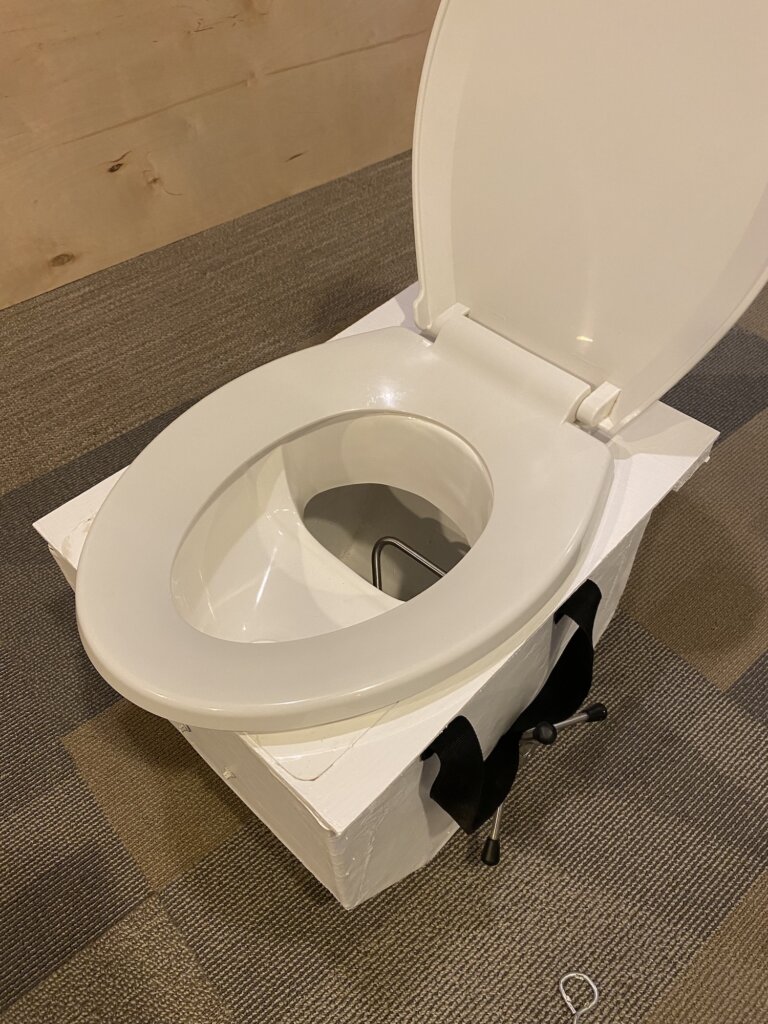
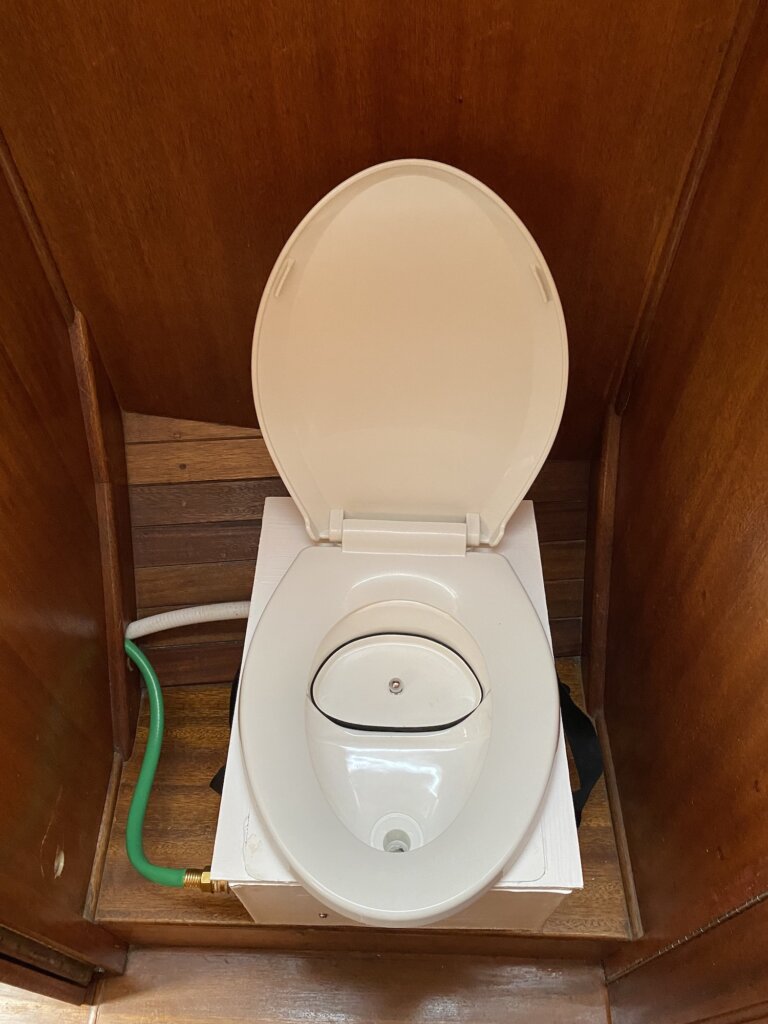
Waste – $250

Our initial plan was to buy a Composting head from Nature’s Head or C-Head. Due to dimensional constraints, we ended up making our own version for a fraction of the cost and probably ended up with something a bit better since it’s exactly what we need for the exact space. We detailed the process we went through here: DIY Composting Head.

What do you think – would you have made the same upgrades or did we miss something big that you would have done? Leave a comment below!

Categories
sailing Sailing Upgrades

How We Added a Self-tacking Staysail to our Sailboat

Resande’s original sail plan included a Staysail, and it was indeed self-tacking but included a bulky boom that swept across the deck. To achieve a cleaner and simpler deck, we wanted to figure out a way to keep the self-tacking setup, but without the boom which provided structure and shape to the sail. The boom would also violently whip around when furling the staysail and send vibrations through the boat.

I was surprised how difficult it was to find forums that showed how to accomplish this. There were some that talked about how to add a boom, but most of the keyboard warriors and racing enthusiasts decried the idea that it would lead to suboptimal sail shape. As a cruiser, I’m less concerned about perfect sail shape (which ended up not even being an issue) and the benefits of removing a 14 foot aluminum pole from the deck far exceeded downsides.

With the boom, we did have a staysail traveler on the cabin top, which, worked similar to a mainsail track. The true issue we had, was when we removed the boom, the track became useless since sheeting directly through the track would result in competing forces. Back to the mainsail comparison, you have control of the traveler from port to starboard with a dedicated line. You technically could do this with the staysail traveler, but then it wouldn’t be as self-tacking, and would add unnecessary rigging components in a process we’re trying to simplify.

After countless hours of trying to find a solution, I finally found it on the Harken website of all places. Their site showed four (now three) different commonly used self-tacking setups:

  • Standard Self-Tacker: you’ve got a sheet going forward to near the bottom of the furling drum, then back to a block on your traveler car which is led back forward to the clew of your sail.
    • This works by creating a pivot point forward so your traveler can tack without the lateral forces trying to self-center on the track. The closer the forward block is to the traveler, the more the traveler car will want to be centered under load which will greatly limit your sheeting angles.
    • The downside is this has a very long sheet going from the cockpit to the base of the sail, then back to the traveler, then up to the clew. This zig-zag will sweep the deck just like the original staysail-boom setup (it’s actually pretty much the same)
  • Self-Tacker on a Boom: is basically the same as the standard self tacker, and the original equipment on our Ericson 39B. It is bulkier on your deck, but the benefit is you have more control of the staysail shape. You have control of the sheet and boom with different lines led to the cockpit.
  • Sheet up the mast: this one seems to have been removed from the Harken website, but it uses the same principle as the Standard self-tacker. Instead of running the sheet all the way forward however, you run it up the mast then down through the traveler block, then forward to the clew which results in a cleaner deck. This would have been our backup plan if the next option didn’t work
  • 2:1 Self-Tacker: the simplest and cleanest (in my opinion) variation, the 2:1 self tacker rides on the sheet itself laterally during the tack. The key difference is the end of the sheet goes to a fixed point instead of the clew. The clew has a block that provides a low resistance path between port and starboard.

The 2:1 Self-Tacker is the one we ended up using on our boat. It accomplished our goal of cleaning up the deck, and it simplified our running rigging in the process. What we found in practice, is our sheeting angles were as good as they were with the boom, though we have less control than we did with two separate lines.

More options, for offshore passage-making Now that we have the boom out of our lives, rigging it like this also leaves the option to run sheets back to the cockpit similar to how you would the headsail. We could want to do this for two reasons I can think of.

  • On a long passage, when you’re on the same tack for days potentially, the self tacking feature isn’t that important.. It could give you more control of sail shape.
  • More importantly, the self-tacking setup would make it impossible to back the headsail when trying to heave to under staysail only. I could see a scenario where we’re running a reefed main and staysail and want to heave-to. I would likely set up the staysail like this on a long passage for the additional options it would provide.

Overall, we’re very happy with our decision to remove the boom. I would highly recommend trying it out and testing it with the 2:1 self tacker (minimal rigging required). Let us know you’re questions/comments below I was surprised how difficult this was to find an answer on when trying to research how to do this.

Categories
Sailing Upgrades

Choosing the Right Watermaker for a Cruising Sailboat

As part of our refit on S.V. Resande, we have decided we want the ability to desalinate seawater to make our own water. Our goal is to disconnect as much as possible from the resources ashore, and water, like electricity is a critical utility to achieve that.

There are a several different options when considering a Reverse Osmosis desalination system. In this post, we’re going to look at offerings from two different companies: Seawater Pro and Spectra. Most watermakers are constructed similar to the Seawater Pro, it actually isn’t even that difficult to piece together your own kit as all the components are fairly easy to source.

One of the main considerations you need to keep in mind is the energy efficiency of your system. Electricity is another finite resource when cruising, and you need a robust system to power this process. Of the options we’re looking at, two are 110V AC powered and the other three are DC powered. It’s really important to understand whether your AC or DC system will be able to provide the needed electricity to the motors. We completely refit Resande’s electrical system, so the options we’re considering below will all work with our system. I’ll be comparing the five different models for their Price, Energy Efficiency, Output, Reliability, and Overall Size

Cost is an important factor that will influence your decision. All of these options are a large investment when refitting a boat, and money is always a constraint. Cost is especially when you consider it’s inverse relationship with energy efficiency: generally speaking, the more you pay, the more efficient your system will be. Below is a table of the five units we’re looking at, pricing is as of December 2022: Winner: Seawater Pro 40 GPH

ModelPrice Gallons/ Hour (GPH)Cost per Gallon-Hour
 Seawater Pro ACC 110 20 GPH $  2,995.0020 $     149.75
 Seawater Pro DC 12 17 GPH $  3,495.0017 $     205.59
 Seawater Pro ACC 110 40 GPH $  3,495.0040 $       87.38
Spectra VT150 $  7,300.006.3 $  1,158.73
Spectra VT200 $  7,900.008.3 $     951.81

Energy Efficiency Just like money, electricity is another finite resource on a boat. Cruising is all about managing your resources. Once you’ve determined if your electrical system is capable of running each option, you need to look at the differences in efficiency. The easiest way to do this is to bring it down to a comparable metric, in this case Watts Per Gallon. I pulled the specs off these models to give rough estimates of the efficiency you can expect from each. The unique thing about the Spectra watermakers is their low energy consumption. Spectra does this by reclaiming some of the pressure with what’s called a Clark pump. It’s impressive that you can desalinate water for 120 watts or less, which should be easily handled by most unmodified electrical systems. They are by far the most efficient option, but you do pay for it in up front costs. Winner: Spectra models

BrandModelGallons/ Hour (GPH)WattsWatts/Gallon (Efficiency)
SeaWater Pro Seawater Pro ACC 110 20 GPH20970                    48.50
SeaWater Pro Seawater Pro DC 12V 17 GPH17600                    35.29
SeaWater Pro Seawater Pro ACC 110 40 GPH40970                    24.25
SpectraSpectra VT1506.3107                    17.00
SpectraSpectra VT2008.3120                    14.50

Cost Vs. Efficiency: as I mentioned before, cost and efficiency have an inverse relationship with these watermakers. The graph below helps illustrate the relationship between up front cost and watts per gallon

Output is important to understand how much time it takes to fill your tanks. The options we’re looking at here vary from 6.3 GPH to 40 GPH. Resande has 80 gallons of water, which would take anywhere from nearly 13 hours to only 2 hours to fill from completely empty. In some ways, output is irrelevant, and you should focus on efficiency since time itself isn’t typically a constraint. You likely aren’t using 80 gallons per day, and you could use the Spectra option for one hour per day to replace your daily consumption. On the other hand, I could see us running the watermaker during peak sunlight hours, where we’re putting nearly 500+ watts of solar to take some of that load off the stored energy in the battery bank. During our shakedown trip in Summer 2022 to South Manitou, we proved out our electrical system with only 350 watts of solar installed. With the weather we had, our batteries were regularly topped off from the night’s consumption by around noon each day, and any additional sunlight was just going to waste the rest of the day. It would be great to convert that to water. Winner: Neutral/Depends on tankage and usage

Reliability I will preface this by saying I have heard nothing negative about the reliability of the Spectra watermakers. That being said, the Spectra Clark pump and spare parts are proprietary and therefore not easily replaceable. If you’re in a remote island, you’re probably not getting your watermaker fixed anytime soon. The Seawater Pro, uses simple and common components that a fellow cruiser may even have. Winner: Seawater Pro models

Overall Size: On a boat, the space required for additional equipment always needs to be a consideration. The Seawater Pro 40 GPH for example has two large 40″ membranes and a high pressure pump with motor. The Spectra however uses a 20″ membrane and it’s all packaged with the Clark pump to be one compact unit. Either one will require space, and depending on the available space one option may be easier to install than the other. You will want to make sure it’s physically located near the main positive bus bar since you’ll likely be pulling heavy amperage (needing heavy gauge wiring) with the Seawater Pro options. The Spectra options would give significantly greater flexibility due to their size, shape, and lower current draw.

Deciding between Seawater Pro models: As of right now, we’re deciding between the three Seawater Pro options.

  • The 20 GPH model makes the least sense on paper, however you could easily upgrade it to 40 GPH in the future just by buying an additional membrane. It’s the cheapest option, and smaller than the 40 GPH in our space constraints
  • The 17 GPH model is more efficient than the 20 GPH option, but a bit pricier. Apples to apples with the 20 GPH it’s probably worth the additional $500. It has a lower current draw at 600W (50 Amps) and runs directly off DC, so you don’t have to worry about involving the inverter to make water.
  • The 40 GPH option is the same price as the DC 17 GPH option, but you get 2.3X the output. You do have to deal with a second membrane and it’s the highest efficiency of the three Seawater Pro options

March 2023 Update: We just received our watermaker yesterday. We ended up going with the 17 GPH DC Powered Seawater Pro model. We also added in the control panel since we wanted to do it right, do it once, and the extra cost would be offset by the countless times we’d be able to avoid ripping apart our aft to operate it in the future.

One more option: at nearly the last minute, we strongly considered going with the Sun Pure Watermaker option, which is very similarly priced and spec’d to the Seawater Pro. The nice thing about it was it’s local here in Michigan, so we’d be able to support a local business and save money on shipping. We still ended up going with Seawater Pro because the quality of the plumbing fittings and flush system looked slightly higher and more importantly the membrane housing is reinforced with the stainless steel rods (2:00 on this video) which help protect from hydraulic shock that can happen, specifically on a boat.

Please leave a comment below letting us know what you would do!

Categories
sailing Travel

South Manitou Island Adventure

We visited South Manitou Island on our sailboat this summer and we absolutely loved it! We stayed on anchor in the bay but you can also visit via the Ferry for a day trip or camp overnight. Either way this is a beautiful summer destination!

South Manitou island is part of Sleeping Bear Dunes National Lakeshore. You can read the story of how the Sleeping Bear Dunes got their name here. North and South Manitou islands are said to mark the spot where two bear cubs disappeared. The large dune on the Michigan mainland is said to represent the mother bear. There are two versions of the story but both describe a mother bear and her two cubs coming from the Wisconsin shoreline across the lake to Michigan.

South Manitou island is uninhabited and there are not many services on the island. You should be prepared to pack in and pack out everything you need. The Ferry runs from Leland. Round trip tickets will cost $45 per adult and $23 for kids 12 and under. You can find more information and book your Ferry here.

There are three campgrounds on the island and camping is not permitted outside of these campgrounds. All of these campgrounds have vault toilets, no water, no electrical. You will need a backcountry permit to camp on the island. You can find more information here.

The main attraction on the island is the scenery! From the lighthouse you can hike the main trail to a few specific things worth seeing.

ShipWreck:

First there is the shipwreck. The wreck of the Francisco Morazan is visible above the water. The ship ran aground in November of 1960 on voyage from Chicago to the Netherlands. The crew was saved, the owner of the ship was never heard from and so the ship sits just off the island to this day. There is a great lookout point from the trail where you will get nice views of the wreck. If you are visiting by boat you can get even closer but visiting the wreck from the water. We took our dinghy over to the wreck and drove all around it which was very cool! It has been taken over by a large colony of birds and it does not smell good when you do visit up close!

Old Growth Cedars:

The next stop if you hike further down the trail is to see the old growth cedars. This group of cedar trees are some of the oldest and largest white cedars in the world. Many of them are 300-500 years old! This was a really pretty portion of the hike! It was quite buggy while we were there so we didn’t stop moving for long! Be prepared and bring some bug spray or wear long sleeves/long pants.

Sand Dunes:

If you hike further you will get to the dune hike. This will lead you up to the top of the sand dunes where you will get amazing 365* views of the entire island. It seemed like the trail just kept going all throughout these dunes. We would have loved to keep hiking around this area if we had more time on the island. We stopped here and turned around as we had already hiked several miles more than we thought we were going to for the day and wanted to get back to the boat for lunch.

Ghost Towns:

You can also hike to the old Village originally settled in the mid 1830s. The village included a house, blacksmith shop, grocery store, barn and a railroad for the steamers to haul wood from the dock inland. We didn’t hike this way so cannot speak to how much of these things are left visible. You will see the signs for the village along the main trail if you are interested in seeing what’s left. You can also hike to the old weather station which again we didn’t do as we had already hiked quite a bit!

Lighthouse Tour:

There are tours of the lighthouse that run if you do want to walk up to the top. We didn’t do this but friends who did said the views from the top were great and it was worth it to do the tour.

The Water and the Beach:

The water is of course the other reason for visiting the island. The water is so clear and changes from turquoise to a beautiful deep blue as it gets deeper. We enjoyed taking the dinghy around the island, taking in the views. The anchorage/bay is a great place for paddle boarding or kayaking if you are traveling by boat and can bring these items with you. Lake Michigan does take while to warm up, we visited in early August and the water was comfortable in the low 70s for swimming.

Our course, taking some time on beach is also a must! The beach is a mix of sand and rocks so wearing some type of water shoe or sandal will likely make your beach walking more comfortable.

We would have loved to have more time here to hike further, explore and just relax and take in the views! Unfortunately we had to take our weather window and sail home so we only had two days on the island. While that is certainly enough time to see most of the main attractions more time is always better when your in such a pretty place!

Have you visited South Manitou Island? What did we miss? What are your favorite  Lake Michigan destinations? Leave us a comment below.

Categories
DIY Projects Sailing Upgrades

DIY Composting Toilet

We did some research and heard several bad stories about boat toilets breaking at the worst possible time. We decided to remove our old holding tanks and go with a composting toilet aboard SV Resande. Our first choice after looking into several different brands was Nature’s Head. We quickly realized that the Nature’s Head wouldn’t fit into our space. Of course, this lead to another DIY project for us.

The actual components of a composting toilet are fairly simple:

  • Solids bin – you want to keep the solids and liquids separate, you can even go as simple as a five gallon bucket. We ended up making ours out of plywood, fiberglass, and gelcoat to the exact shape and size for our boat. We did add an agitator to give a good ‘fluff’ to the solids and mix everything around
  • For the agitator, we ended up buying a replacement for the Nature’s head. This worked perfectly for the width we were going with, and was easier than fabricating something ourselves. We bought it at: Nature’s Head Agitator Kit
  • Diverter – The urine diverter is really the difference between a composting toilet and a porta potty. The goal is to divert the urine away to a separate tank so it never mixes into the smelly sewage that’s in the holding tank you’re trying to get rid of. There seem to be a few options out there, but we went with one from a UK Ebay seller strumpetandtrollop, they also have a website https://www.strumpetandtrollop.com/. They have some pretty unique stuff – shipping was expensive, but I liked their diverter the best (fiberglass and gelcoat) plus it had a ‘modesty bung’ which is pretty nice
  • Toilet seat – pick your favorite from your local hardware store – we went with and oval shape
  • Pee Jug – The counterpart to the solids bin. You need it to be lower than the bottom of your diverter if you want gravity to work in your favor. We used quick-disconnect hose fittings so we can easily remove the jug or solids bin without tools. We went with a 2.5 gallon (10 liter) option which should last several days and is easily emptied
  • Pee Jug Vacuum System – in early testing of our system we found it’s possible to outpace the drain rate of the urine diverter. We also found it doesn’t drain when heeled to the port side. Our solution is to put a small 12v vacuum pump on the vent side of the pee jug to create a moderate vacuum inside the jug. This will remove air bubbles and allow faster drainage
  • Ventilation fan – links directly to the solids bin to keep air flowing and remove moisture and unpleasant smells. I found a nice option on Etsy including the 12v fan for only $20 :JohnnyCompostToilets

The first step was to draw out what we thought would work best in our space and then proceed with building a cardboard model.

Once we were happy with the fit of our model we proceeded with making the real solids bin out of wood. We used wood glue to secure the sides together. Tape was necessary initially until the glue was dry. Once we were satisfied with the wood bin we used fiberglass to make the bin more sturdy and last longer. We then used white gel coat to seal and protect it.

Next was building a toilet top for the urine diverter that we had purchased to sit on. We did this also out of wood. We fiberglassed the urine diverter to the top once we were happy with the size/shape. From there we used gel coat to seal and protect the top.

Next up was figuring out how to funnel the urine from the diverter down and into our pee jug. We tried a few options before we found a funnel the correct shape and size for our application. Once again the fiberglass came out and we used the funnel as a mold so we could make a fiberglass funnel the exact shape and size we needed. The fiberglass funnel is molded to a 90 degree elbow connected to a bulkhead fitting. The bulkhead fitting has a quick disconnect fitting, so you can disconnect the solids tank for complete removal without any hose clamps. We’ve got a quick disconnect on the pee tank side of the hose as well for easy removal of that tank.

Finally, we added some polyester straps so we can easily remove the whole tank and carry it off the boat to empty.

Finally it was ready to install! We got our last ever pump out, removed the old holding tank and toilet and voila!

Finishing Touches

Well, almost voila.. we had a slight issue with the funnel draining to the pee tank when heeled to port. To solve this, we added a small DC vacuum pump, and attached it to the vent of the pee tank. To create a vacuum/siphon effect to encourage the drain.

For the solids bin ventilation, we used some 1.5″ sump pump hose connected to a 12v fan and housing from JohnnyCompostToilets. This takes odors from the solids bin to the stern locker, which is well ventilated.

We are using Coco Coir bricks to help facilitate the compost in our solids bin. Overall, we’re still figuring out how to make this system the easiest and most efficient for us. We can say it definitely smells better in our boat now that there are no old holding tanks! If you are living on your boat, you are going to have to deal with your waste at some point. We much prefer doing it this way with no sewage and doing so on our own terms!

Tell us what you think? Do you have a composting toilet on your boat? What other options do you think we could have considered? Leave us a comment below.

Categories
DIY Projects Sailing Upgrades

Resande Master Project List

Below is the running list of projects we’ve done and are planning to do on Resande. Where relevant, we included links to blog posts tied to projects on the list

  • 2021
    • Replaced Core in Cockpit
    • 55 lb Mantus M1 anchor & BR2 Bow Roller
    • Electrical Phase 1:
      • Inverter/Charger
      • Wiring upgrade
      • Lynx distribution Bus bar
      • Victron BMV 712/Shunt
      • AC Panel
      • MPPT Solar charger
      • 2x175W Flexible Solar panel
    • Remove Forward head, convert to dedicated shower
    • Reinforce foredeck & staysail bulkhead
  • 2022
    • 275 ft Chain
      • Build lower chain box for 100ft
    • Re-cored cabin top
    • Re-upholster cushions
    • New Furling line
    • New main sheet & traveler control lines
    • Low-friction reefing system
    • Self-tacking staysail rigging
    • Install Garmin Class A Autopilot
    • Electrical Phase 2:
      • 400AH Battle Born Lithium Batteries
      • DC/DC Charger
      • DC wiring cleanup
      • All new AC Wiring
    • Build & Install Composting Toilet
    • Install SeaDek
    • New speed & temp transducer
    • Re-finish all teak
    • New mattress
    • Jabsco Hotshot Washdown pump
    • Lewmar 40″ Folding Wheel (replacing 32″ Edson destroyer wheel)
    • Soundproof engine bay
    • Cat door

On Deck for 2023:

  • New spreader lights
  • Electrical Phase 3:
    • 120 amp Balmar Alternator
    • K6 Belt conversion for Perkins 4108
    • MC-618 Charge controller
  • New standing rigging
  • Re-core deck above forward head
  • 525+ Watts Solar
  • Davits
  • Underwater lights
  • Swim platform/ladder
  • Redo rudder (foam, fiberglass)
  • Watermaker
  • Custom cat litter box

Categories
DIY Projects Sailing Upgrades

DIY Boat V-berth Mattress: Step by step guide

Our 1976 cabin cushions were quite worn out when we bought SV Resande. The cushion covers looked nice but after a few nights sleeping on them we soon realized we were in need of an upgrade/change if we are to spend any significant amount of time living on the boat.

We are on a cheap/cruising budget so we decided to look for a high quality memory foam mattress we could cut to shape ourselves. Here we go with another DIY project!

Our cushions that came with the boat were at a height of about 5-6 inches. Most mattresses we found were around 10-12 inches high. We measured and determined that a 10 inch mattress would work in our space. We chose a mattress that is 100% memory foam so that it can be cut through without messing up the structure of the mattress. After much consideration, we ultimately chose the Lull . We read another blog post from another cruiser who had used the Lull successfully. That gave us confidence it would work!

Before you cut anything, try the mattress for a few nights and make sure you like it! You can return it without additional fees for up to 365 nights. It comes in the mail tightly packaged making it easy to order and set up.

Be sure to measure your boat mattress and chose the size you need before you order. Our v-berth is pretty wide so we initially thought we may need a king. With some creative thinking we determined we could use a queen instead by using the scraps for the forward-most triangle piece. This option was much cheaper and we had a lot less left over material than we would have if we used a king.

Time to cut!

We laid out our boat cushions as a template and carefully measured. We placed the queen mattress laterally along the front/wide edge of our v-berth (the widest part). We then cut along each side to follow the triangular shape back. We used the foam we cut away on each side to fill in the bottom portion of the v-berth which is the skinniest part forming the triangular shape. With this method we had very little waste.

It is important that you note the angles of your cushions as they sit against the hull and take into consideration the difference in height (original cushions compared to mattress). We actually used a goniometer from Erika’s work as an OT to help us get the correct angle. We measured how the cushions were angled at the bottom and cut our mattress along that same angle. We made sure to cut a bit wider initially- you can always trim it more to size but once you cut, you can’t undo it!

Please note – if you’re increasing the thickness of your mattress, the total width of your mattress will be wider than the original.

We were left with one large mattress cushion and then the smaller foot mattress cushion. We used the cover that the Lull mattress initially came in for the larger portion. Using safety pins we pinned back the areas we had cut to “shape” the cover around our new cushion. We ordered a twin size mattress cover which we cut and sewed as a cover for the smaller foot cushion portion.

All in- this project cost us $799 for the mattress and $15 for the twin mattress cover and only took a couple hours start to finish. It was not easy to get this back onto the boat! We recommend using a ratchet strap to tighten the mattress down into a smaller shape (fold it like a taco) to get back through the companionway.

Our last step in this process was to cut down a piece of wood to support the middle of the widest part of the mattress in the front. You can kind of see it in the picture below. Our old cushions angled back on one side with a small cushion piece that fit in to connect either side of the bed. We chose to cut our new mattress on more of a straight edge so we just needed a final support to go where that original small cushion piece went.

Having a comfortable bed definitely goes a long way in making SV Resande fell like home. What do you think, what updates have you made inside your boat to make it feel more comfortable? Leave us a comment below.

Categories
sailing Sailing Upgrades

Must Have Boat Buying Criteria for Cruising

When we looked at buying a boat, we had some specific criteria. We knew we would need to make several upgrades for cruising, but wanted to make sure we had a good foundation. After a lot of research we set up the following criteria:

Requirements:

  • Freshwater only (Great Lakes)
  • ‘blue-water’ capable 
    • We weeded out a few, but not all production boat brands
  • 36-42 feet – large enough to live on for an extended period, but within our price range
  • Draft of no more than 6’
  • Functional layout
  • Easy to sail short-handed
  • Large tankage for fuel/water
  • $45-65k – This seemed to be the sweet spot for older boats in good condition.

Not required, but would need to have a discount if they were missing/in poor condition

  • Good sails with a lot of life left in them
  • Self-tailing winches
  • Dodger/Bimini
  • Good running/standing rigging
  • Electric windlass

Bonus items – we’d upgrade if they aren’t included 

  • Stack pack
  • Modern anchor
  • Full canvas enclosure
  • Updated electronics
  • Reliable autopilot

When we purchased Resande (learn about our boat here!), we immediately knew she checked a lot of these boxes. She even had some of the bonus items listed. Still, we knew it was going to require a long list of upgrades to take her from a Great Lakes cruiser for short trips to one that could handle a trip to the Atlantic and down to the Caribbean. We are continuing to refine this list, prioritizing some items sooner than others. The previous owner had spared no expense maintaining and updating many of the items above. Below is a list of the upgrades for cruising we currently have put together. These will be listed by area/system, and I will include an Excel file for people like me that think in spreadsheets.

Boat Projects

  • Fix de-lamination in foredeck (re-core)
  • Tower in a box or davit system for Dinghy
  • Replace one head with a composting toilet
  • New lifelines
  • New halyards (main, headsail, staysail)
  • New under-deck autopilot
  • Add reverse osmosis water maker 
  • Seal mast step with engine paint or other (known corrosion issues with these boats, probably not an issue for years since it’s always been in fresh water, but worth getting it right now)
  • Put together “spare parts” list/kits

Electrical System: overall is in decent condition, the DC system was professionally redone in 2009, but there are some areas for improvement:

  • Battery Charger upgrade – right now the old charger is ancient, and the surveyor recommended upgrading it
  • Inverter – be able to run small appliances, water maker
  • Battery bank – right now our house bank is only about 100 AH, and one of the batteries was leaking/bad when we bought the boat. We are looking at upgrading to Firefly Carbon Foam AGM batteries unless a better lithium option comes on the market in the next few years. We are thinking around 350 AH in the house bank
  • DC – USB outlets. Small project, but makes a big difference being able to plug a phone cable directly into the wall without AC power. 
  • Solar Panels – need to work out the sizing (will post calculations on here) but likely 2 X 175 watt panels on a tower, with 2-3 more flexible 80-100 watt panels on the dodger
  • Replace all outlets w/ GFCI 

LED Lighting to Replace any Incandescent or Fluorescent bulbs to reduce current draw

  • Navigation Lights
  • Spreader Lights
  • Mast head light
  • Mast head navigation light
  • Nav station lights 
  • Cockpit lighting
  • Fluorescent replacements:
    • Aft
    • Both heads

Ground Tackle

  • Mantus 45lb M1 anchor
  • 150’ of chain
  • Mantus bridle w/ chain hook
  • Mantus swivel
  • Mantus dinghy anchor

I’m sure we will be adding to this list and updating it with more details, specifics, and in-depth explanations of why we went with certain products. We don’t have any affiliations or with these products or companies, we try to research products to find the best value.