Categories
DIY Projects sailing Sailing Upgrades

How to Make a DIY Swim platform

We don’t have an easy way on/off our sailboat SV Resande so we decided to make our own swim platform. Back in the 70’s when Resande was built swim platforms weren’t really a thing boat builders added. We weren’t sure exactly how it would turn out but figured it was worth a shot. We actually ended up really happy with it.

Our boat has a pretty narrow stern. We knew we didn’t want too big of a swim platform so that it didn’t look out of place. We actually used the seat from inside our dinghy as a reference point. It felt like a fairly good size, large enough for one of us to comfortably sit on. Having this seat to base our design off of also meant we could bring that seat to the boatyard, hold it up to the back of the boat and get somewhat of an idea what it may look like before proceeding further.

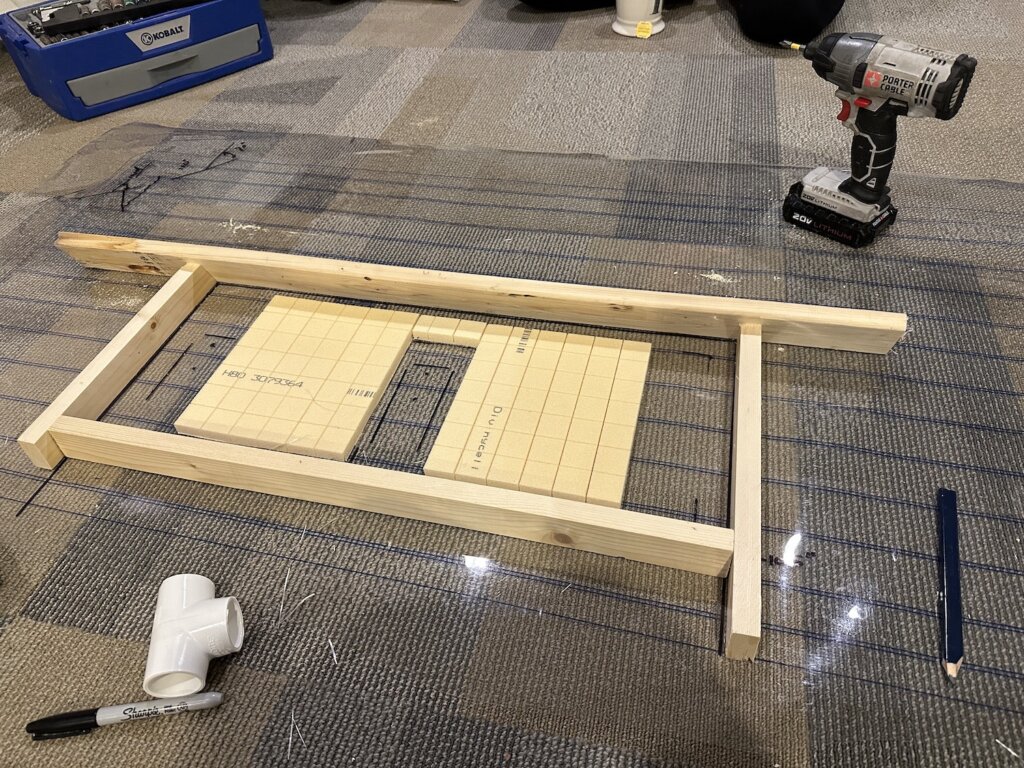
From there we made a wood form/frame so we could finalize the size we wanted. Once we were happy with our design we brought the wood platform to the boat to help ensure we liked the fit. We also needed to make sure we could match the angle of our stern so that we can actually install the swim platform and have it lay flat against the hull. Our stern has both an angle and a radius, making it a compound angle to attempt to match. We measured the angle (about 70 degrees) with a goniometer from Erika’s work, and measured a 2″ deflection over 24″ of length on the back (1″ per foot).

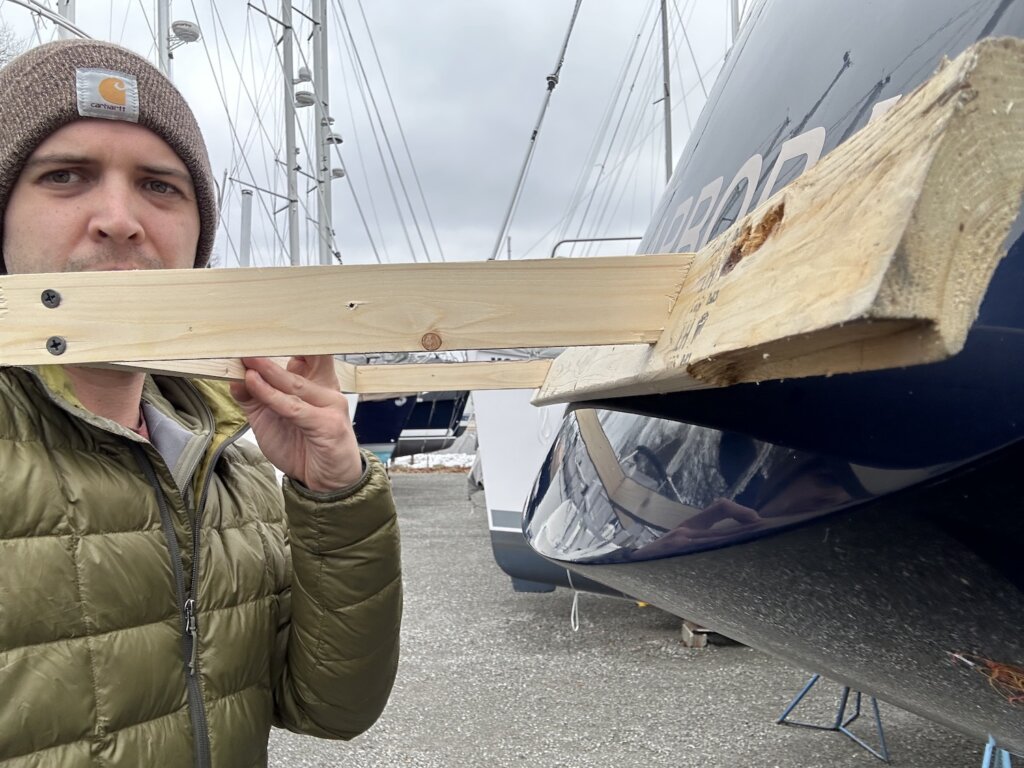
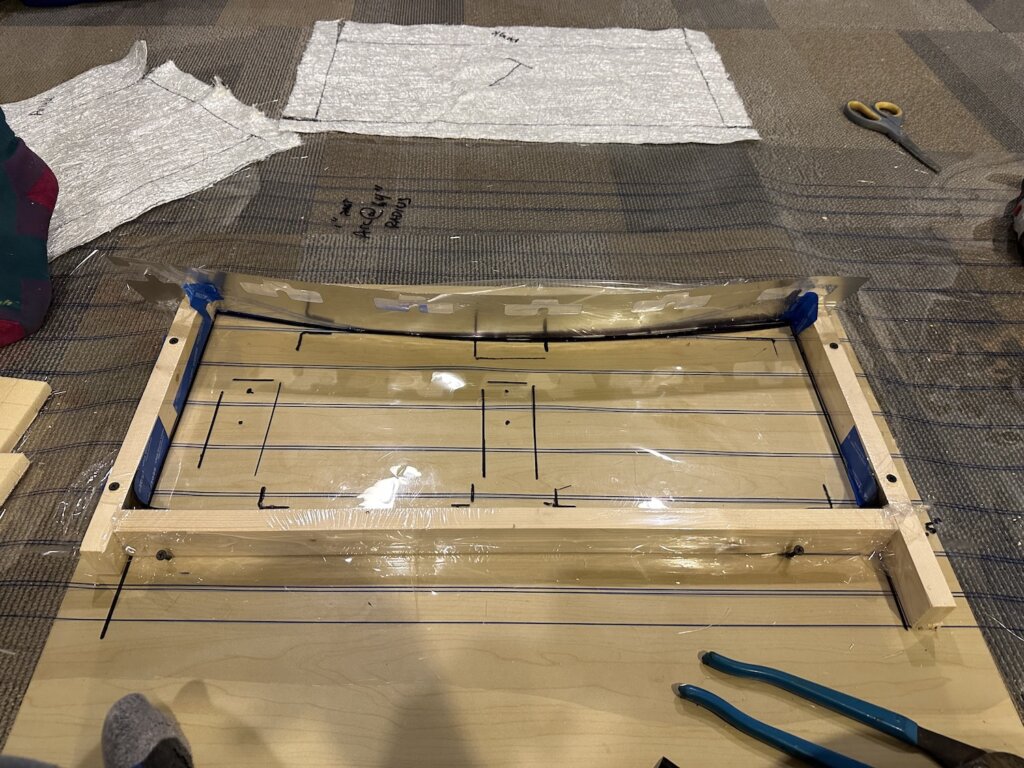
Back at home, we used a miter saw to cut the exact angle of the wood frame. For the radius, I’m sure there’s a great fancy mathematical way to calculate this, but I simply took a tape measure and created a arc on the floor until we found where a centerline meets a 1″ deflection over 12 inches… it was about 68″ if I remember. For this angle, we used a flexible piece of scrap metal from work, we screwed it to the wood frame to get both the miter angle and this moderate radius. We used some thin plastic sheeting (meant to cover windows to keep cold air out in the winter) to wrap the wood so we could fiberglass using the frame then “pop” out our swim platform. We also used some old plastic to draw in where our ladder would go to better size the swim platform up. We screwed the plastic and the wood frame to another scrap piece of wood so we could keep everything still and square as we worked.

Here’s the wood frame screwed to the scrap wood base, coated in plastic

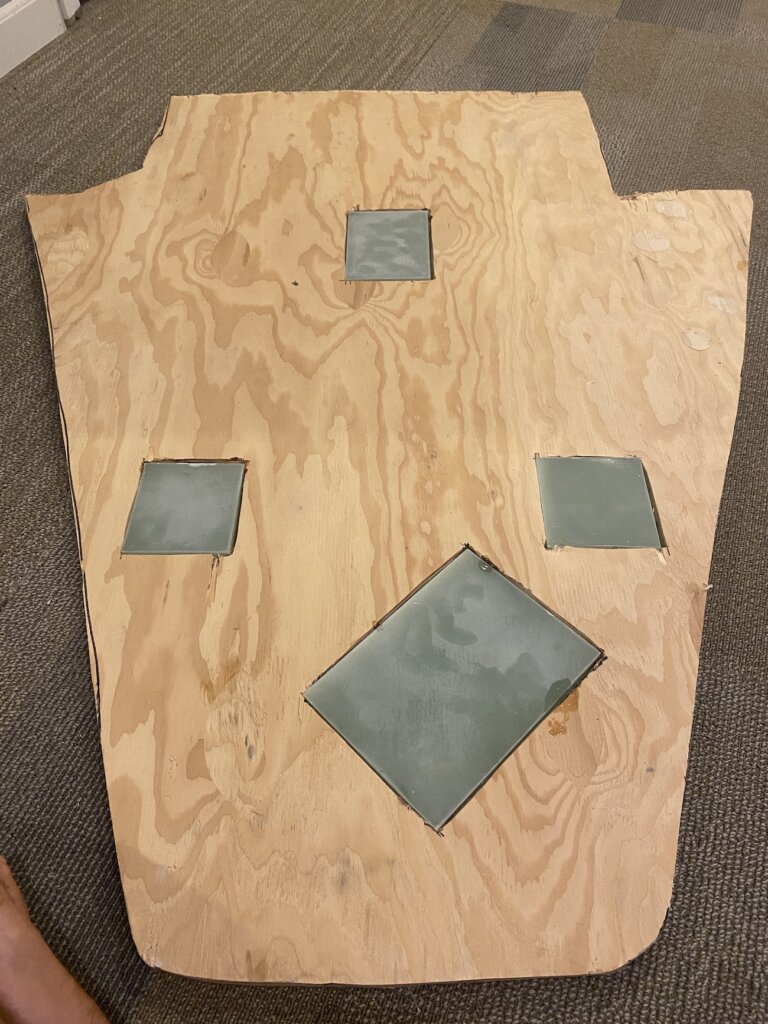
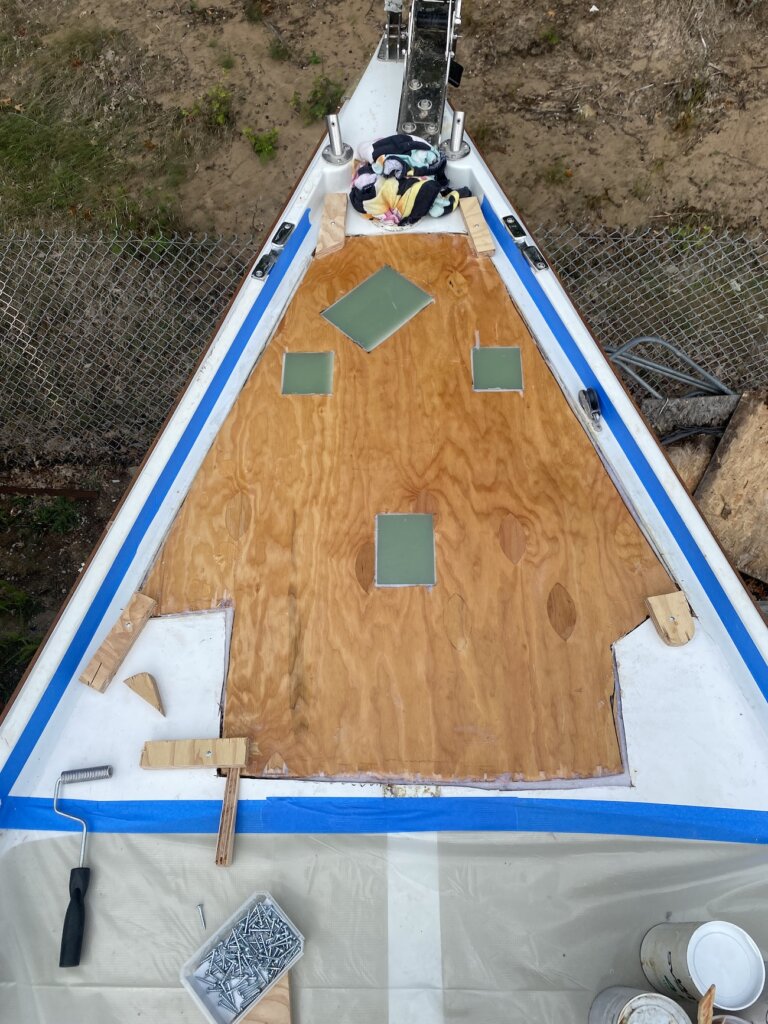
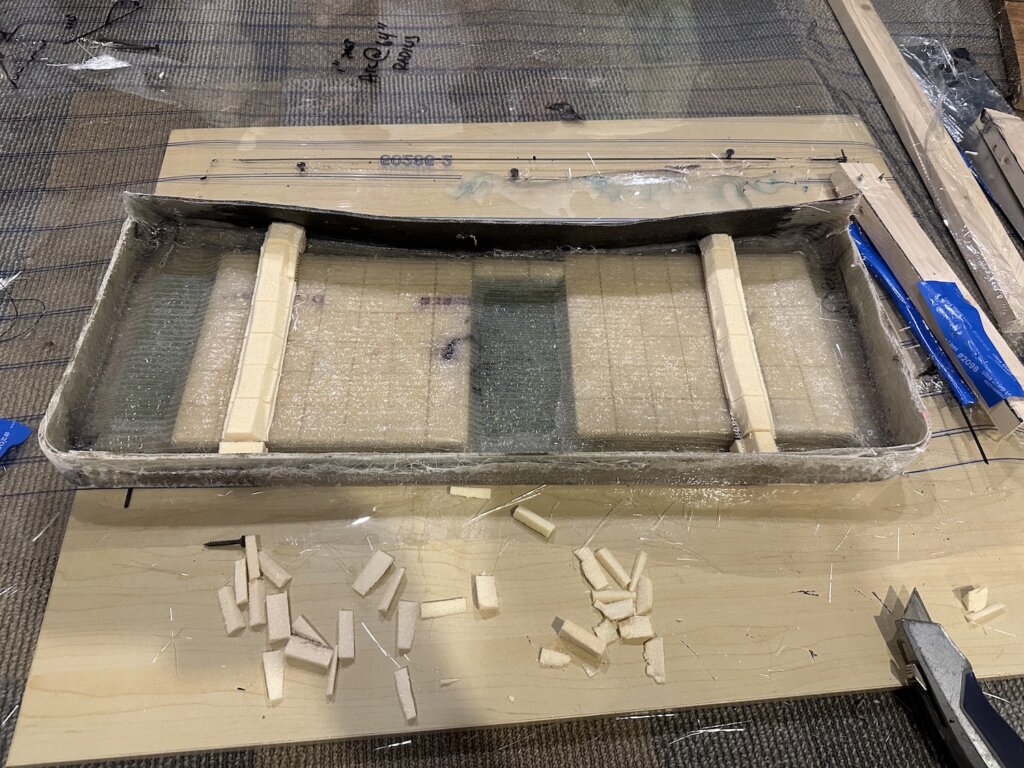
We chose not to make the entire platform out of straight fiberglass but instead use some core material. We have used this form core for some of our re-coring projects and found it very easy to use. It was perfect for this project as well. For the ladder mount areas, we decided to reinforce with 1/4″ G10.

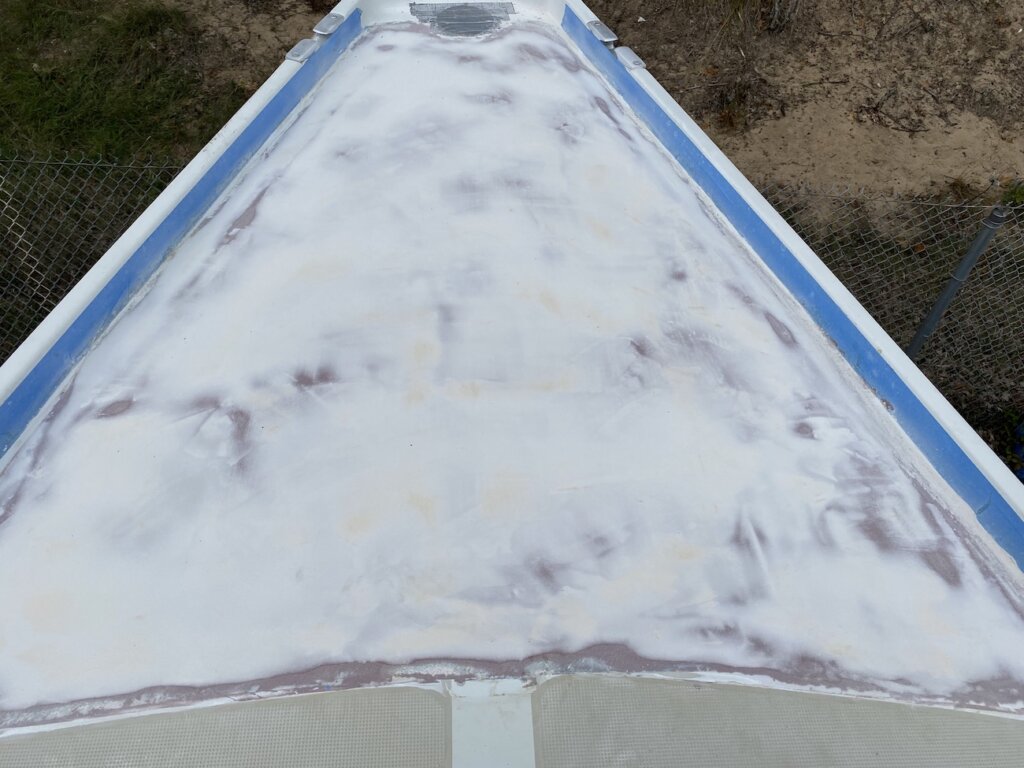
As a completely fresh build, we used vinyl polyester resin for this project. We first laid down a layer of wetted out 1.5 oz chopped strand mat, which form fits to the corners and started up the undercut angle. We then layered on layer of 1708 Biaxial, added in the foam core and G10, then two more layers of 1708 Biaxial

Fresh out of the mold, before grinding away the excess
To reinforce, we added two ‘ribs’ of foam and glassed over them with 1708 Biaxial and epoxy resin. The foam was only to create the angled rib for structure.

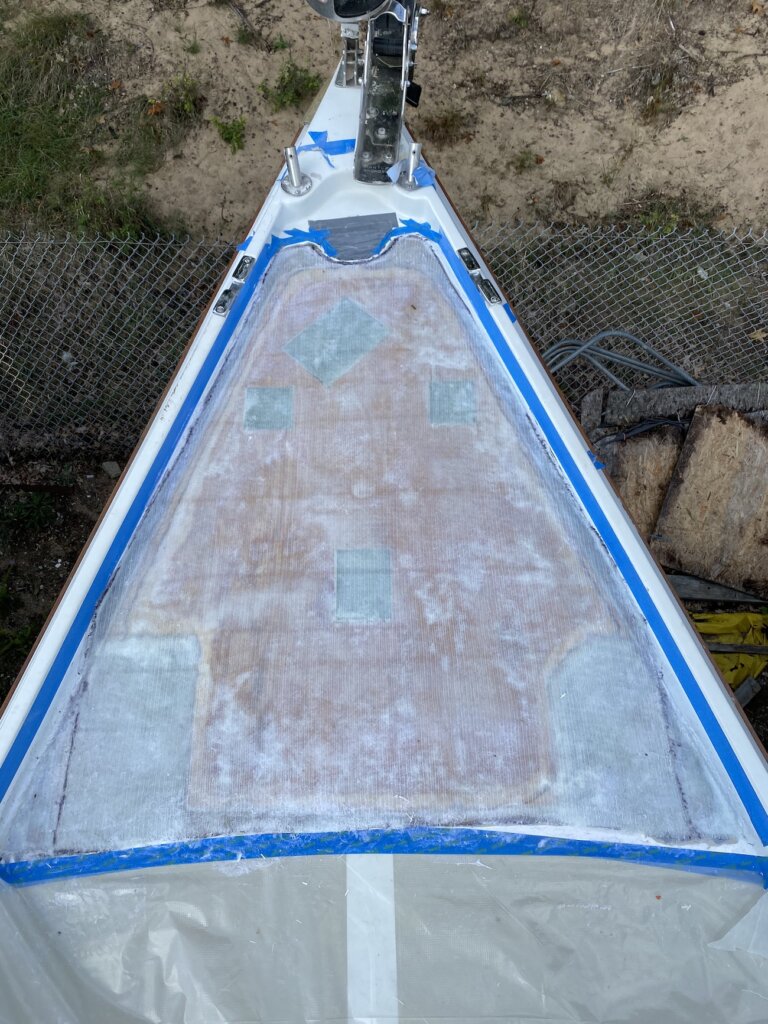
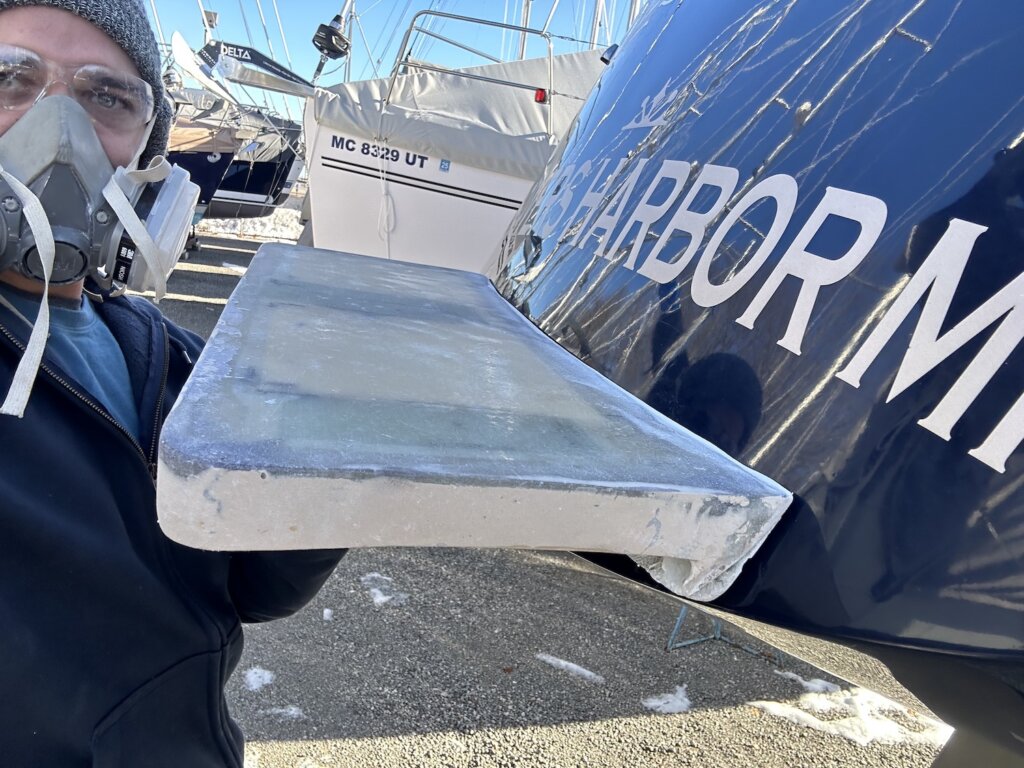
After a few layers of faring it was back to the boat to again check the fit and make sure we were happy.

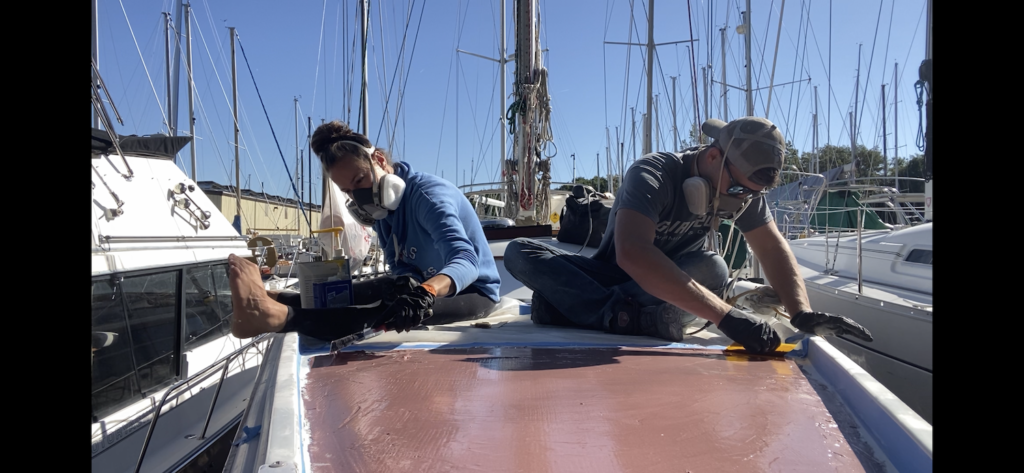
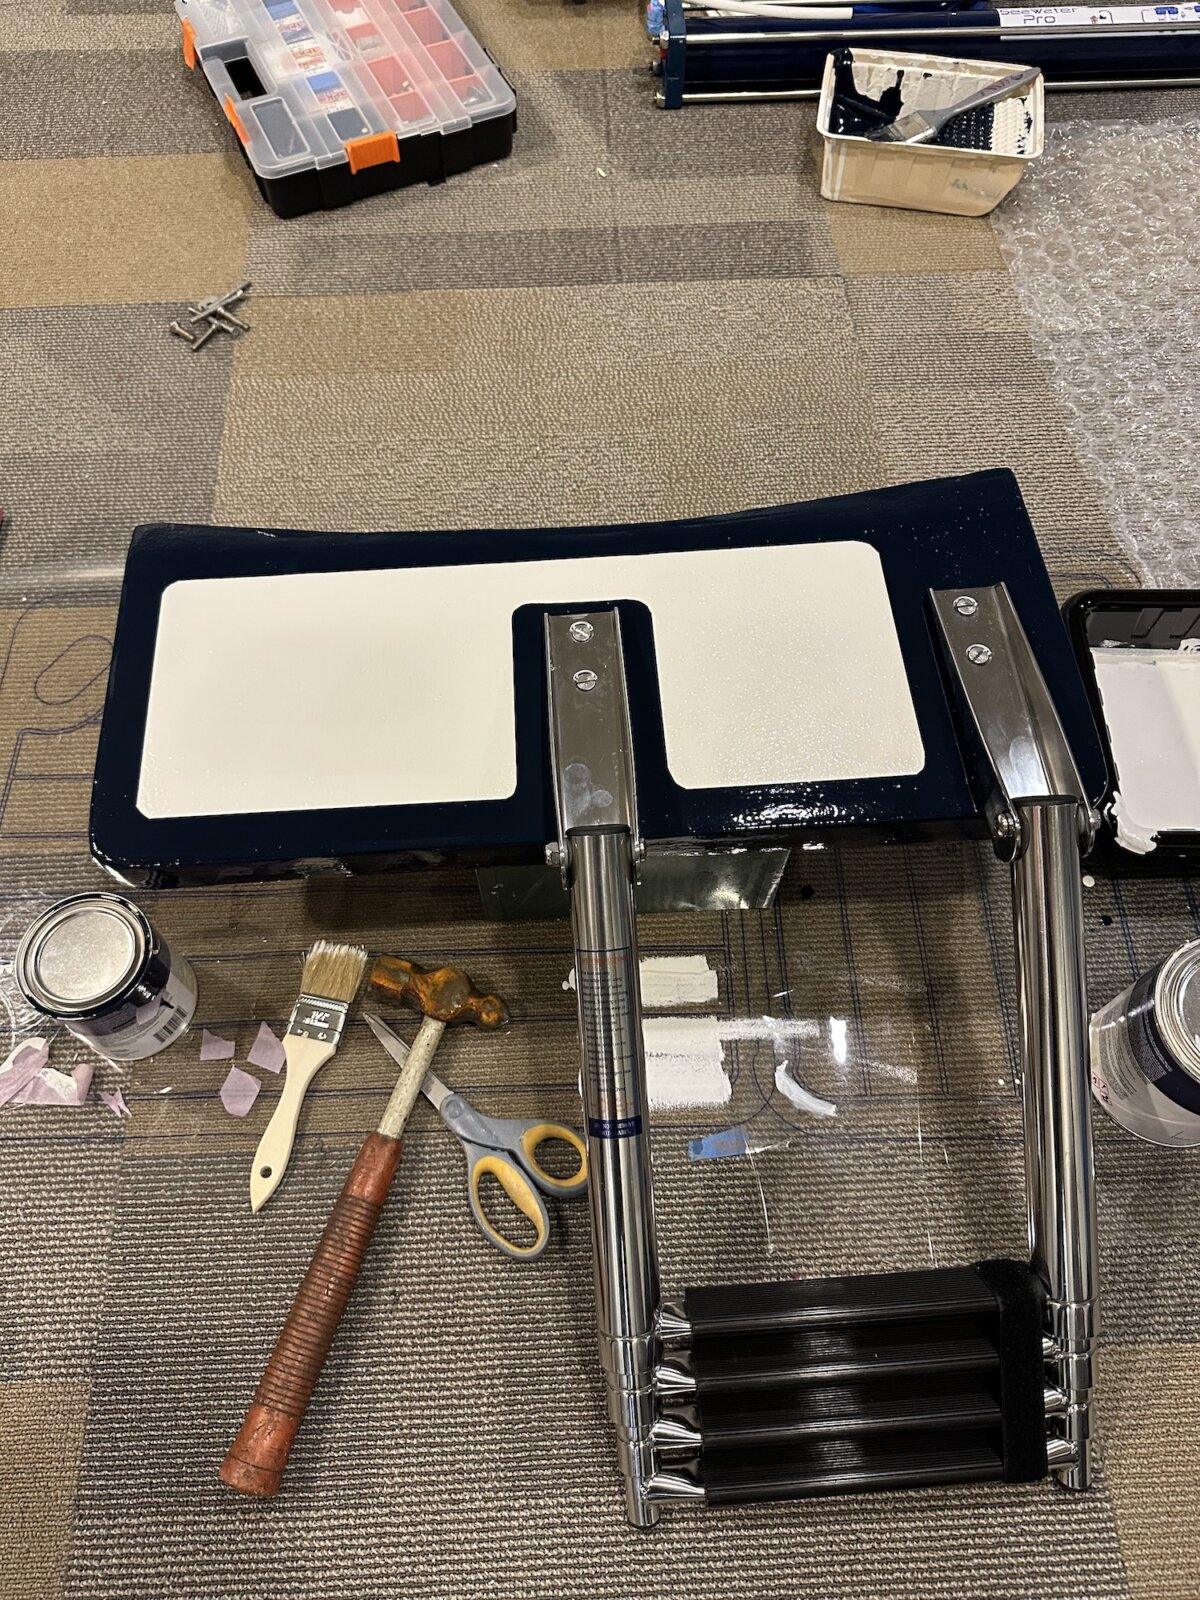
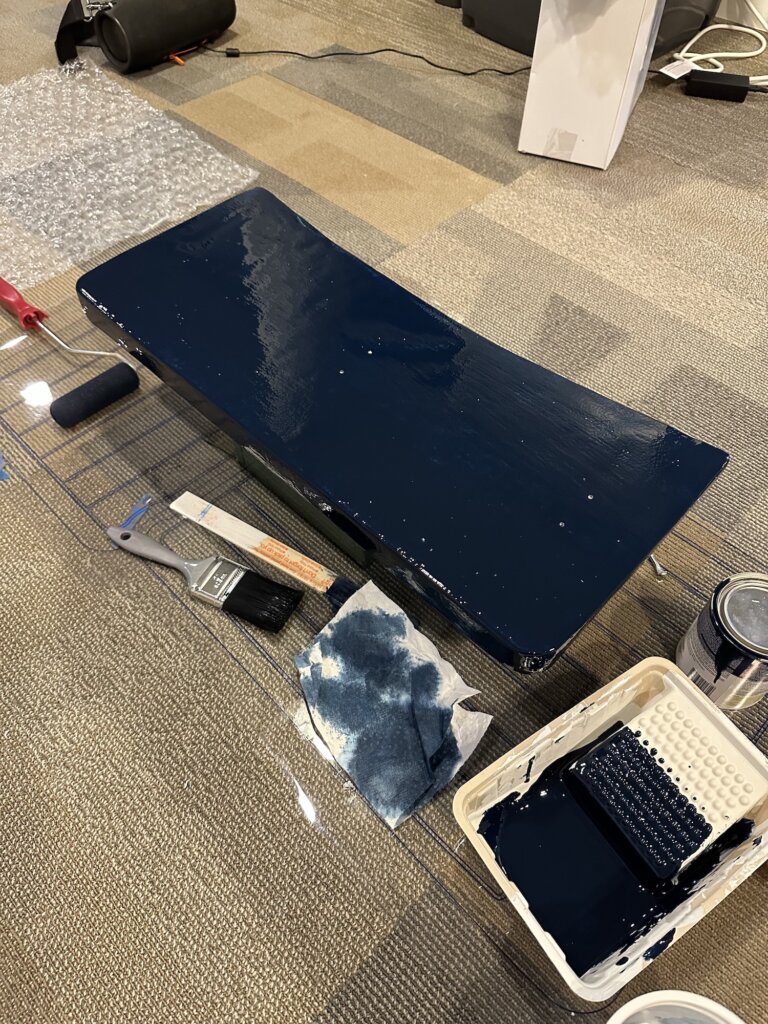
We used Total Boat topside primer and then wet edge topside paint. We chose to match the dark blue of the boat hull.

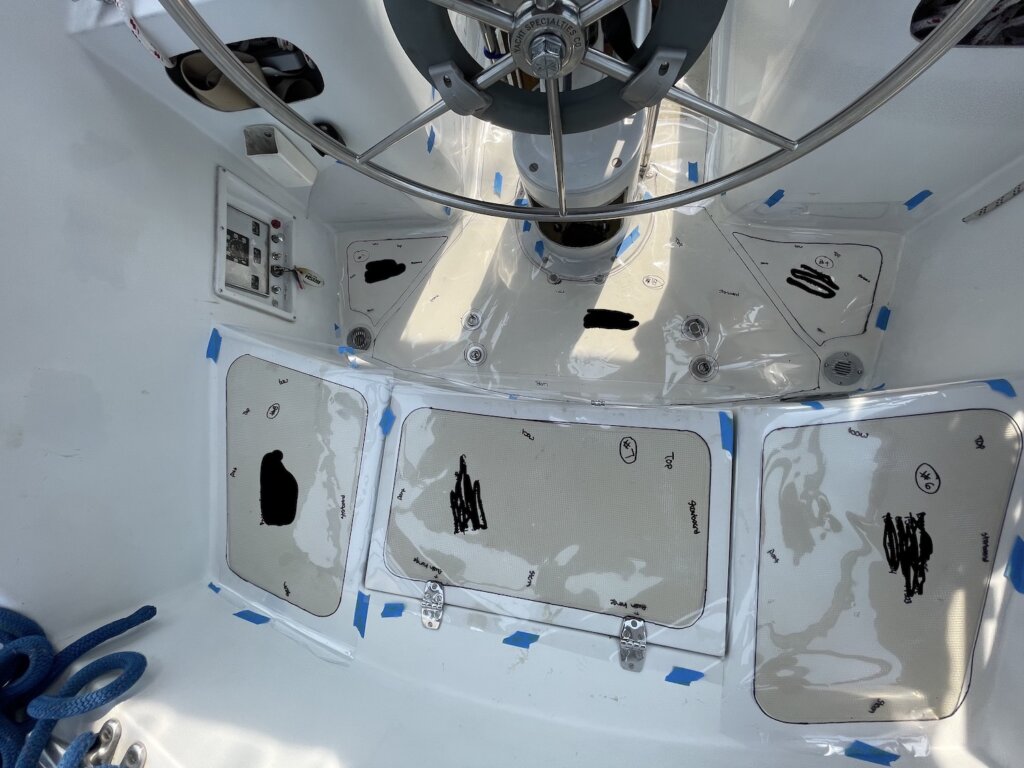
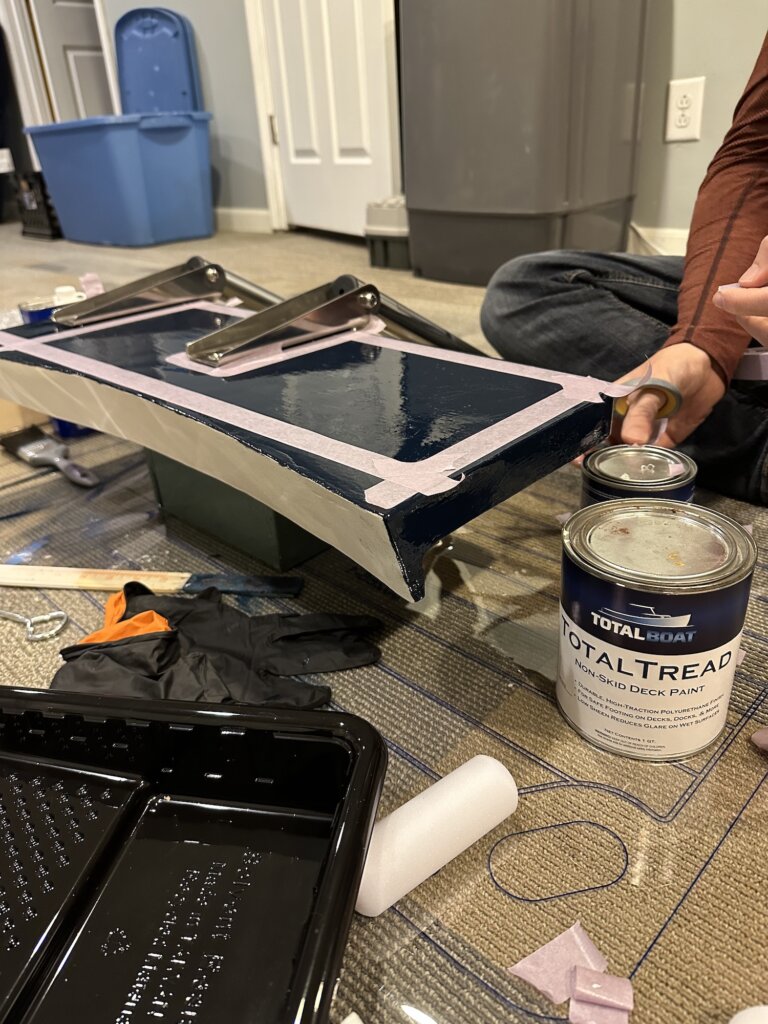
Once the blue paint was finished we installed the swim ladder and then taped out were we wanted to add total boat non-skin paint.

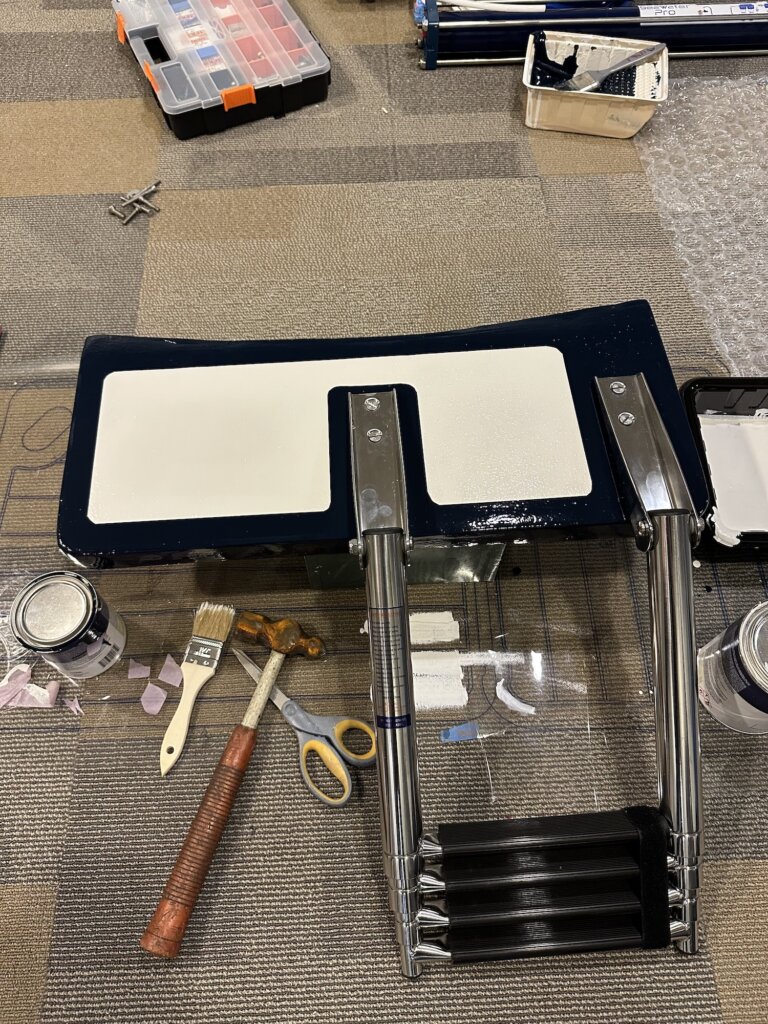
Two coats of Total Boat white non-skid paint coved the blue well and we were very happy with how it turned out. We will be installing this soon and will then update this post with how it all ends up.

What do you think? We think it turned out pretty great, and can’t wait to put it to use this summer!

Categories
DIY Projects sailing Sailing Upgrades

Re-Coring the Foredeck

Similar to the cockpit, we knew our foredeck was wet when we purchased Resande. It’s a common issue on old boats where hardware goes through the deck if the owner isn’t keeping up on leaks. We decided to tackle this project in Fall 2021, after hauling out for the season. We’re also not planning to add back our staysail boom. We’ll have a post about how we’re rigging the staysail without a boom in the future. Most of the steps are identical to our Recoring the cockpit post, but we decided to do something a bit different for the high-load areas that have the highest risk of future leaks. As you can see in the pictures, we used 3/4″ plywood just like the cockpit. The difference is we made inserts out of 1/2″ thick G10 fiberglass board and glassed these inserts into the plywood prior to laminating.

The areas we did this in are the high load areas: windlass bolts, new port & starboard cleats, and the staysail tacking point. These areas will all have thru-bolts and will benefit from the high compressive strength of G10 (plywood or balsa core will deflect under a highly tightened bolt).

Resande’s foredeck has a lot of hardware due to our staysail. We aren’t planning to continue using a staysail boom, but we do plan to add a second foredeck cleat.
All of the hardware now removed, we start to understand the scope of the water intrusion.
After cutting the top shell of the fiberglass off, we scrape out the wet and rotten wood. We used an angle grinder to remove the top shell. Scraping, then sanding down to the lower fiberglass shell to make sure you adhere to something solid when you put the new core in.
This is the new core piece. As mentioned before, we added pieces of G10 where the high load hardware is located. Above in the picture is the layout: Staysail will attach in the top insert; the two small inserts in the middle will be cleats, and the large one at a diagonal is where the windlass will bolt through.
We used multiple layers of 17oz biaxial fiberglass cloth to build up the 1/4″ difference between the 1/2″ G10 and 3/4″ Plywood. this was on purpose, and we beveled out the plywood so we could build the layers up and larger in diameter.
Not shown, but we made relief cuts on the underside to help contour to the shape of the deck. The deck is slightly crowned, so we needed to flex the new core down on the side, we used pieces of wood to help clamp them down as the resin cured
After the core is in place, we ground the edges to a bevel to make a smooth and seamless transition. Our goal is that this new edge is nearly invisible.
As with the cockpit, we did 3 coats of fairing. This step is much like mudding drywall to try to get the seamless transition from the old to the new. We used the West Systems. Fair, sand, repeat until happy.
The final layer of fairing we used micro-balloons, which sand even easier for a nice final finish before gelcoat.

We used Total Boat topside paint instead of gelcoat. We decided to go with white and not try to match the foredeck color to the rest of our non-skid. We are planning to paint total boat non-skid in this area when we get a warm, dry day.

We also decided to go with a cleat on each side and not just replace the one center cleat we had previously.
We moved the placement of our winless buttons and added a wash-down pump on deck.
A final look with everything back in place. Completely done except the non-skid paint.

What do you think? Questions on our process or suggestions for our next project? Leave us a comment below.

Categories
DIY Projects sailing Sailing Upgrades

How we Re-Cored our Cockpit

On our sail down to Muskegon from Bowers Harbor, we noticed flexing under the helm when steering hard. We knew moisture was high from the survey, but we didn’t think of the practical concern and thought it would be a ‘someday’ project. After that sail down, we knew it was a critical project for the safety of the boat, so it was the first place we decided to tackle.

The area that was wet & rotten was the entire helm area, to just forward the steering pedestal (which we had to remove. The 4 bolt heads aft of the pedestal hold the steering brackets on our Ericson. All the steering hardware had to be removed prior to recoring the deck here.
Chiseling out the rotten and wet core. Our cockpit has end-grain balsa core which does a nice job of isolating water intrusion to close to the hardware. We were able to get all the bad stuff out with a chisel, hammer, crow bar, and anything else that can do some damage. We also found a straight bit on a router set to the right depth can help make this process quicker when you hit the high moisture but still bonded areas.
After the core is removed prep the area: Sand, remove any old fibers or wood, and wipe with acetone.
The final product before the new core. We ended up extending it forward more than our original tapping.
We cut the core to shape, ground down the edges with an angle grinder, and used West Systems 403 filler to epoxy the core down to the bottom layer. We tried to grind a groove into outer edge to make sure when we were done with the project, the water still drained well to the corners.
After the core was bonded and ground out, we glassed it in with 1708 Biaxial fiberglass, which is basically a three-in-one fiberglass material for additional strength.
After the first fairing with West System 410 Fairing filler, we had to add an additional layer of fiberglass mat to build up the area to make it level. After each layer of fairing, we sand smooth and find low spots and imperfections. Expect 2-3 fairing layers to get the finish you want.
After the third layer of fairing, we sanded heavily. While it doesn’t look smooth visually, your hand is a much better gauge.
Once happy with the fairing, we reinstalled the steering pedestal to get the boat ready to go in the water.
We primed the repaired area with Total Boat Topside Primer, then finished with Total Boat Wet Edge Topside Paint. We used a foam roller with moderate success (it disintegrated pretty quickly)
To be continued… we are getting Seadek in our cockpit! This is a picture of the templates we made and sent back to Seadek to be scanned. The process overall was very smooth, which we’ll show in a future post!

Hope you learned something, let us know if you’ve ever done core work on your boat. If so, how did you do it differently, and have any advice for us in the future? Let us know in the comments below!