Categories
DIY Projects Sailing Upgrades

How to Measure Your Custom SeaDek Like a Pro

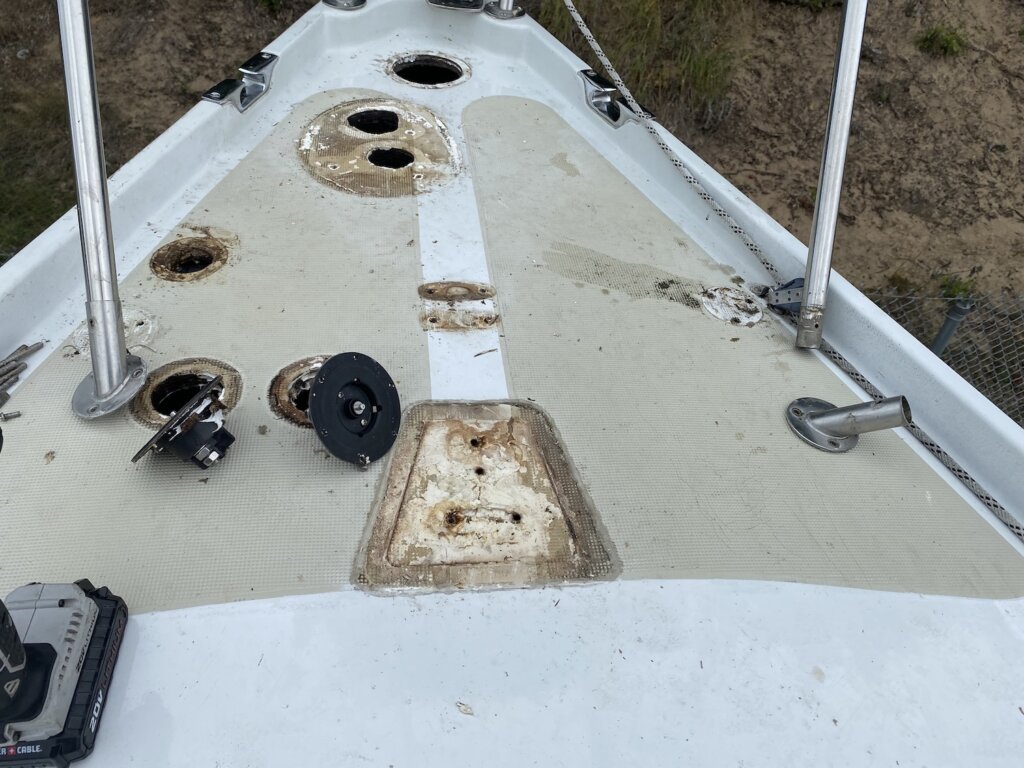
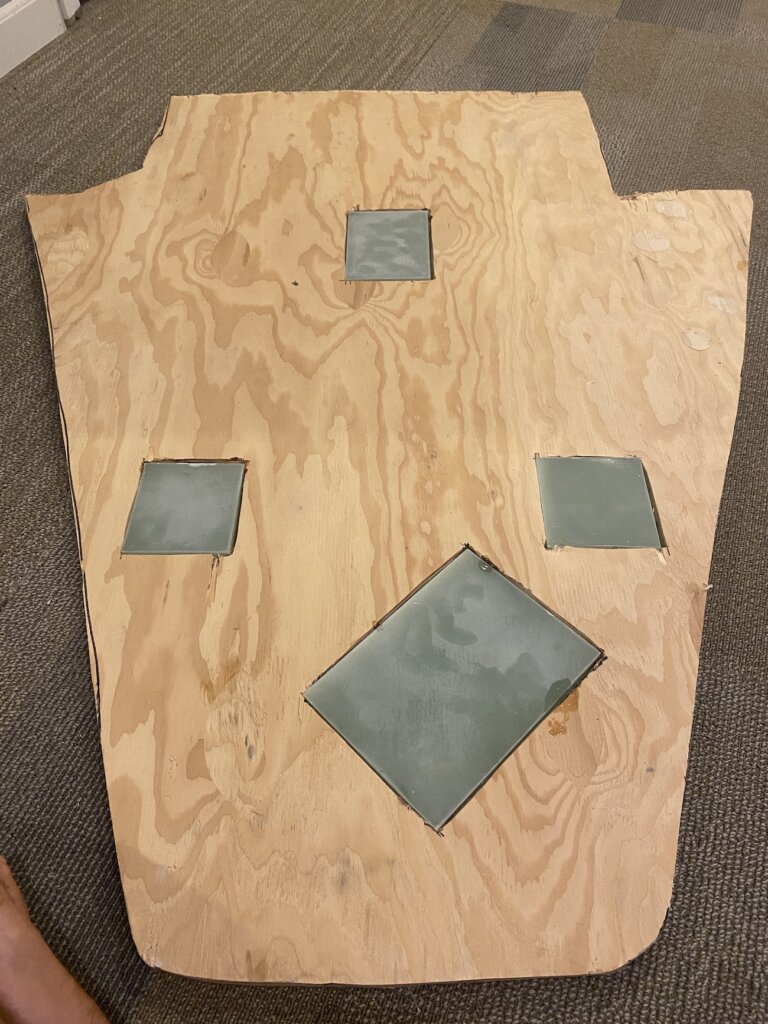
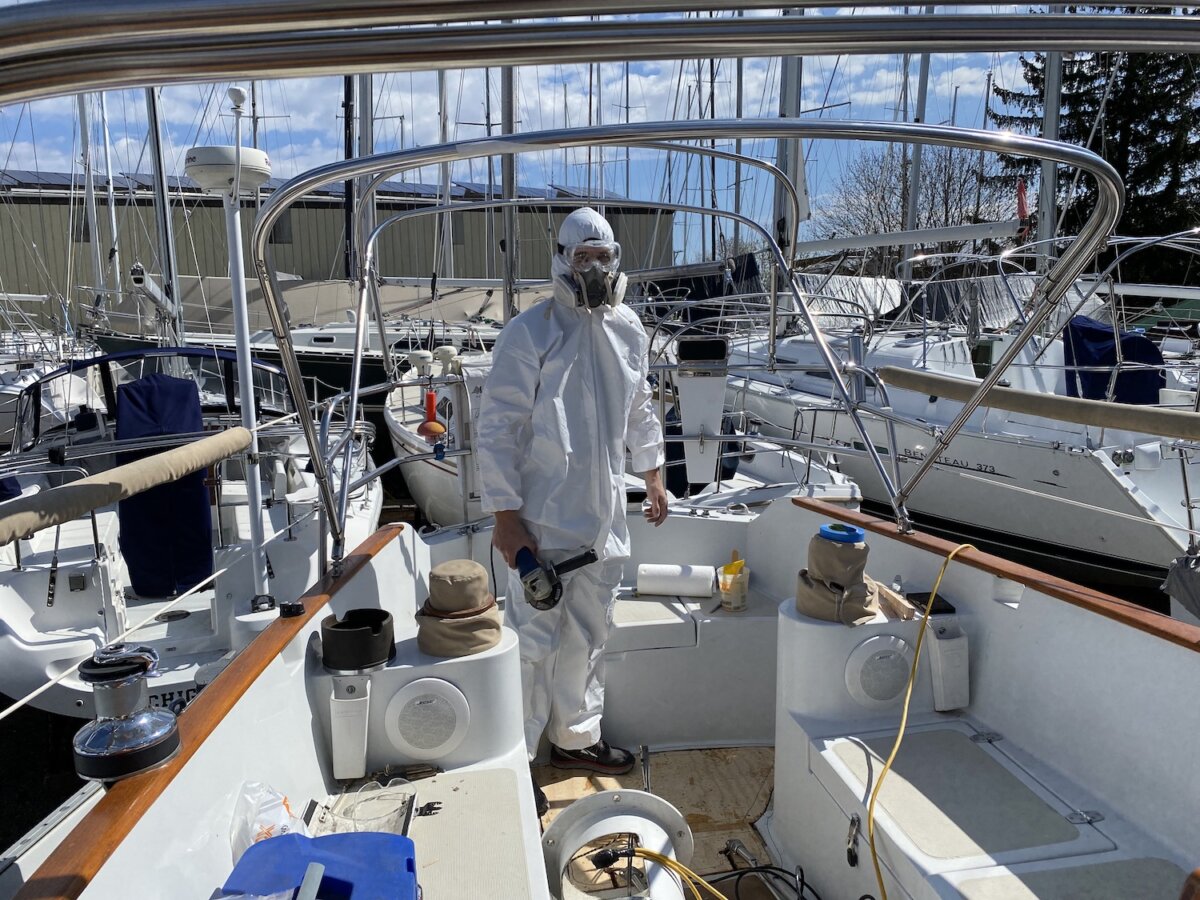
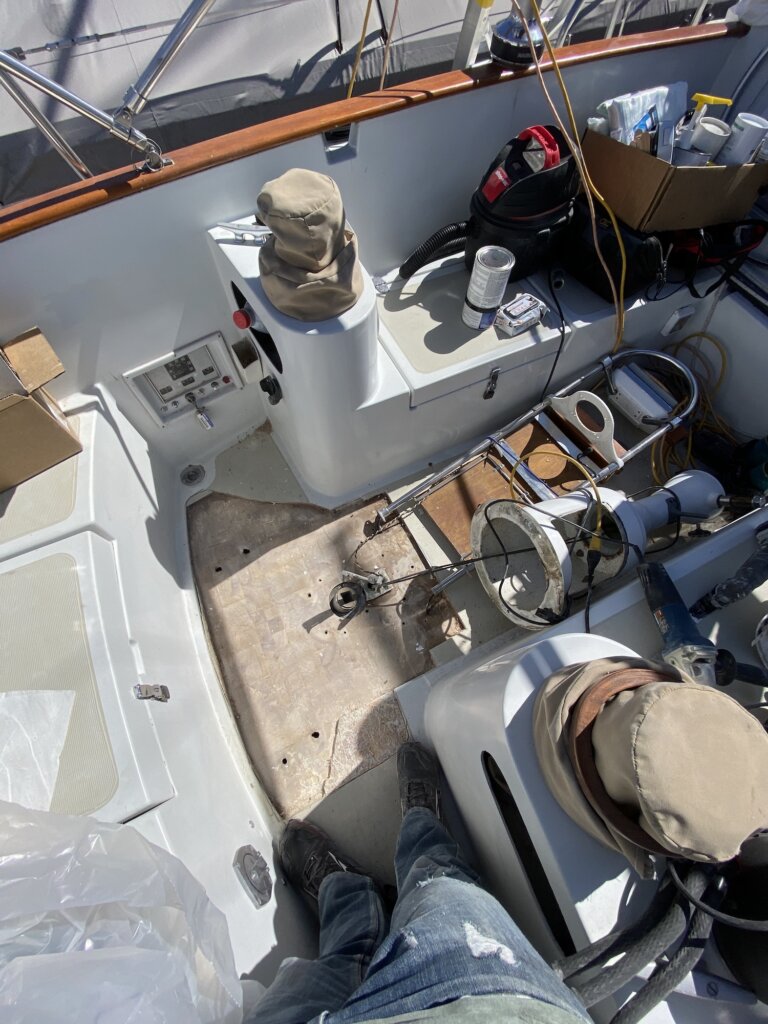
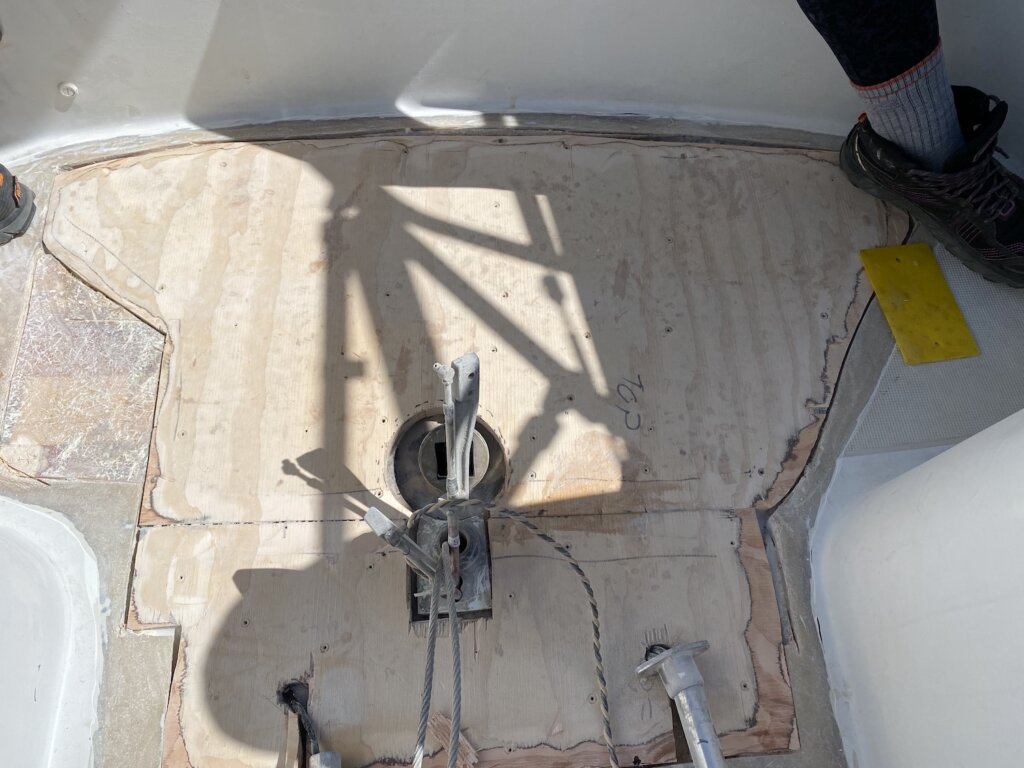
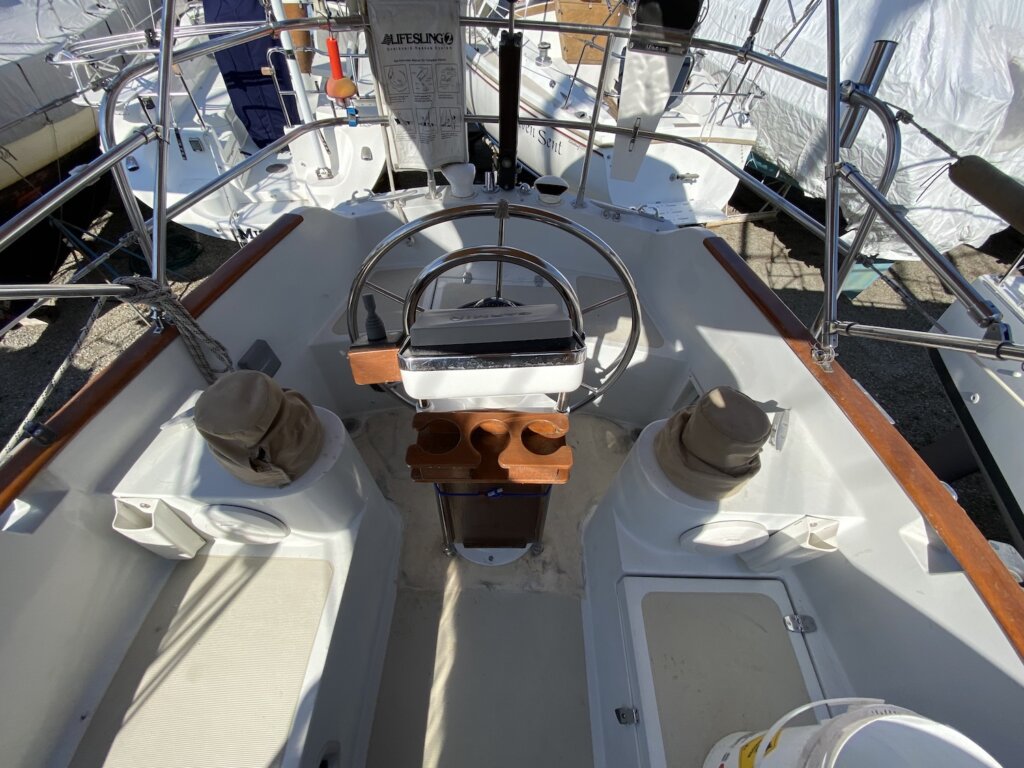
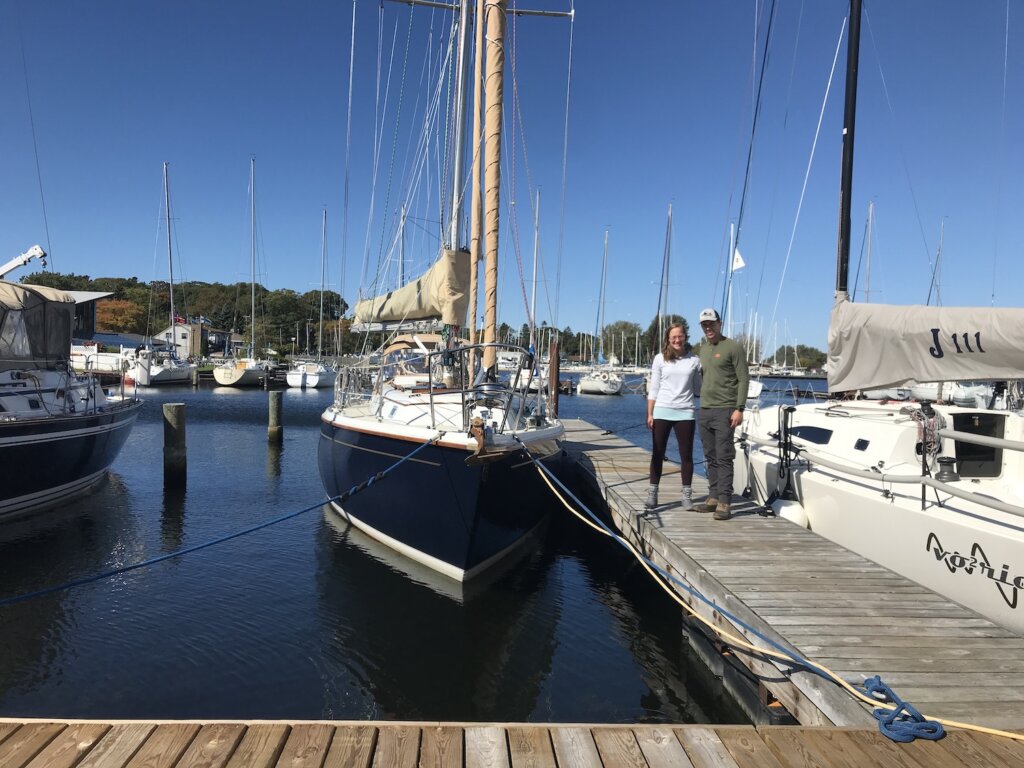
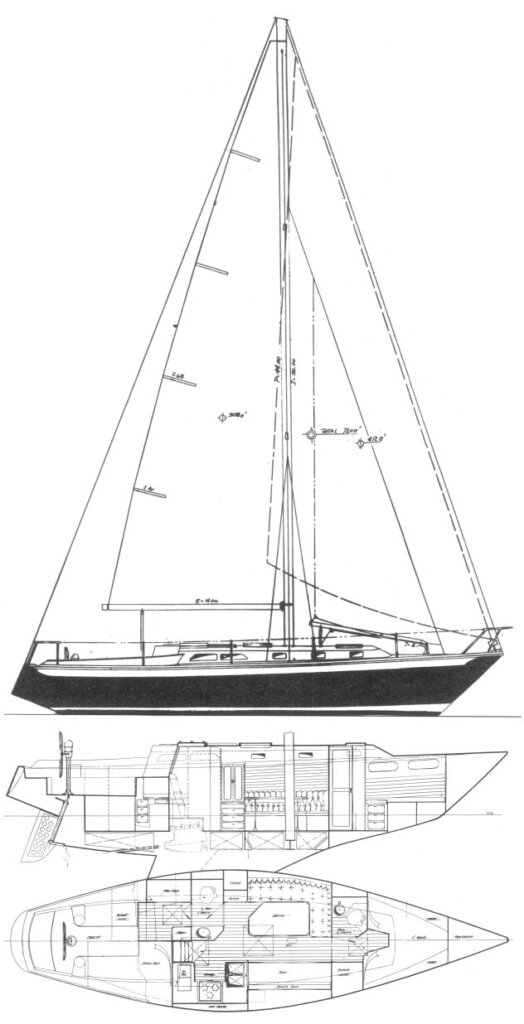
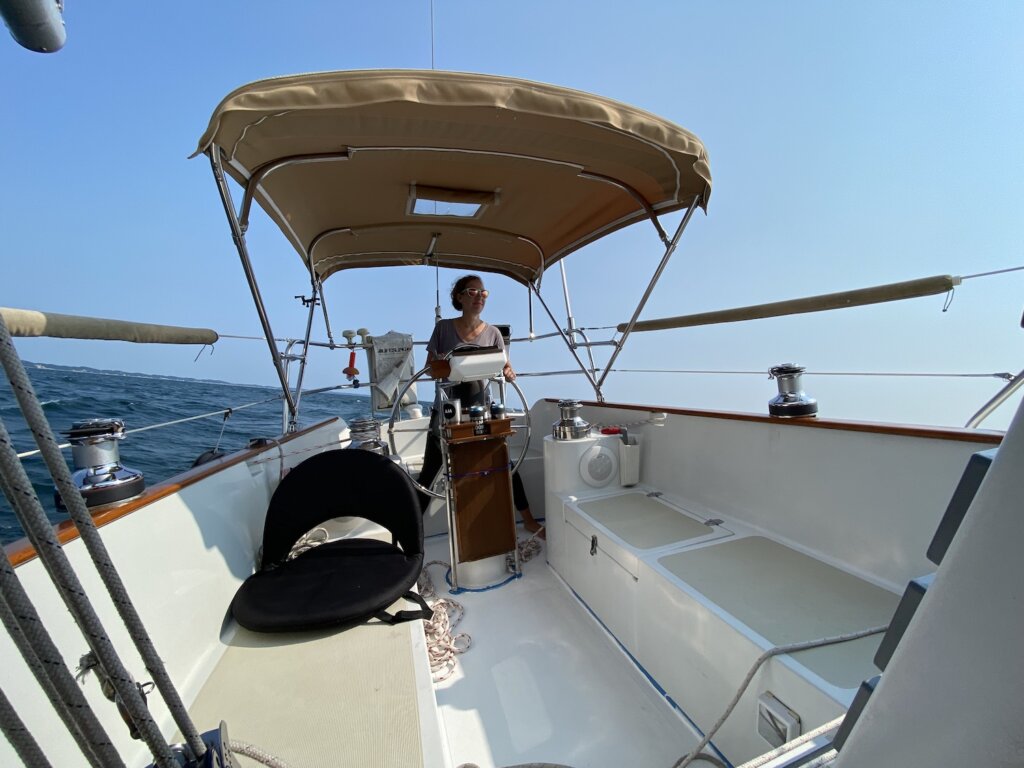
As part of our refit on Resande, we decided to splurge a bit and go with custom SeaDek nonskid in our cockpit. After re-coring our cockpit (see post here) we knew we wanted to put SeaDek over the cockpit floor so it would blend in better. While we were at it, we might as well do all the seating with SeaDek to complete the look and have a much more comfortable cockpit. SeaDek has some common templates on their website, but with only 18 hulls ever made Resande is a pretty rare lady -even if there was another owner that’s measured, your relying on their work. As you’ll see, it’s not that difficult just do measure it yourself.

This is right after we painted the floor where we re-cored, painters tape still in place.

SeaDek has two options if you’re looking for a custom template layout:

  • You can hire a professional to template and send in the measurements for you – finding one nearby can be tricky depending on your location. The nearest one to us was about an hour away and they’ll (rightfully) charge for mileage & time for the initial measurement and the dry fitting. When I looked into it, it was actually pretty reasonably priced – you can find a local dealer here: https://www.seadek.com/seadek-certified
  • You can do it yourself! There are some great videos online for how to do it, and they actually make the process really seamless. I was really impressed. This is the option we chose, and the subject of the rest of this post.

Step 1: Estimate the size of your templates

Your going to order a template kit from SeaDek https://www.seadek.com/template-kit.html, which they will mail to you in a tube along with the instructions, a sample pack of SeaDek swatches with all the different colors, and several sheets of Mylar. You need to know approximately the size of your templates so you know how much Mylar to order. Each Mylar sheet is 40″ by 80″, which is also the maximum size SeaDek is able to cut. we’ll keep this in mind later, if you have large pieces that will need to be cut in two – the SeaDek designers will figure out the best looking fit, but it’s something to consider. For our cockpit, I calculated that we’d need 4.5 sheets of Mylar, so I ordered 6 to be safe. They are inexpensive to add, and you’d hate to run out – so order extra

Step 2: Template kit arrives, prepare to measure!

Our template kit arrived pretty quickly – make sure you keep the packaging! They include a prepaid label to send the templates back so they can scan them. Before you get started, make sure you have the following:

  • Masking tape to hold down the Mylar
  • Mylar sheets
  • Sharp scissors
  • Fresh fine point sharpie – included with the template kit
  • An extra set of hands (optional, but it really helps!)

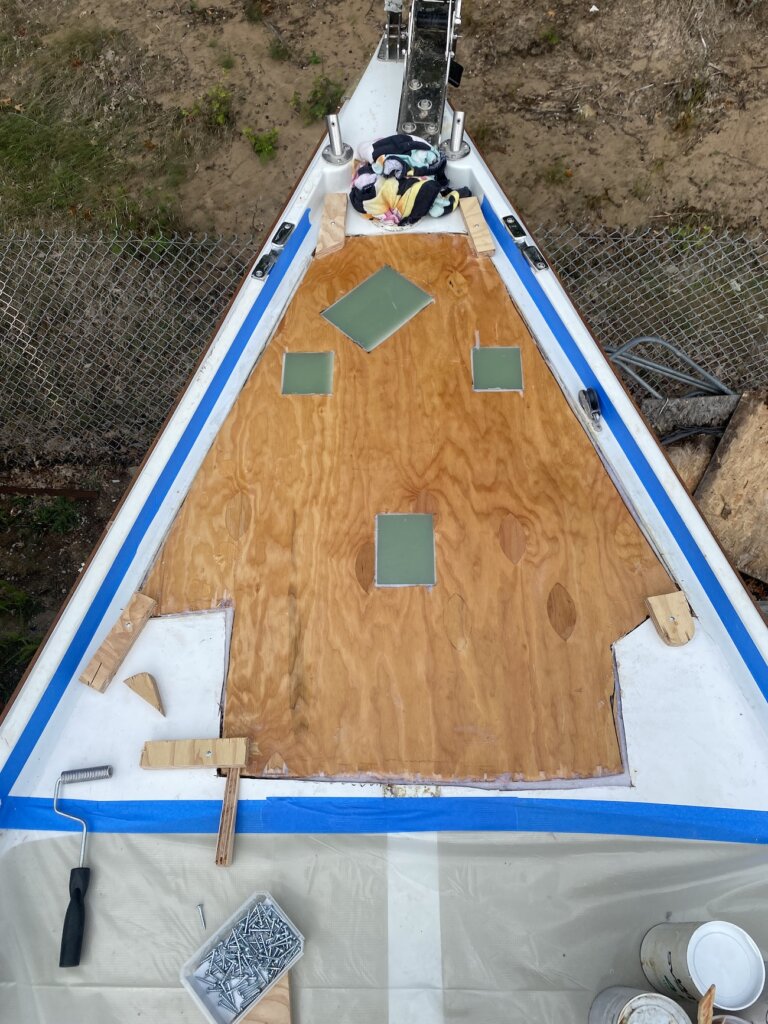
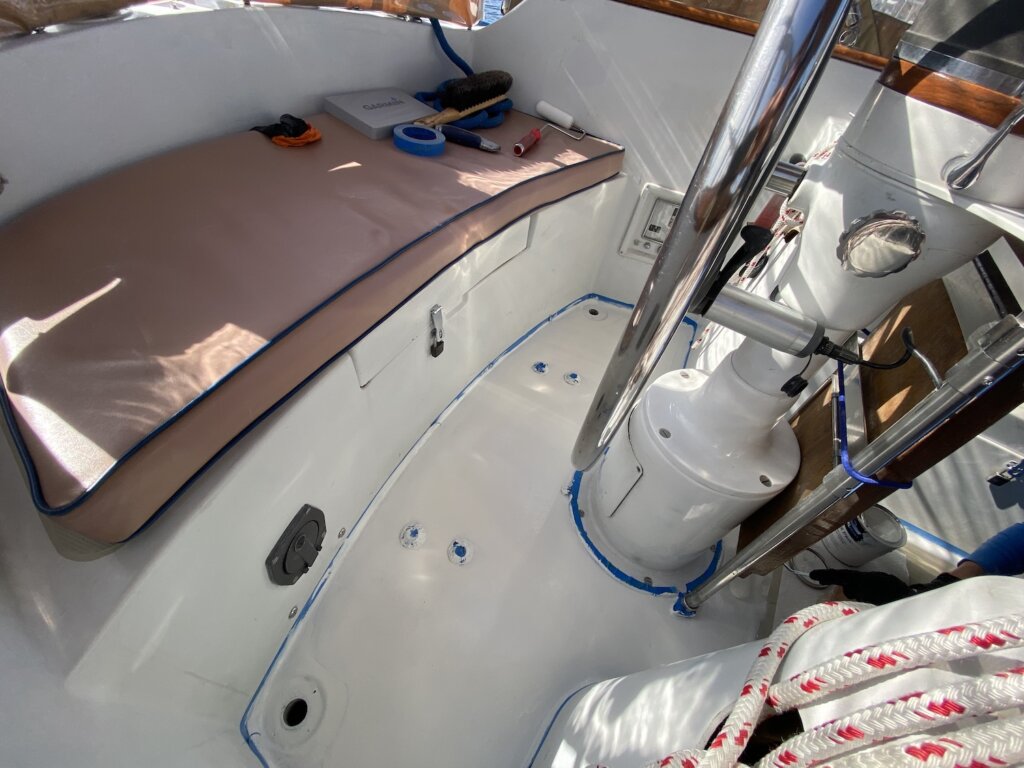
Step 3: Cut mylar to oversized shapes and tape into place

Once leave 1-2 inches around the desired nonskid area, and tape into place. You want it to lie as flat as possible so it’s not distorted when they scan it in.

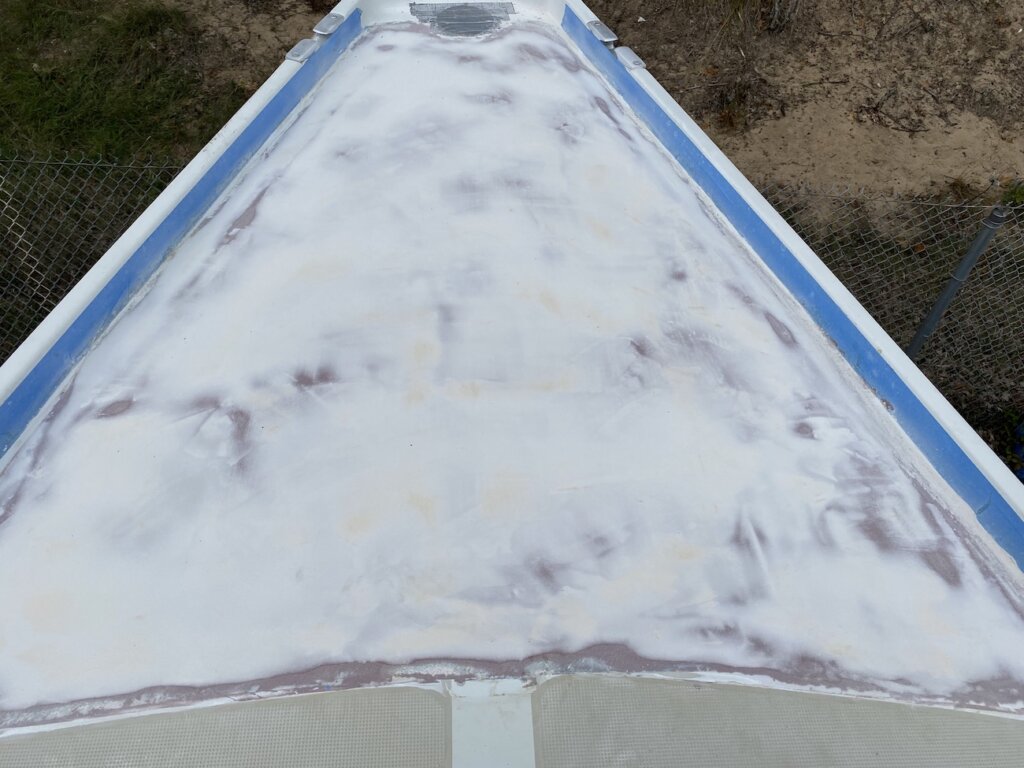
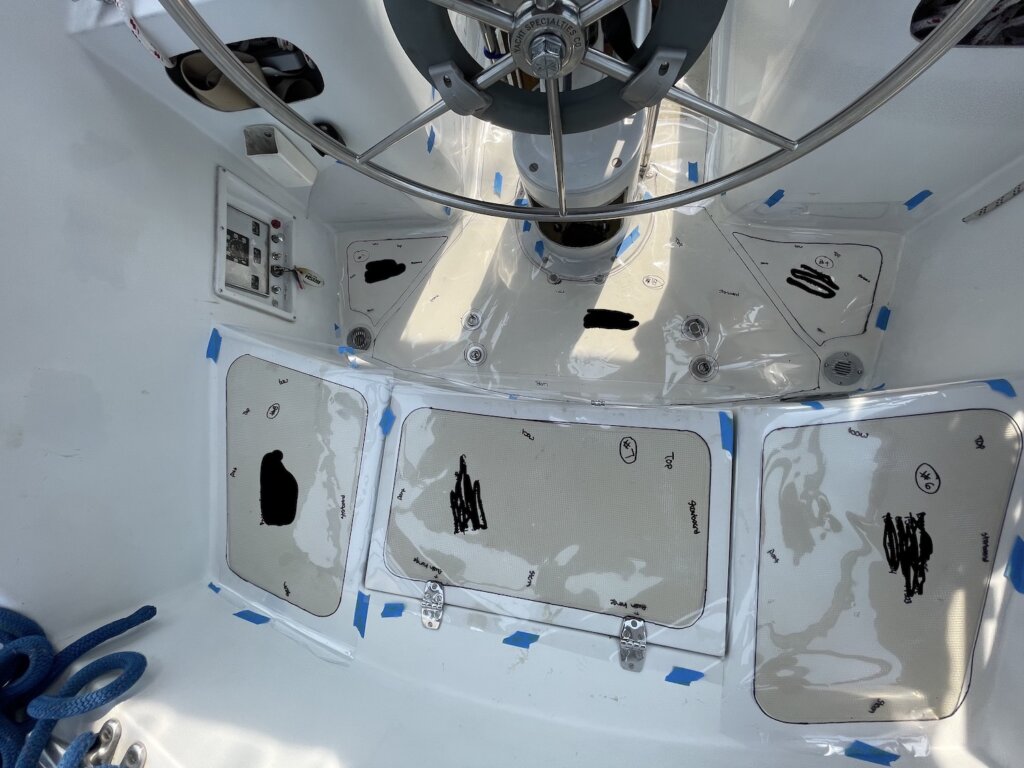
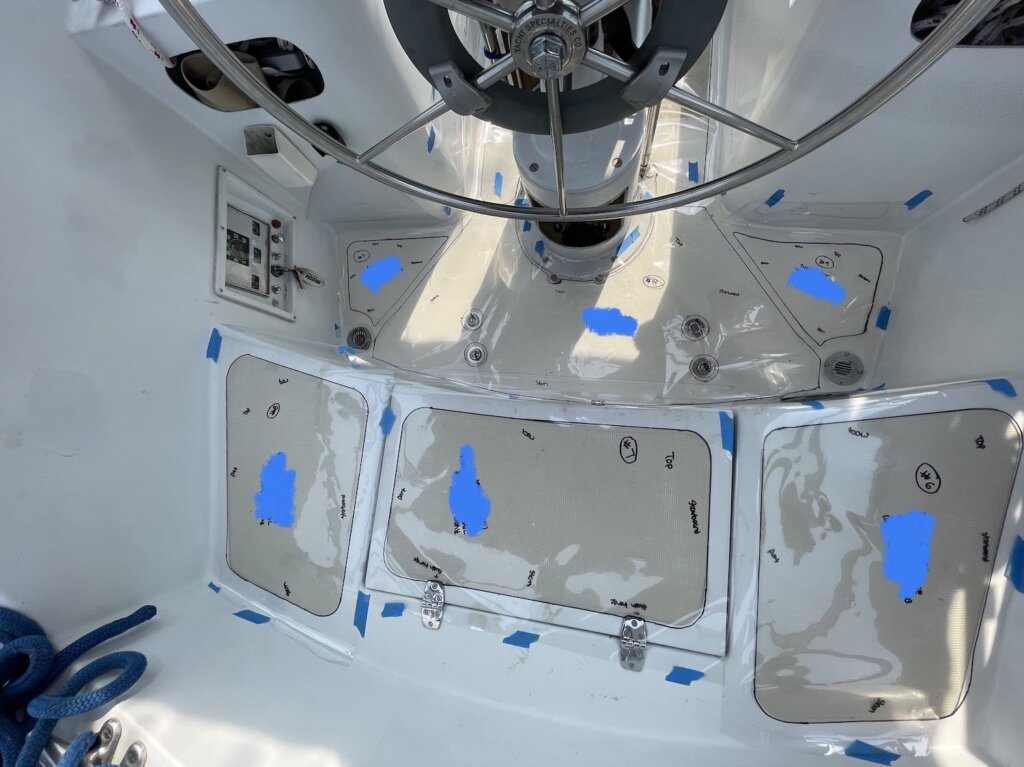
Step 4: Start labeling, tracing and marking pieces for hardware

You can now trace the old molded nonskid on your project area. The better job you do, the better it will turn out. We messed up a few areas in the re-cored area that didn’t have non-skid to reference and we just did a squiggle line through it to cross off the error – they figured it out in the design process. SeaDek wants some pretty specific labeling on each mylar piece:

  • Name, Address, and Phone #
  • Write TOP on the top side of each part
  • Write “Bow”, “Stern”, “Port”, “Starboard” on all four sides of the template
  • Number each template piece
  • Note any hardware, hinges, latches, etc.

We had 11 different pieces in our cockpit, so it was a lot of labeling, but it also helps everything be really clear for the designer as they put your project together.

Step 5: Take pictures of everything while it’s in place

To help out the SeaDek designer put your puzzle together, you’ll send them pictures of your project traced in place – make sure they can see the template #’s and orientation. You’ll email this to endusersales@seadek.com – once emailed they’ll respond with a confirmation email detailing the designers that will be helping you with the projcet

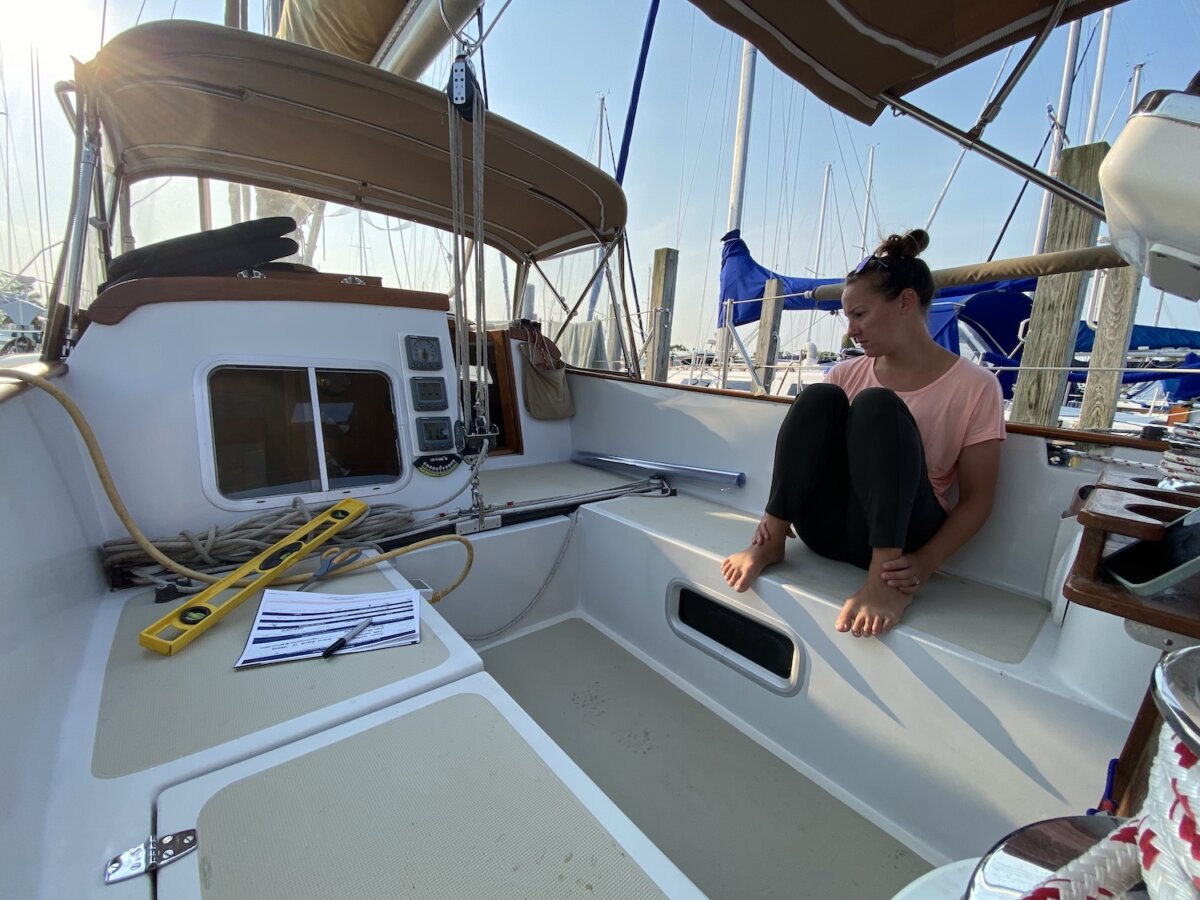
Step 6: Fill out the SeaDek Material Information Sheet

They will include a format that looks like the image below that you need to fill out all of your information, the boat’s information, all the template #’s and descriptions, color, thickness, a sketch of your template, and other info:

This is what the template worksheet you need to fill out looks like

Step 7: Roll it up, tape it up, and ship it back to SeaDek!

The next step is that simple, mail it back with the included prepaid label and the designer will reach out to you. It was about 2 weeks between mailing my templates back and getting the initial design drawings! I know timing can vary based on the projects they have, but that was my experience.

Step 8: Review the initial designs – approve them to send the dry fit templates

You will receive the drawing design a few weeks after mailing the templates in. If you’re comfortable with the design and don’t see any glaring issues. We sent them back a minor adjustment to make the pieces in our cockpit mirror images of each other – these were done free-hand, so they fixed them up and had them print the dry fit templates.

Step 9: Receive the dry-fit templates, cut and tape in place

They will send you new mylar sheets that are laser printed with your templates on them – including grain direction and spacing. It gives you a good idea of how they will look in place. Again, cut around the templates, leaving a few inches around the entire template, and tape them into place to make sure everything lines up with the nonskid on your boat. From here, you can mark major errors and send them back to be scanned again, or email them approving the designs. We had one angle that we had slightly modified, but we just told them to make it a straight line and bump it out .25″ because the nonskid wasn’t a perfect line and we didn’t need it to be that exact to the original.

These are the dry-fit templates taped in place so we can see how the final product will look

Step 10: Order the Seadek!

Once you’re happy with the design, you can place the order. When we were ordering, they were offering a 3 year warranty that covered pretty much everything. We weighed getting it because we plan to live on the boat and give it a lot of abuse – we’re even bringing cats and it covers pet damage! We decided against it, because it ended up being about 20% of the cost to replace the SeaDek – realistically I just didn’t see us ripping out the old SeaDek within 3 years in nearly any scenario. There may be some cat scratch damage, but I don’t know if we’d actually want to spend the time ripping it all out to put in new SeaDek. Time will tell if we made the right decision.

Bonus: Design Considerations

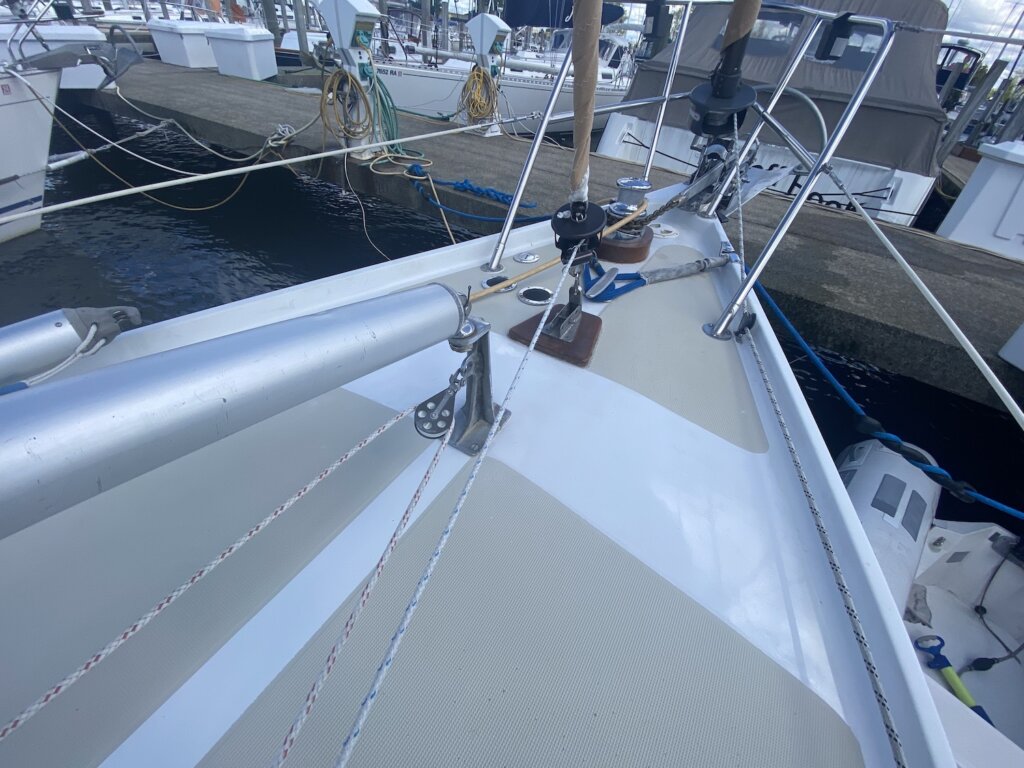
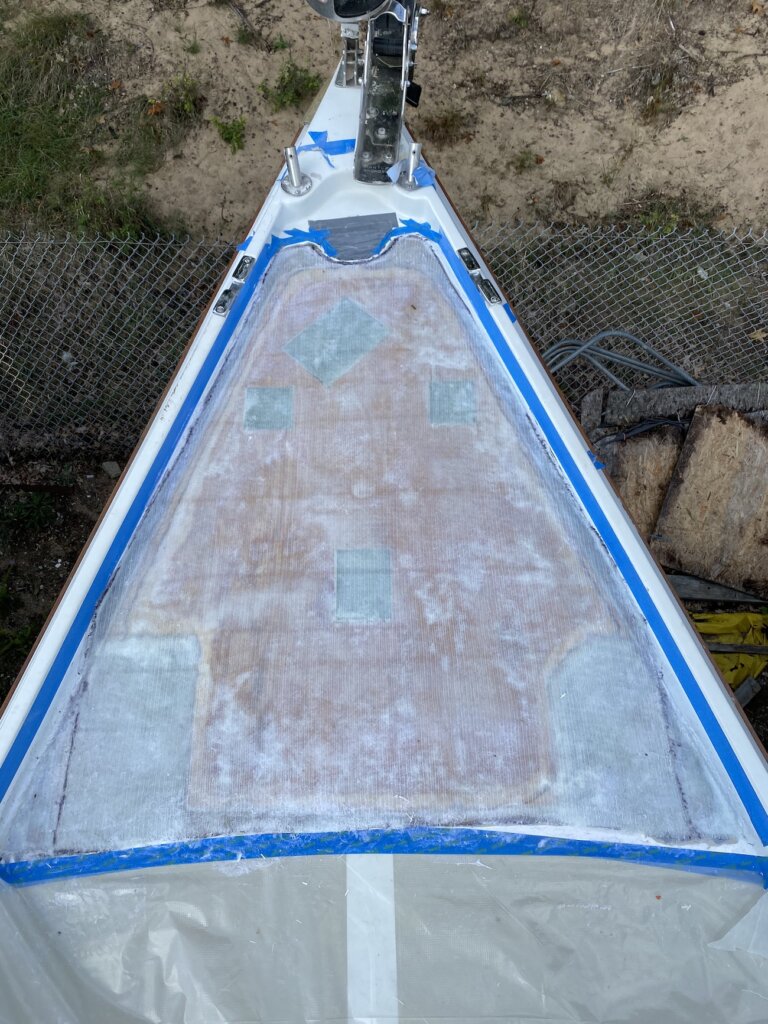
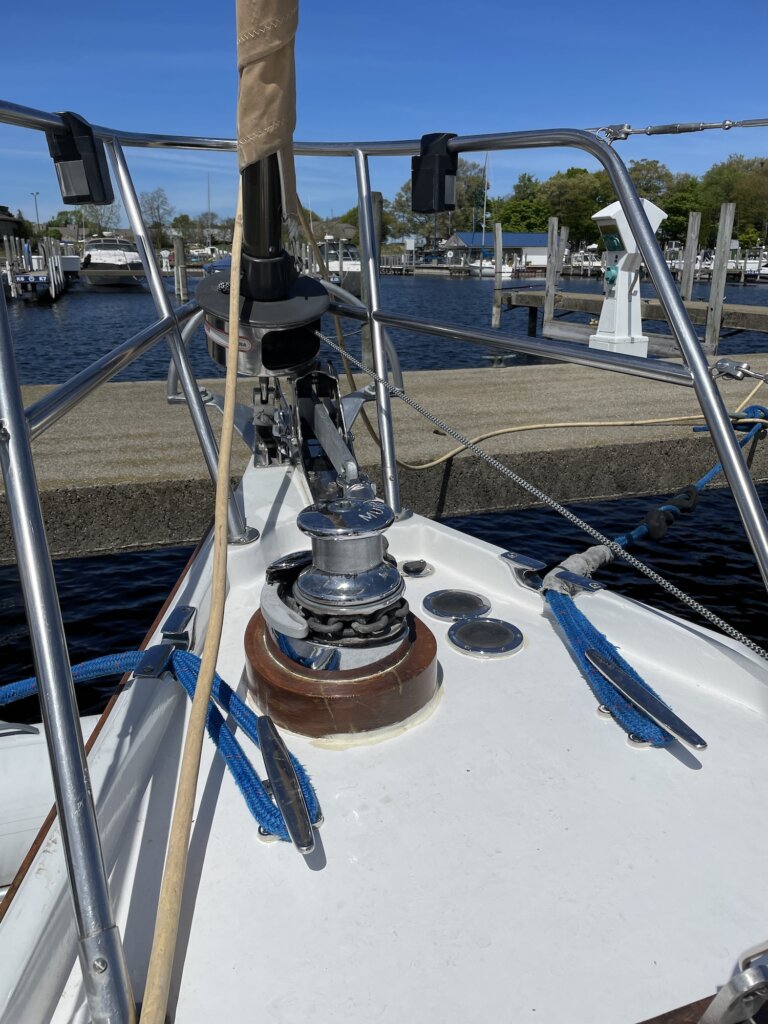
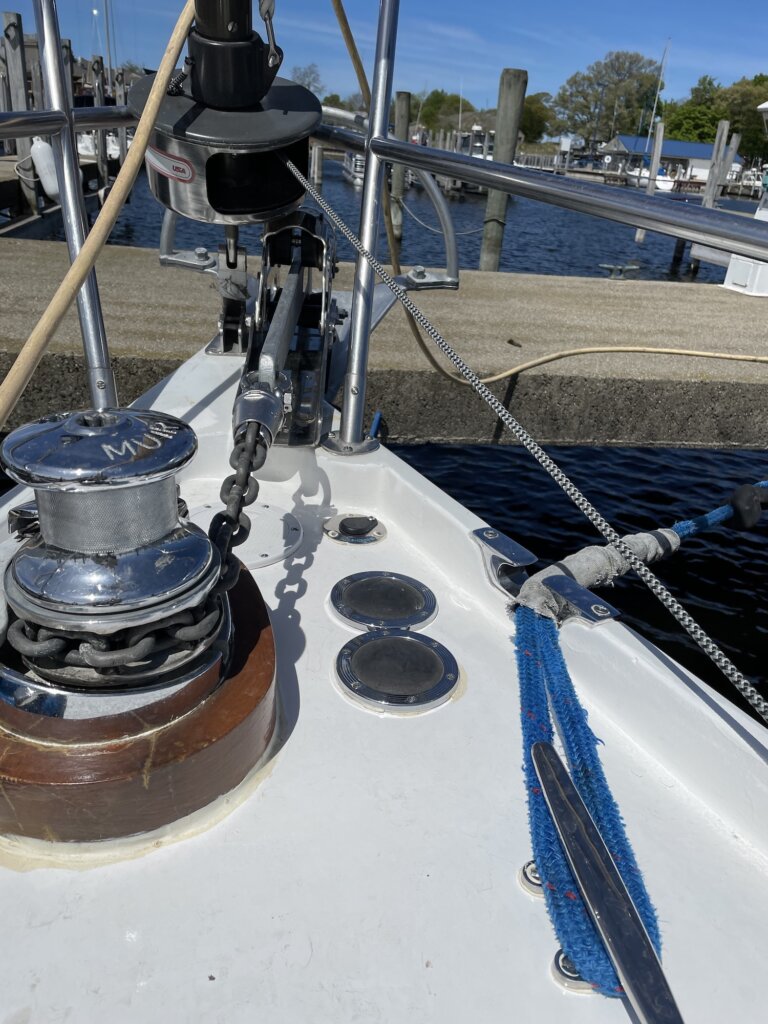
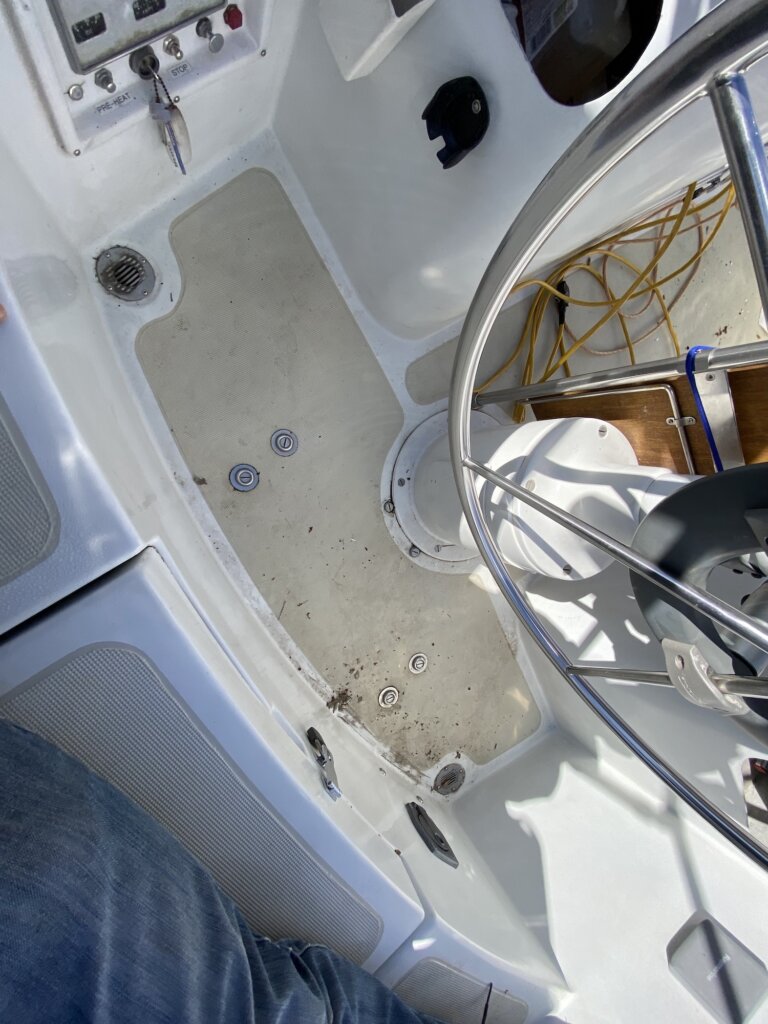
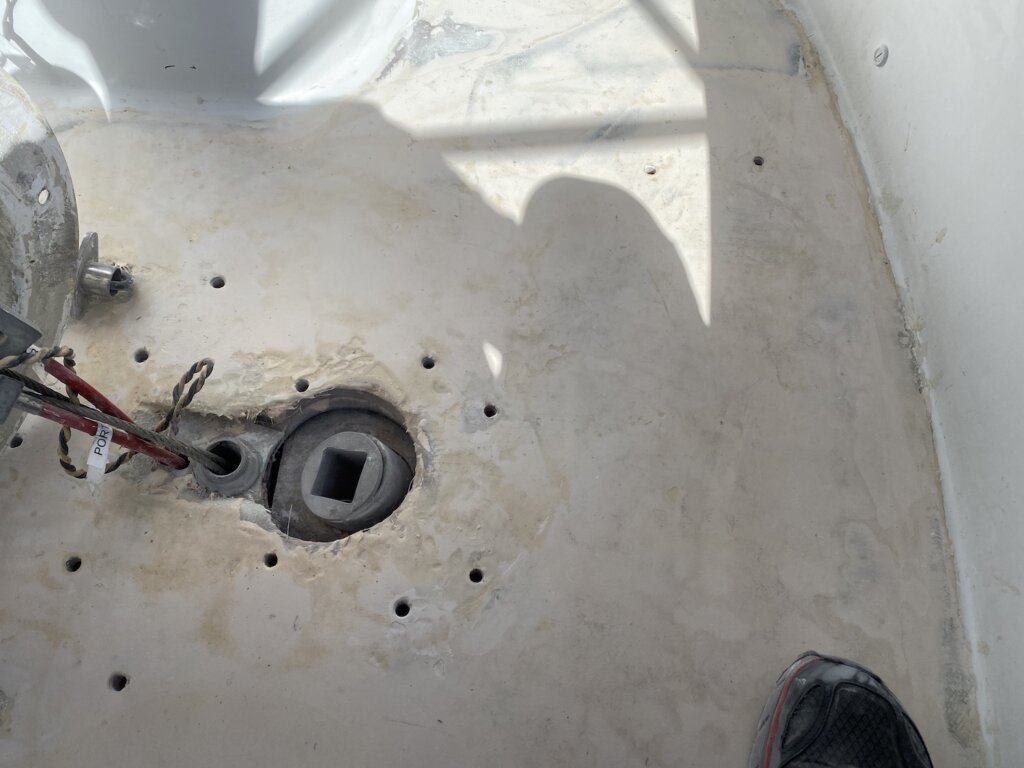
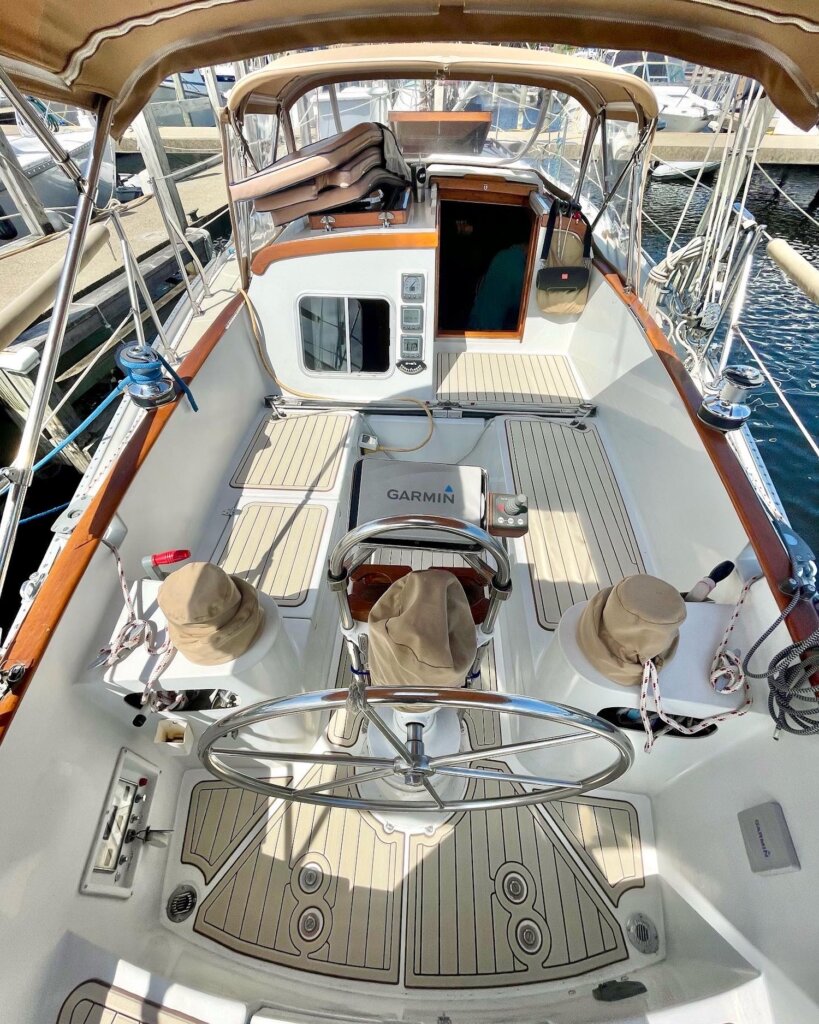
  • Remember drainage! You do not want to interrupt the natural drainage flow of the cockpit. This was one of my biggest concerns, and if you look at the location of the drains in the cockpit, you’ll notice there is a direct path to them that’s because outboard of that channel, the cockpit floor starts sloping up. If we didn’t do something, the water would pool somewhere around here and not drain out.
  • Use a straight edge: Free hand drawing will have imperfections, especially with how our nonskid was laid out.
  • Don’t be afraid of coloring outside the lines: you can use your non-skid as the template, but you can add additional areas easily, or expand the non-skid area. Don’t be overly constrained by the existing non-skid.
This video does a really nice job of showing exactly what to do

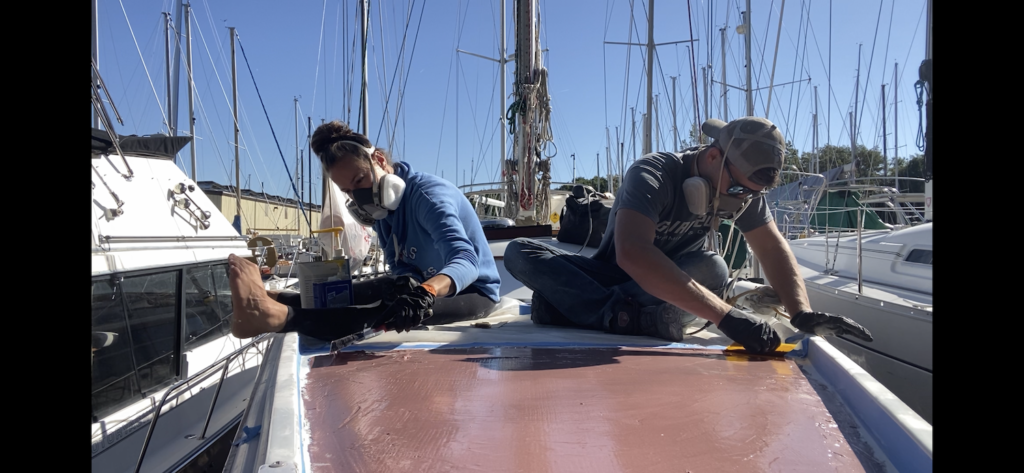
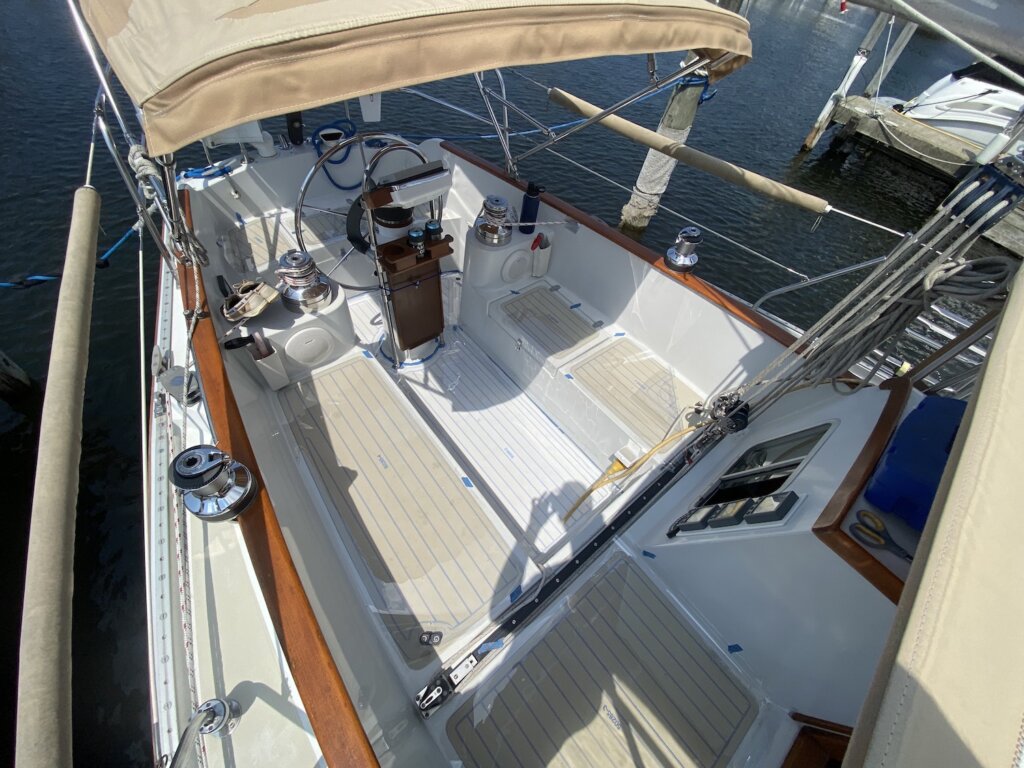
Step 11: Installation!!!!

This is the exciting part. We are working on putting together a video with instructions and tips/tricks on how we installed our SeaDek. We are super happy with how it turned out! We will link the video once we have it completed.

To install the SeaDek:

  1. Use a glue primer to help the pieces adhere. Using a foam paint brush to brush along the edges, we applied this before placing each piece.
  2. While giving the glue a short amount of time to become somewhat tacky, use a razor blade to cut along the middle of the back paper cover of the SeaDek piece your going to place
  3. Fold over the edges on each side of your cut.
  4. Dry fit/place the piece without removing the paper backing, this way you can ensure you have to piece exactly where you want it.
  5. Use painter’s tape to secure one half and help keep it in place
  6. Slowly peel back the paper backing on the half you didn’t tape in place
  7. Press down, start in the middle and move out towards the edges to avoid bumps, bubbles
  8. Make sure to apply firm pressure to ensure you have the piece secure
  9. Remove the tape and repeat the process to stick the second half down
  10. Repeat this process for each piece of SeaDek
  11. Step back and admire your new SeaDek!!!!!!
Final product installed!

What do you think? Would you DIY or hire an expert? Let us know below!

Categories
DIY Projects sailing Sailing Upgrades

Re-Coring the Foredeck

Similar to the cockpit, we knew our foredeck was wet when we purchased Resande. It’s a common issue on old boats where hardware goes through the deck if the owner isn’t keeping up on leaks. We decided to tackle this project in Fall 2021, after hauling out for the season. We’re also not planning to add back our staysail boom. We’ll have a post about how we’re rigging the staysail without a boom in the future. Most of the steps are identical to our Recoring the cockpit post, but we decided to do something a bit different for the high-load areas that have the highest risk of future leaks. As you can see in the pictures, we used 3/4″ plywood just like the cockpit. The difference is we made inserts out of 1/2″ thick G10 fiberglass board and glassed these inserts into the plywood prior to laminating.

The areas we did this in are the high load areas: windlass bolts, new port & starboard cleats, and the staysail tacking point. These areas will all have thru-bolts and will benefit from the high compressive strength of G10 (plywood or balsa core will deflect under a highly tightened bolt).

Resande’s foredeck has a lot of hardware due to our staysail. We aren’t planning to continue using a staysail boom, but we do plan to add a second foredeck cleat.
All of the hardware now removed, we start to understand the scope of the water intrusion.
After cutting the top shell of the fiberglass off, we scrape out the wet and rotten wood. We used an angle grinder to remove the top shell. Scraping, then sanding down to the lower fiberglass shell to make sure you adhere to something solid when you put the new core in.
This is the new core piece. As mentioned before, we added pieces of G10 where the high load hardware is located. Above in the picture is the layout: Staysail will attach in the top insert; the two small inserts in the middle will be cleats, and the large one at a diagonal is where the windlass will bolt through.
We used multiple layers of 17oz biaxial fiberglass cloth to build up the 1/4″ difference between the 1/2″ G10 and 3/4″ Plywood. this was on purpose, and we beveled out the plywood so we could build the layers up and larger in diameter.
Not shown, but we made relief cuts on the underside to help contour to the shape of the deck. The deck is slightly crowned, so we needed to flex the new core down on the side, we used pieces of wood to help clamp them down as the resin cured
After the core is in place, we ground the edges to a bevel to make a smooth and seamless transition. Our goal is that this new edge is nearly invisible.
As with the cockpit, we did 3 coats of fairing. This step is much like mudding drywall to try to get the seamless transition from the old to the new. We used the West Systems. Fair, sand, repeat until happy.
The final layer of fairing we used micro-balloons, which sand even easier for a nice final finish before gelcoat.

We used Total Boat topside paint instead of gelcoat. We decided to go with white and not try to match the foredeck color to the rest of our non-skid. We are planning to paint total boat non-skid in this area when we get a warm, dry day.

We also decided to go with a cleat on each side and not just replace the one center cleat we had previously.
We moved the placement of our winless buttons and added a wash-down pump on deck.
A final look with everything back in place. Completely done except the non-skid paint.

What do you think? Questions on our process or suggestions for our next project? Leave us a comment below.

Categories
DIY Projects sailing Sailing Upgrades

How we Re-Cored our Cockpit

On our sail down to Muskegon from Bowers Harbor, we noticed flexing under the helm when steering hard. We knew moisture was high from the survey, but we didn’t think of the practical concern and thought it would be a ‘someday’ project. After that sail down, we knew it was a critical project for the safety of the boat, so it was the first place we decided to tackle.

The area that was wet & rotten was the entire helm area, to just forward the steering pedestal (which we had to remove. The 4 bolt heads aft of the pedestal hold the steering brackets on our Ericson. All the steering hardware had to be removed prior to recoring the deck here.
Chiseling out the rotten and wet core. Our cockpit has end-grain balsa core which does a nice job of isolating water intrusion to close to the hardware. We were able to get all the bad stuff out with a chisel, hammer, crow bar, and anything else that can do some damage. We also found a straight bit on a router set to the right depth can help make this process quicker when you hit the high moisture but still bonded areas.
After the core is removed prep the area: Sand, remove any old fibers or wood, and wipe with acetone.
The final product before the new core. We ended up extending it forward more than our original tapping.
We cut the core to shape, ground down the edges with an angle grinder, and used West Systems 403 filler to epoxy the core down to the bottom layer. We tried to grind a groove into outer edge to make sure when we were done with the project, the water still drained well to the corners.
After the core was bonded and ground out, we glassed it in with 1708 Biaxial fiberglass, which is basically a three-in-one fiberglass material for additional strength.
After the first fairing with West System 410 Fairing filler, we had to add an additional layer of fiberglass mat to build up the area to make it level. After each layer of fairing, we sand smooth and find low spots and imperfections. Expect 2-3 fairing layers to get the finish you want.
After the third layer of fairing, we sanded heavily. While it doesn’t look smooth visually, your hand is a much better gauge.
Once happy with the fairing, we reinstalled the steering pedestal to get the boat ready to go in the water.
We primed the repaired area with Total Boat Topside Primer, then finished with Total Boat Wet Edge Topside Paint. We used a foam roller with moderate success (it disintegrated pretty quickly)
To be continued… we are getting Seadek in our cockpit! This is a picture of the templates we made and sent back to Seadek to be scanned. The process overall was very smooth, which we’ll show in a future post!

Hope you learned something, let us know if you’ve ever done core work on your boat. If so, how did you do it differently, and have any advice for us in the future? Let us know in the comments below!

Categories
Lessons Learned sailing Sailing Upgrades Travel Lifestyle

Simple Guide for Calculating Your Sailboat’s Energy Budget

After spending way too much time figuring out how to size the power system for our boat, I thought it would be good to create a simple guide to estimating your needs. It is an excel file you can download/modify with your own sailing or RV needs. I ran through this math with our teardrop trailer, and now with the more complicated sailboat. This whole file is set up for a 12-volt system, you may need to make some modifications to this file for different voltages.

Start at the top of the document and fill out the yellow boxes. The file The results will show up at the bottom.

Think of your system as the combination of three different calculations:

  • Energy generation from solar, wind turbine, generator, and/or alternator
  • Energy storage to/from the battery bank
  • Energy draw to the system demands

Each system needs to be sized appropriately for your application, which starts with the demand you expect to have in your system. Start by listing all of the loads that will be on your system, and classify them in different ways: on anchor vs. on passage and define the minimum critical requirements. Then figure out how many amps and how many hours each draw will take on a given day – either on passage or at anchor. For example, we don’t need to run our autopilot while at anchor, and it’s one of the biggest amp draws we have on our boat.

Once you understand your overall system needs, you can play with sizing your solar panels and battery bank. This is the generation side of the equation. You want to make sure you’re accounting for usable sunlight, clouds, and a safety factor when making your assumptions. You also want to make sure you’ve got the ability to weather a few days of low (or zero) power generation. This all gets calculated at the bottom of the excel file where it shows the final calculations of how long you’d be able to last (theoretically) in each scenario, and what your excess/deficit would be.

On this calculation, we determined we would be at a deficit on passage and would be able to last 7.2 days. We could turn some systems off to conserve battery.

What do you think? I’d love to get some feedback on the file/calculations.

Categories
sailing

Lessons Learned From Our Fist Big Sail

We bought our boat in Bower’s Harbor, on Old Mission Peninsula near Traverse City Michigan but we live near Grand Rapids Michigan. So once the purchase was complete we needed to get the boat closer to home. Our timing wasn’t perfect since we officially owned the boat at the end of September. But we decided to sail down the first weekend of October. We went from Bower’s Harbor marina to Muskegon which is approx 176 nautical miles. 


For more details on how our first big sail went check out our post here: Sailing Bower’s Harbor to Muskegon 


This is the post where we tell you all the lessons we learned so you can learn from our experience and our mistakes:) We do not claim to be experts right now but here is what we learned: 

1. Communication is critical 

You need to make sure everyone is on the same page, especially when you are learning or have a crew on board. You may want to start planning a tack or jibe several minutes before you need to. Make sure everyone knows the goal of the maneuver, their specific job, and what needs to happen before we can start it. It is better to over-communicate to minimize confusion.

 
2. Make time to talk about what went well, what didn’t, and what we could try to do differently in the future. 

This is a new boat for us, so everything is a bit foreign. Every time after docking, I want to know what the crew’s perception was of the approach, speed, fender location, etc. so we can improve it in the future. It helps to approach it constructively, not critically: “how can we improve X” instead of “we messed that maneuver up” 

3. Using a preventer line is super helpful when on a run 

We would have had several accidental jibes while on a run on day 2 without that on


4. Take your time

As new sailors, tasks aren’t second nature yet, if you try to rush and get anxious you won’t be thinking as clearly. For example, I tried to pull the halyard as you do when raising the mainsail as I was trying to lower it. I was exhausted from the day and I could not at that moment figure out that I just needed to ease the line out to lower the sail.  


5. Having an extra set of hands can be helpful but be mindful of who you invite.

We would recommend someone you know and are comfortable with (especially if you are going on a longer trip). If you are new to sailing it can be stressful and frustrating at times so having someone you know can handle that and not take things personally is helpful. Someone who has any on the water experience or sailing experience is also great. You want someone who will be willing to take on jobs, learn new skills and be helpful to you. 


6. Explaining sailing to your guests

Some people will want to learn more than others. Even if your guests aren’t interested in learning to sail they still need to know a few things. Telling them in general what the lines that are in the cockpit do is helpful so they know at the very least to stay out of the way of those lines and not to pull on them or adjust them. 


7. It is exhausting at first

We had a great time on this trip but we will not deny that it is very tiring to sail for 12+ hours at a time.  As you gain more experience it likely gets easier but at first, as we have said, things aren’t second nature so you are thinking through every move. We knew this was a huge undertaking for one of our first sails but we had to get the boat back to where we live. 


8. Autopilot is a necessity!

We have an old ray marine steering wheel-mounted autopilot that we have named “Old Ray”.  Old Ray worked okay when we were motoring on day one with no wind or waves. With wind and waves, our autopilot couldn’t keep up so we had to hand steer. Hand steering is very tiring in the wind and waves, it takes more effort than you might think to keep the boat going straight. We are planning to upgrade our autopilot in the next year before setting off on our next big sailing trip. 


9. Boating/on the water experience is beneficial 

We were power boaters before we bought our sailboat. We had experience in waves and changing conditions in lake Michigan. We also had two sailing lessons with friends on their boat in Lake Michigan. It is crazy how much you can learn and pick up on in a few lessons if you are really motivated to learn. On top of our lessons with friends, we did buy the ASA 101, 103, and 104 books. The additional reading helped everything sink in. Our point here is even if your on the water experience isn’t specifically sailing experience it will still help you. Your overall comfort on the water and understanding of water, waves, and weather is something. 


10. Don’t psych yourself out

Sailing, specifically taking a long journey on a boat for the first time is daunting. It can be really scary and make you anxious. It is easy to psych yourself out! But stay calm, plan your trip ahead of time, review the steps and any necessary obstacles that you know about. When you are on your trip, take it one step at a time, think about what you are doing at each given moment instead of the big picture. Once you are out there and the only things that matter are the boat and the water and where you are going it is honestly really nice! The rest of the problems and stressors you have in your life on land all fade away. 


11. Don’t be afraid to try new things

Sailing on our own was new to us on this trip. On day two we were on a run all day, going as close to directly downwind as we could. The wind was too high for the asymmetrical spinnaker so we tried to sail wing on wing. We tried twice throughout the day and both times we just couldn’t get it to work. So we retrimmed our sails and just kept going. Yes, it didn’t work, and we still aren’t 100% sure what we should have done differently to make it work. But you never know until you try and you can learn a lot from mistakes and things that didn’t go well. As long as you know you can keep yourself, your crew, and the boat safe it’s okay to try!


12. Pack food that is easy to eat

When the water is flat and there is no wind it is easy to eat whatever type of meal you want. When the water is wavey, the wind is stronger and the boat is heeling over it makes relaxing for a snack or a meal a challenge. It might be going along okay and you may think you have some time. But you might have an accidental jibe or you may need to tack or jibe or do something to adjust the sails at any point. Bring food that can be prepared quickly and that you can easily set down and pick back up as needed. 


One of the best things a long trip like this can give you is confidence in yourself and in your boat. After three days of living on  SV Resande, we feel way more comfortable! After all, the best way to learn is to get out there and do it! You will never know everything and there will always be something to fix on your boat. At some point, you just have to go!


Any tips/tricks you have learned from your sailing experience? Questions? comments, leave them all below!

Categories
sailing

First Big Sail: Bower’s Harbor to Muskegon

When we bought our boat (SV Resande), we knew it was the end of the season and about 180 nautical miles from where we wanted to store her for winter. We bought the boat in Bower’s Harbor, near Traverse City Michigan but planned to store it in Muskegon for the winter. We closed on the boat on September 25th, and at that time we had never sailed on our own. The goal was to get the boat to Muskegon before they pulled the docks for winter in Bowers Harbor on October 10. We decided to sail down the first weekend of October.

Bower’s Harbor Marina, our starting point

Before this trip, our sailing experience included two sailing lessons with friends on their boat, a day sail on our boat with the previous owners, and one day sail on our own. In total maybe 7 hours of experience. In preparation, we had also been reading and researching as much as we could. We found the American Sailing Associations books to be helpful (ASA 101, 103).  We had previous boating experience on Lake Michigan with the powerboat we owned prior to buying our sailboat. While we were nervous about the length of the trip, we felt we could safely make the passage despite our limited experience. 

The Route

Bower’s Harbor is about halfway up Old Mission Peninsula so it is located in the West Arm of Grand Traverse Bay. The bay is between Old Mission and Leelanau Peninsula. We first had to go around the Leelanau Peninsula, so we could start heading south down the Lake Michigan coastline to Muskegon. Assuming 5.5 knot average speed, we estimated this trip would take 32 hours of sailing.

Bowers Harbor to Muskegon sailing route
Our Route: Bower’s Harbor to Muskegon

We checked the weather forecast repeatedly the week before we left. We planned to leave Bower’s Harbor early on a Saturday morning. By Monday we were expecting to see gale-force winds from directly out of the south (on our nose). We planned to complete our trip in three days, which would get us into port at Muskegon before the weather turned. Given the weather, we decided to push a lot of miles the first day to set us up for a shorter day on Monday to beat the gales.

  • Day 1 Bower’s Harbor to Frankfort: 77 nautical miles ~14 hours
  • Day 2 Frankfort to Pentwater: 55 nautical miles ~10 hours
  • Day 3 Pentwater to Muskegon: 44 nautical miles ~8 hours


Day 1: Bower’s Harbor to Frankfurt, 77 nautical miles 

We woke up super early to get this day started. This was our longest day and we were anxious to get going. We pulled all the dock lines and were off the dock by 5 AM. From Bower’s Harbor, we had to navigate past a few shallow spots near the small island just outside the marina. Once we were past those we could easily navigate north up the Leelanau Peninsula, working our way out of the Grand Traverse Bay. We made a quick detour to Northport, near the top of the Leelanau Peninsula to top up our diesel. 

Ericson 39B
Ryan’s dad – our crew, sleeping on the job!

 The entire day there was pretty much no wind. We had about 10 knots for about 10-15 minutes but other than that we motored all day. It was a cold and cloudy day with some sprinkles of rain along the way. We passed the Manitou Islands and the Sleeping Bear dunes, getting some beautiful views along the way. Since we were just motoring this was a very easy day. We were able to set ‘Old Ray’ (our autopilot) on a bearing and move about without too much intervention. We were relaxed, we cooked breakfast and lunch underway, using both our oven and our stove.
In total it took us about 14 hours to reach Frankfort. We arrived just before sunset so we were able to dock before dark. Once we were docked we enjoyed a warm shower at the marina and then closed ourselves in down below to stay warm and out of the rain. We cooked dinner on the boat and went to bed early. 

Day 2: Frankfurt to Pentwater, 55 nautical miles 

We slept in a little bit this morning, we were off the dock by about 7:30 AM. The wind was out of the north/northeast at about 10-15 knots at the start of the day, building to 15-20 knots. Since we were heading south, we could sail on a run/broad reach most of the day. 

We hooked up a preventer line to keep from accidentally jibing. Due to the coastline, we had to jibe several times since we couldn’t keep the sails full on a true run. We would sail with the waves for a while then have to head out further from the coastline going parallel to the waves for a bit. The waves started at 3-5 ft and built to 5-7 ft as the day went on. The boat handled the waves really well. It was another mostly cloudy day, we did get some sun but it was still cold. In total, this stretch of the trip took about 10 hours. We had great speed over ground most of the day but probably added 8 nautical miles due to having to jibe.

We had to hand steer this entire day. ‘Old Ray’ couldn’t handle the weight of the boat under sail and the belt that drives it was slipping. We bought a replacement belt that will hopefully fix it, but for this trip, he was pretty much useless unless we were motoring. We also discovered our house battery bank had a bad battery. When we stopped the engine to sail, the Autopilot (which was barely working) only lasted about 20 minutes before flashing ‘low battery’.

 Again we arrived before dark so we could dock with some light. We were physically and mentally exhausted from all the sailing. Since we are new sailers, everything isn’t second nature to us yet. We still have to really think about each step and each time we have to jibe or adjust the sails. After two long days, we were ready for a little time off the boat. We walked into town and enjoyed a beer and a burger at the Brown Bear pub. It felt great to be inside and to be warm at least for a little while! 

Heading into Pentwater

Day 3: Pentwater to Muskegon, 41 nautical miles 

Our final day! We had been checking and rechecking the forecast. The gales were supposed to hit Muskegon at about 2-3 PM. So in order to beat the weather we left Pentwater in the dark at 5 AM. The wind started off out of the west at about 10-15 knots so we comfortably sailed south on a beam reach for a few hours. We had a full moon and clear skies so we could easily see. Between the cold and the wind we were freezing this entire day! We had a beautiful sunrise and mostly sunny skies but it was still very cold!


Shortly after sunrise the wind shifted to more straight out of the south and picked up a bit. We continued sailing a bit longer then motor sailed on a tight close reach the rest of the way to help make time and get in before the high winds. We heeled to about 20-25 degrees most of the sail. Once we got used to it this became more comfortable. The heeling was something that made Erika nervous before the trip but by the end she barely noticed. We had 3-5 ft waves on our beam most of the day. They began building in the last hour of our sail and we could feel the wind picking up more.  In total this day was about 8 hours. 

It was such a great feeling when we finally made it! We gained a ton of experience on this three-day trip! We know that we still have a lot to learn! But we feel like we can officially call ourselves sailers! 

Docked in Muskegon, we made it!

We have more on our lessons learned from this sail on our post here

What resources have you found helpful in learning to sail? Any advice? Leave us a comment below!

Categories
sailing

SV Resande

In September 2020 we purchased our Ericson 39B Resande and sailed her from Bowers Harbor down to Muskegon Michigan. Since then we’ve been gaining sailing experience and working on projects to get her cruising-ready. We’re starting with a great foundation, but we have several systems we want to build upon to get cruising ready.

 
  • Model: Ericson 39B
  • Year: 1976
  • Hull type: Fin with rudder on skeg
  • LOA: 39.00 ft / 11.89 m
  • Rigging Type: Cutter
  • Beam: 11.33 ft / 3.45 m
  • LWL: 30.00 ft / 9.14 m
  • Draft: 5.92 ft / 1.80 m
  • Displacement: 19,000 lb / 8,618 kg
  • Ballast/Displacement: .50
  • Ballast: 9,500 lb / 4,309 kg
  • Capsize Screening Formula: 1.70
  • Comfort Ratio: 35.4
  • First Built: 1975
  • Last Built: 1978
  • Number Built: 20
  • Designer: Bruce King
  • Builder: Ericson Yachts (USA)
Resande Master Project List
 
For more information on our boat:
 
Original Documents
Sales Brochure e39b_color_brochure
Plumbing Diagram: E39B plumbing diagram
E39B Laminate Schedule: E39B_Laminate_Schedule
 
Ericson 39B